Easy Decorative Easter Eggs
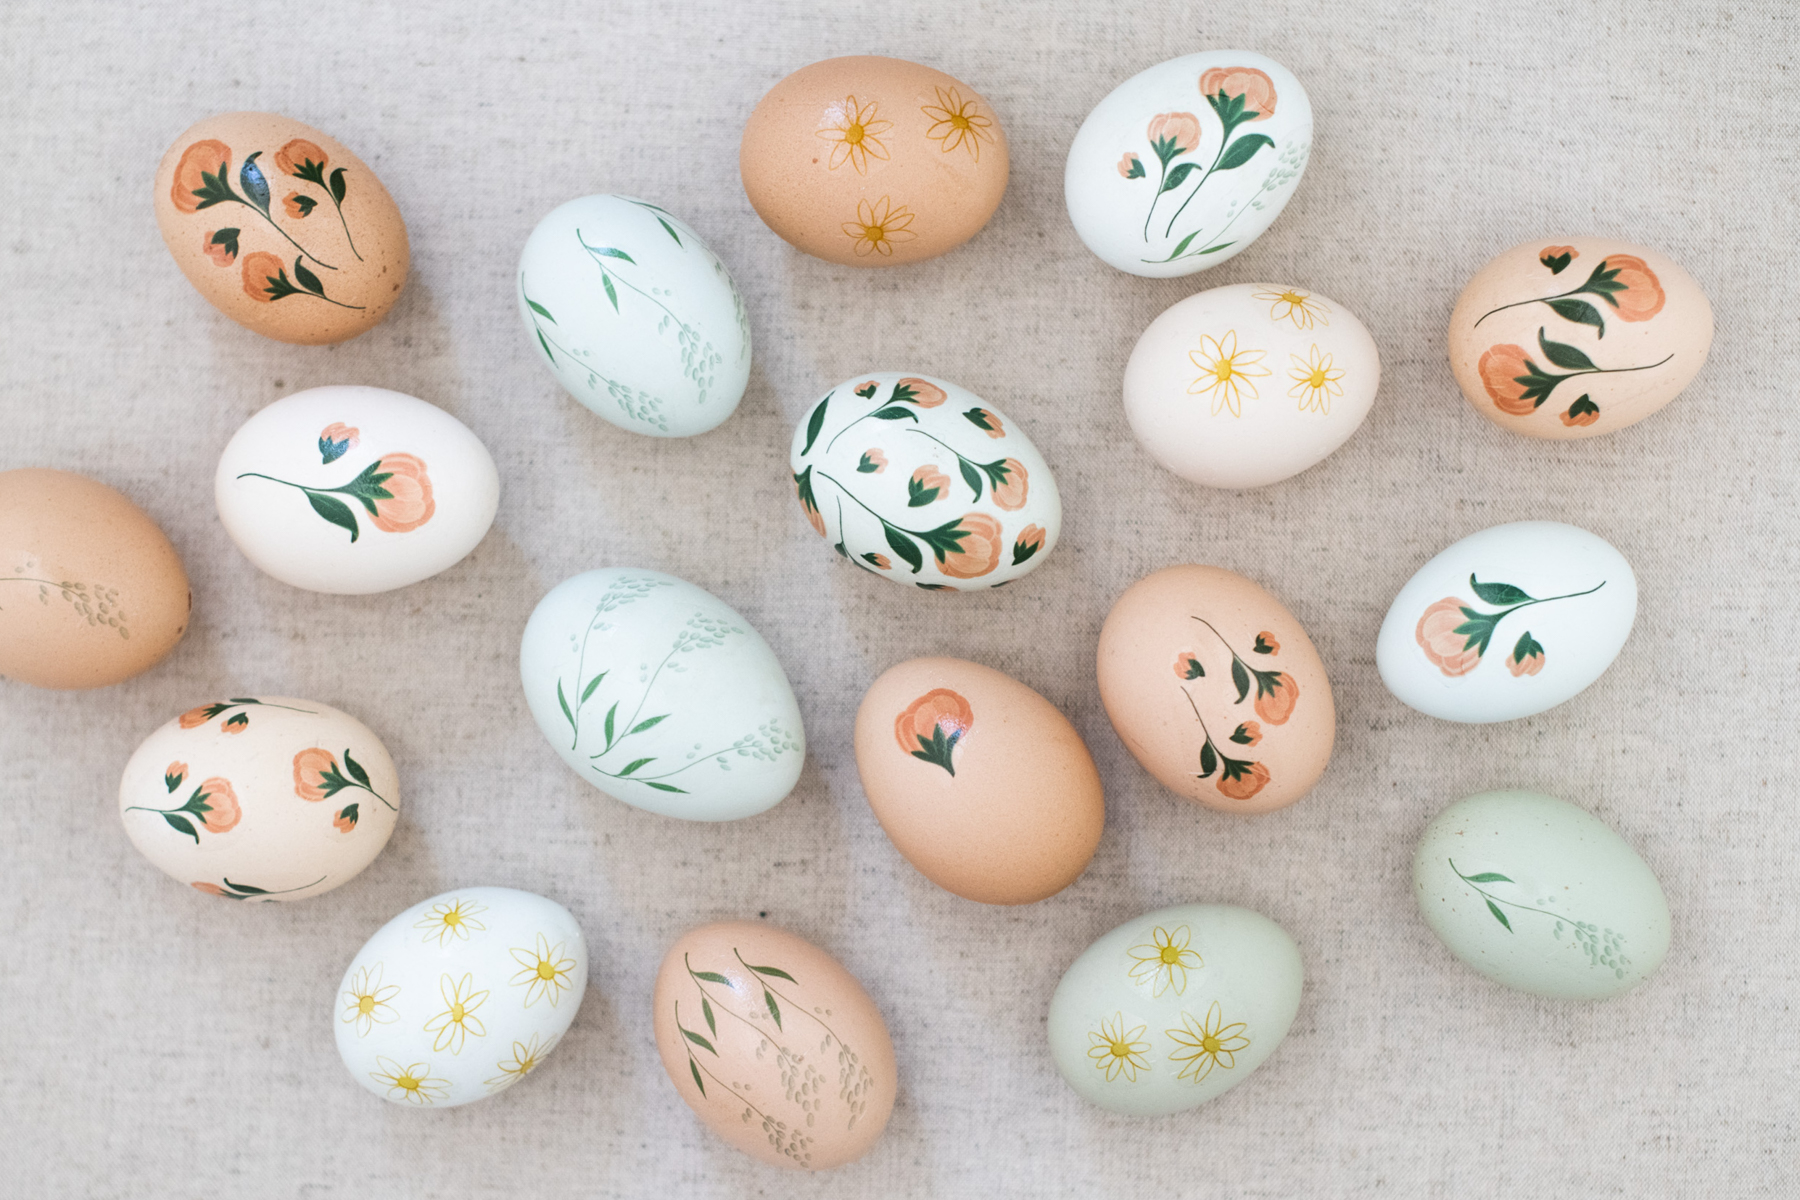
I’m excited to share one of my favourite DIY’s out of my new book “Gather at Home“. Since this Easter will be a little different due to Covid-19, I thought it would be nice to share this Easter Egg decorating DIY with you. It’s super easy, mess free, and you definitely don’t need to be an artist to create these eggs! You’ll want to visit this download page here > Illustration Printouts for your free download of each of the floral illustrations that you’ll be using to decorate your eggs. I hope this craft brings you joy the Easter. I promise that you’ll love decorating these on your own or with your family, the kids love it! If you decide to join in ton the fun be sure to share your photos with me and tag #GatheratHome.
“Decorating Easter eggs (or Pisanki in Polish, which means to paint)was an important, fun tradition in our house each spring. Every year, we come together as a family to decorated eggs to our Easter baskets. It’s something that I look forward to every Easter. Painting eggs can be time consuming and messy. I’m excited to introduce this DIY because it will make your eggs look stunning and takes no time at all. With no paint involved, it really is mess free. The secret to these flawless eggs is printable tattoo paper!!!” -My Book “Gather at Home”, Page 24.
*Don’t worry if you don’t have tattoo paper you can also create a similar look with plain white paper and white/ clear drying glue such as Mod Podge. See Note below.
Materials:
Glass head pin
Large Eggs
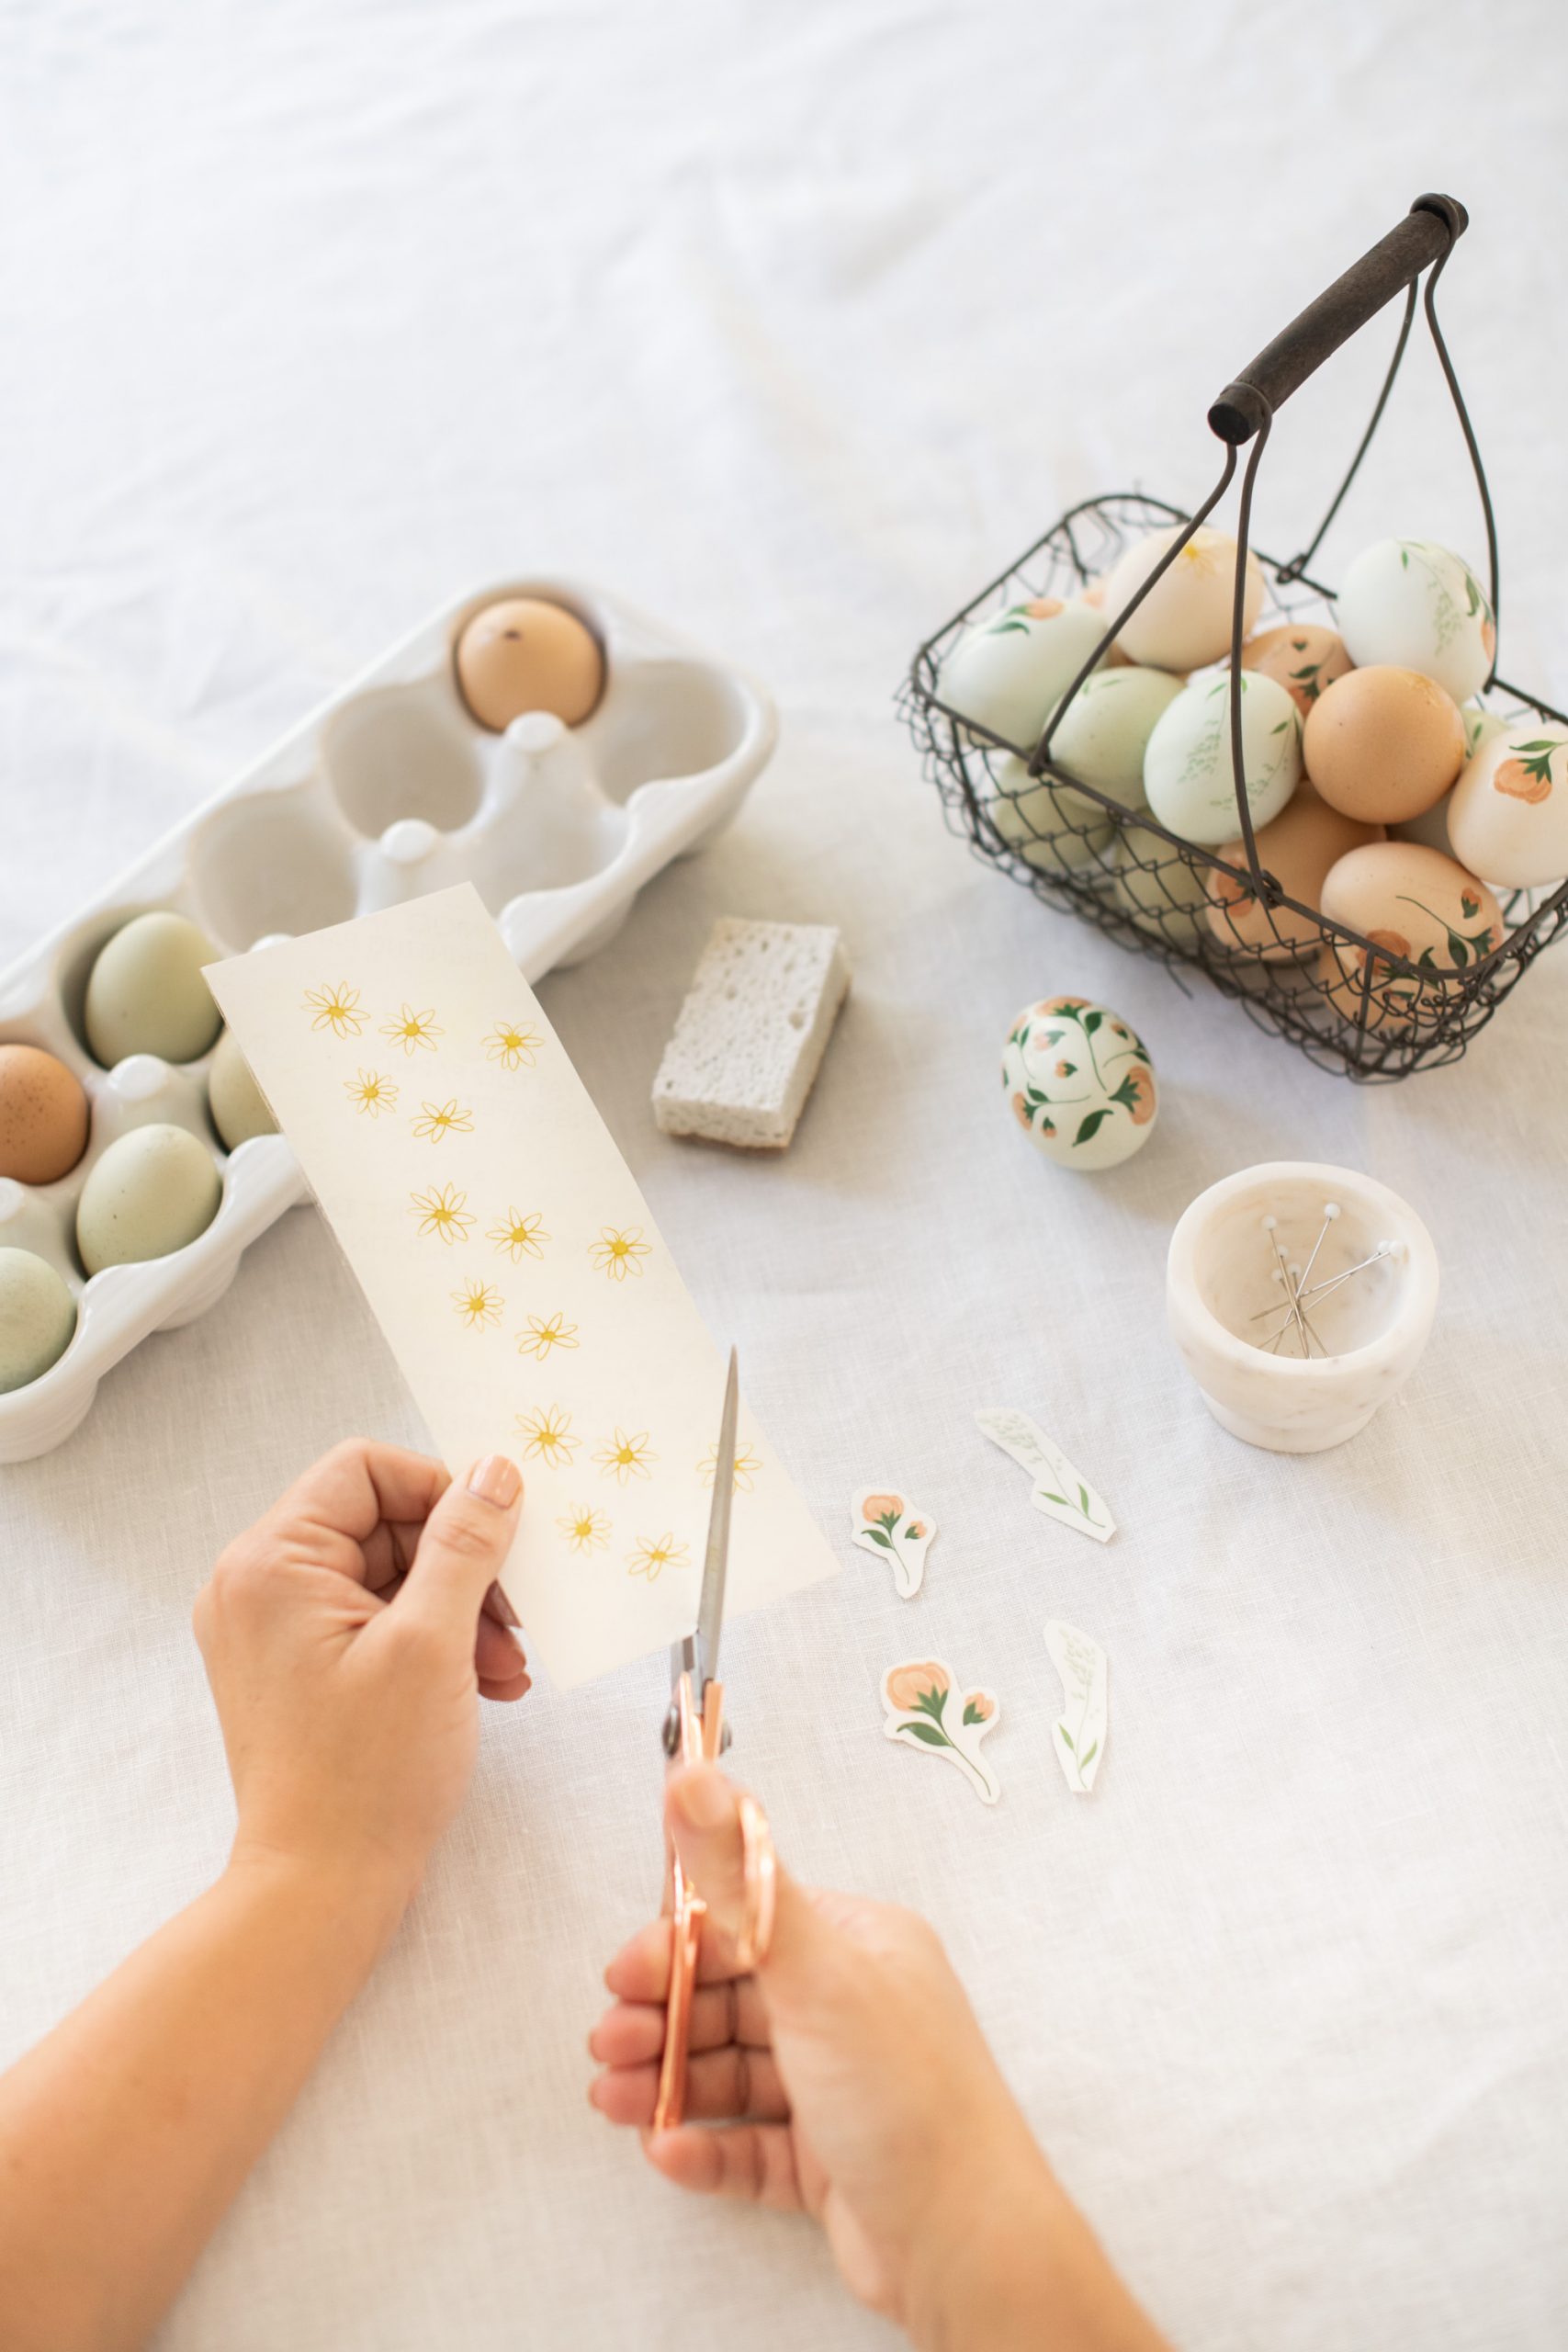
Tattoo paper or temporary tattoos
Design download (optional, found at monikahibbs.com; search for “floral Easter egg designs”)
Printer
Scissors
Small bowl
Water
Sponge
“Decoupage” method (See note in Step 2.)
Mod Podge
Small Paint Brush
White Printing Paper
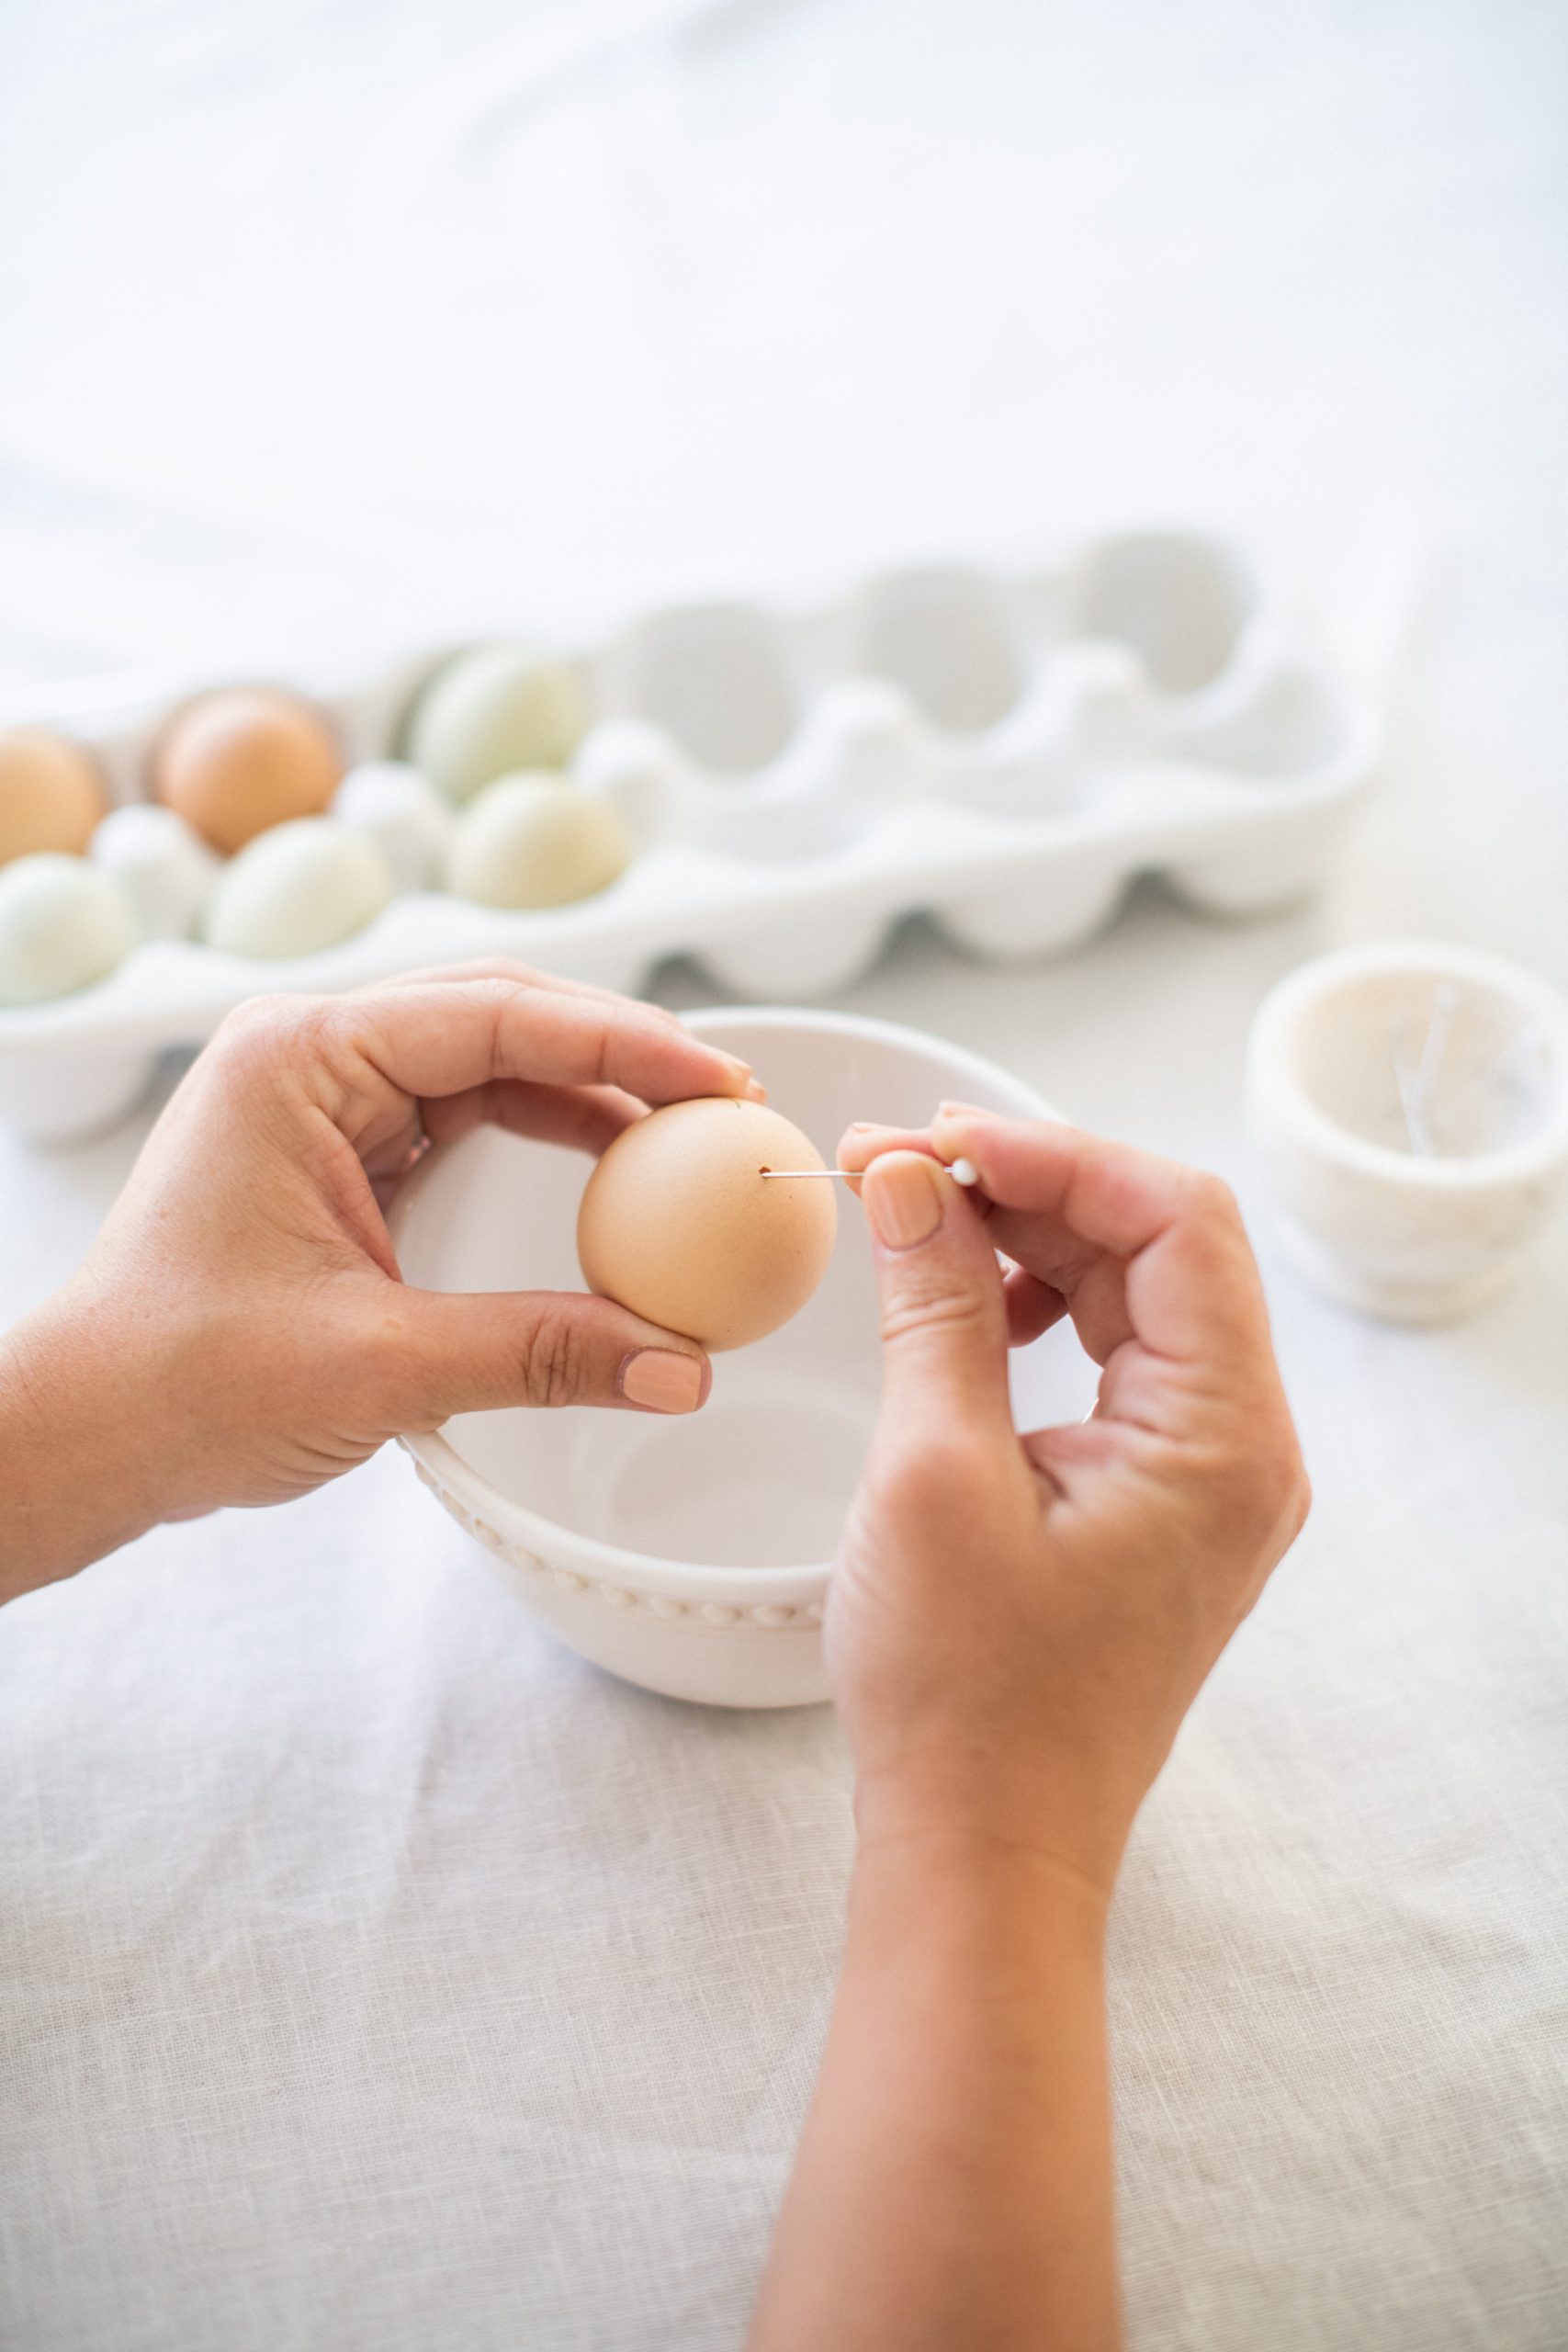
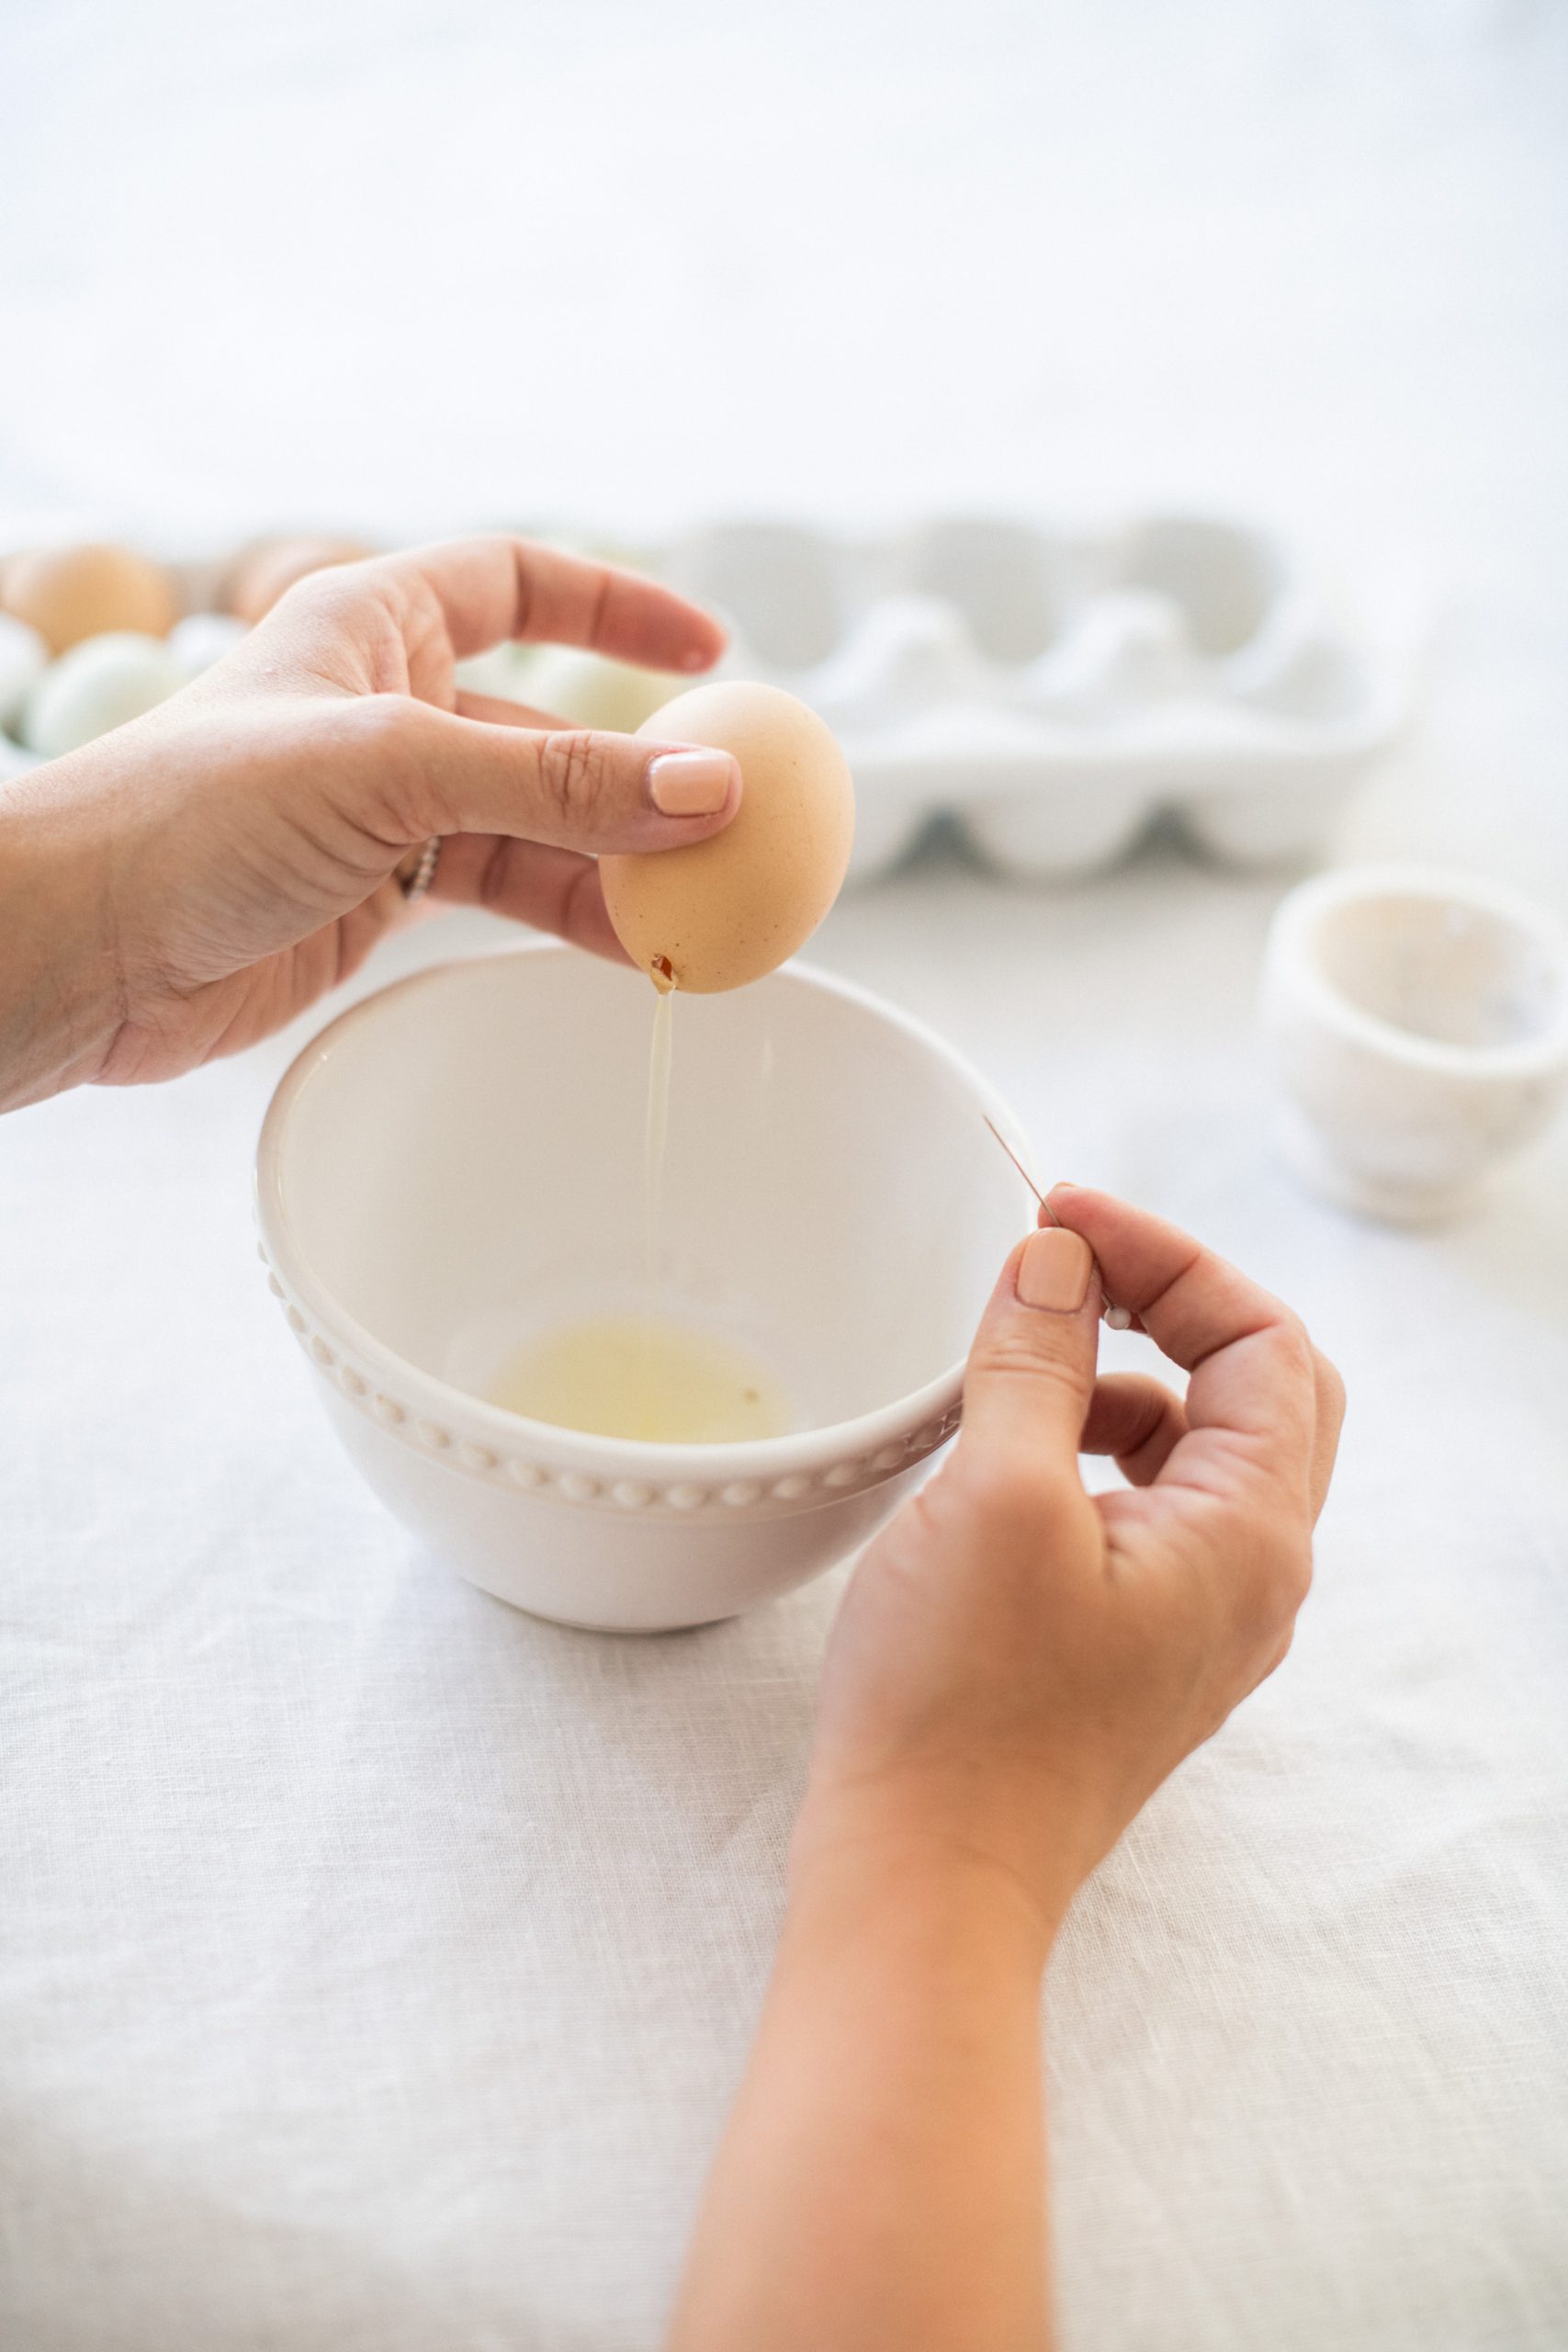
- 1. Using the pin, poke a hole at the top and bottom of each egg. Make the hole larger (about 1/8 inch/3 mm) by carefully moving the pin around in circles. Position the egg over an empty bowl. Gently blow into the top hole until the egg white and yolk fall out through the bottom hole. Rinse out the egg with water. Blow out through the top hole again to remove any excess water. Let dry.
2. Following the manufacturer’s instructions, print out the designs of your choice on the tattoo paper. If you find temporary tattoos you like, you can use them instead. Cut out the temporary tattoo designs, making sure to cut as close as you can to the design details as possible.
On a little side note: I know during this time during Covid-19 it might be a little harder to find tattoo paper. I’ve tried a bit of a different method using a “Decoupage” method. You can still print out the illustrations, this time on regular white paper. You’ll need white glue or Mod Podge as well as a paint brush. Paint your egg with the glue and then place your cut outs over top, painting a thin layer of glue over the illustrations. Let dry.
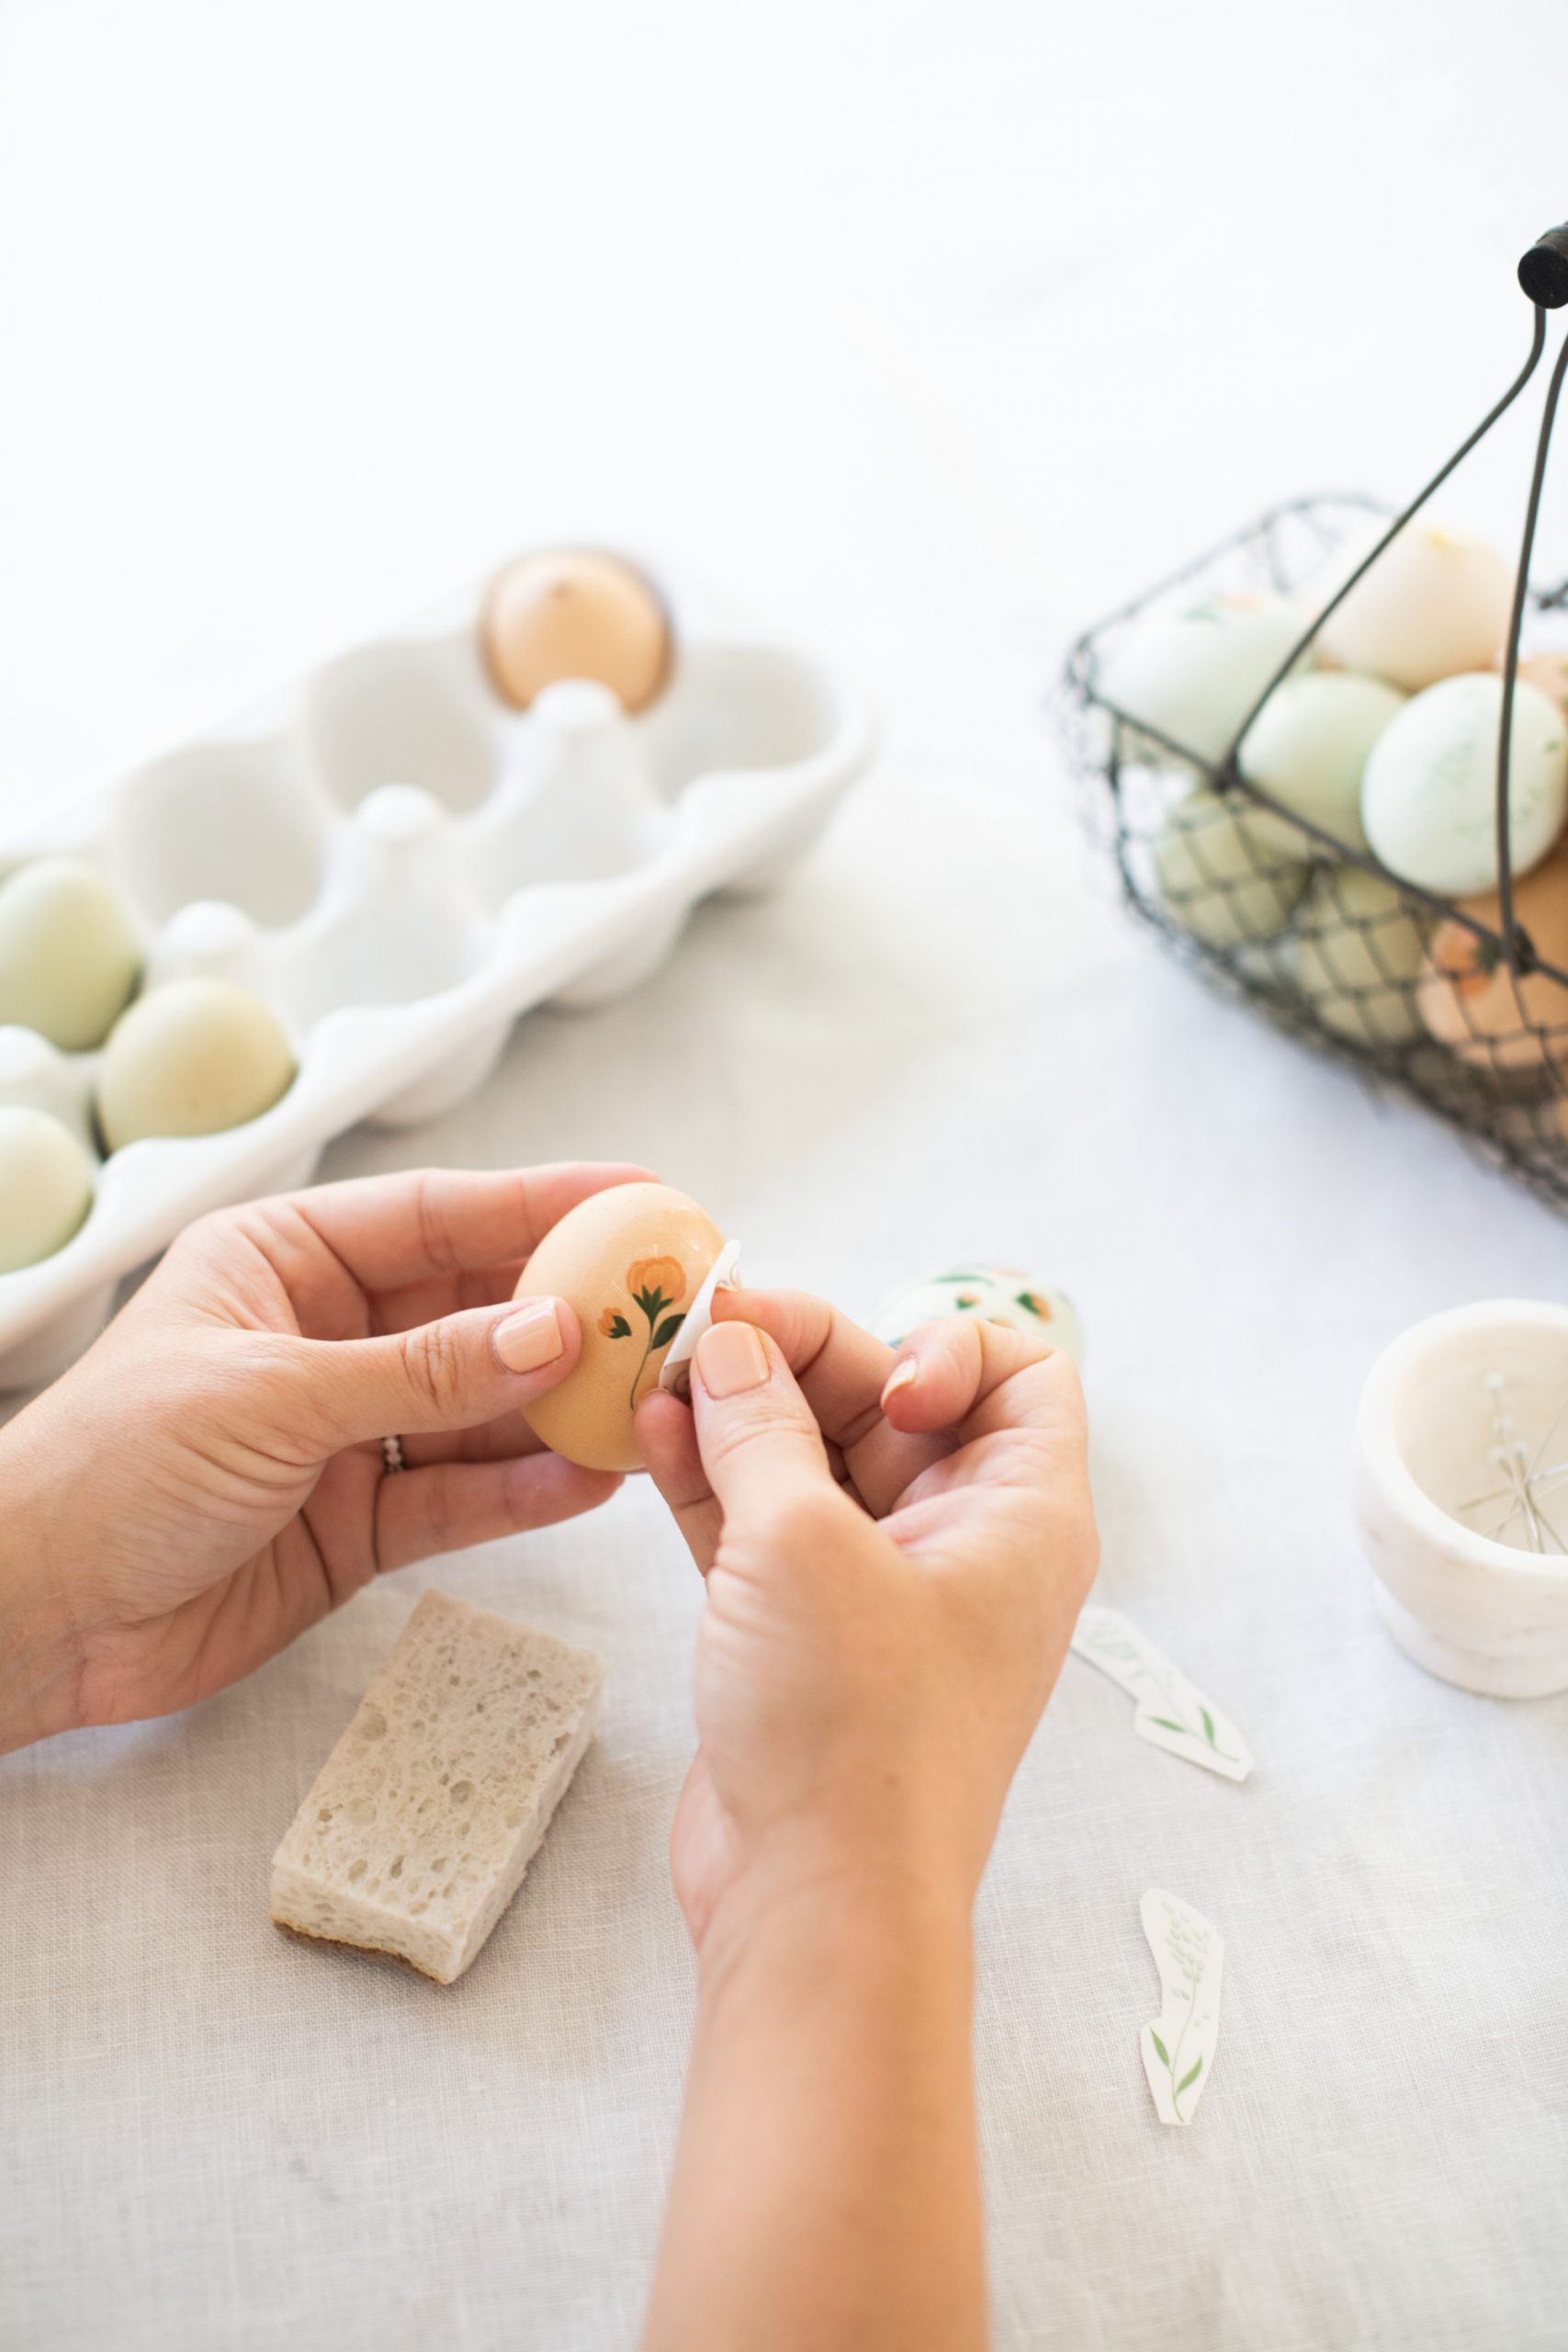
3. Remove the plastic covering from the tattoo paper and place the temporary tattoo on the dry egg in the desired position, design side down. Once the tattoo is in the right spot, wet the back of the paper with a damp sponge, pressing down gently to ensure the tattoo completely transfers onto the egg.
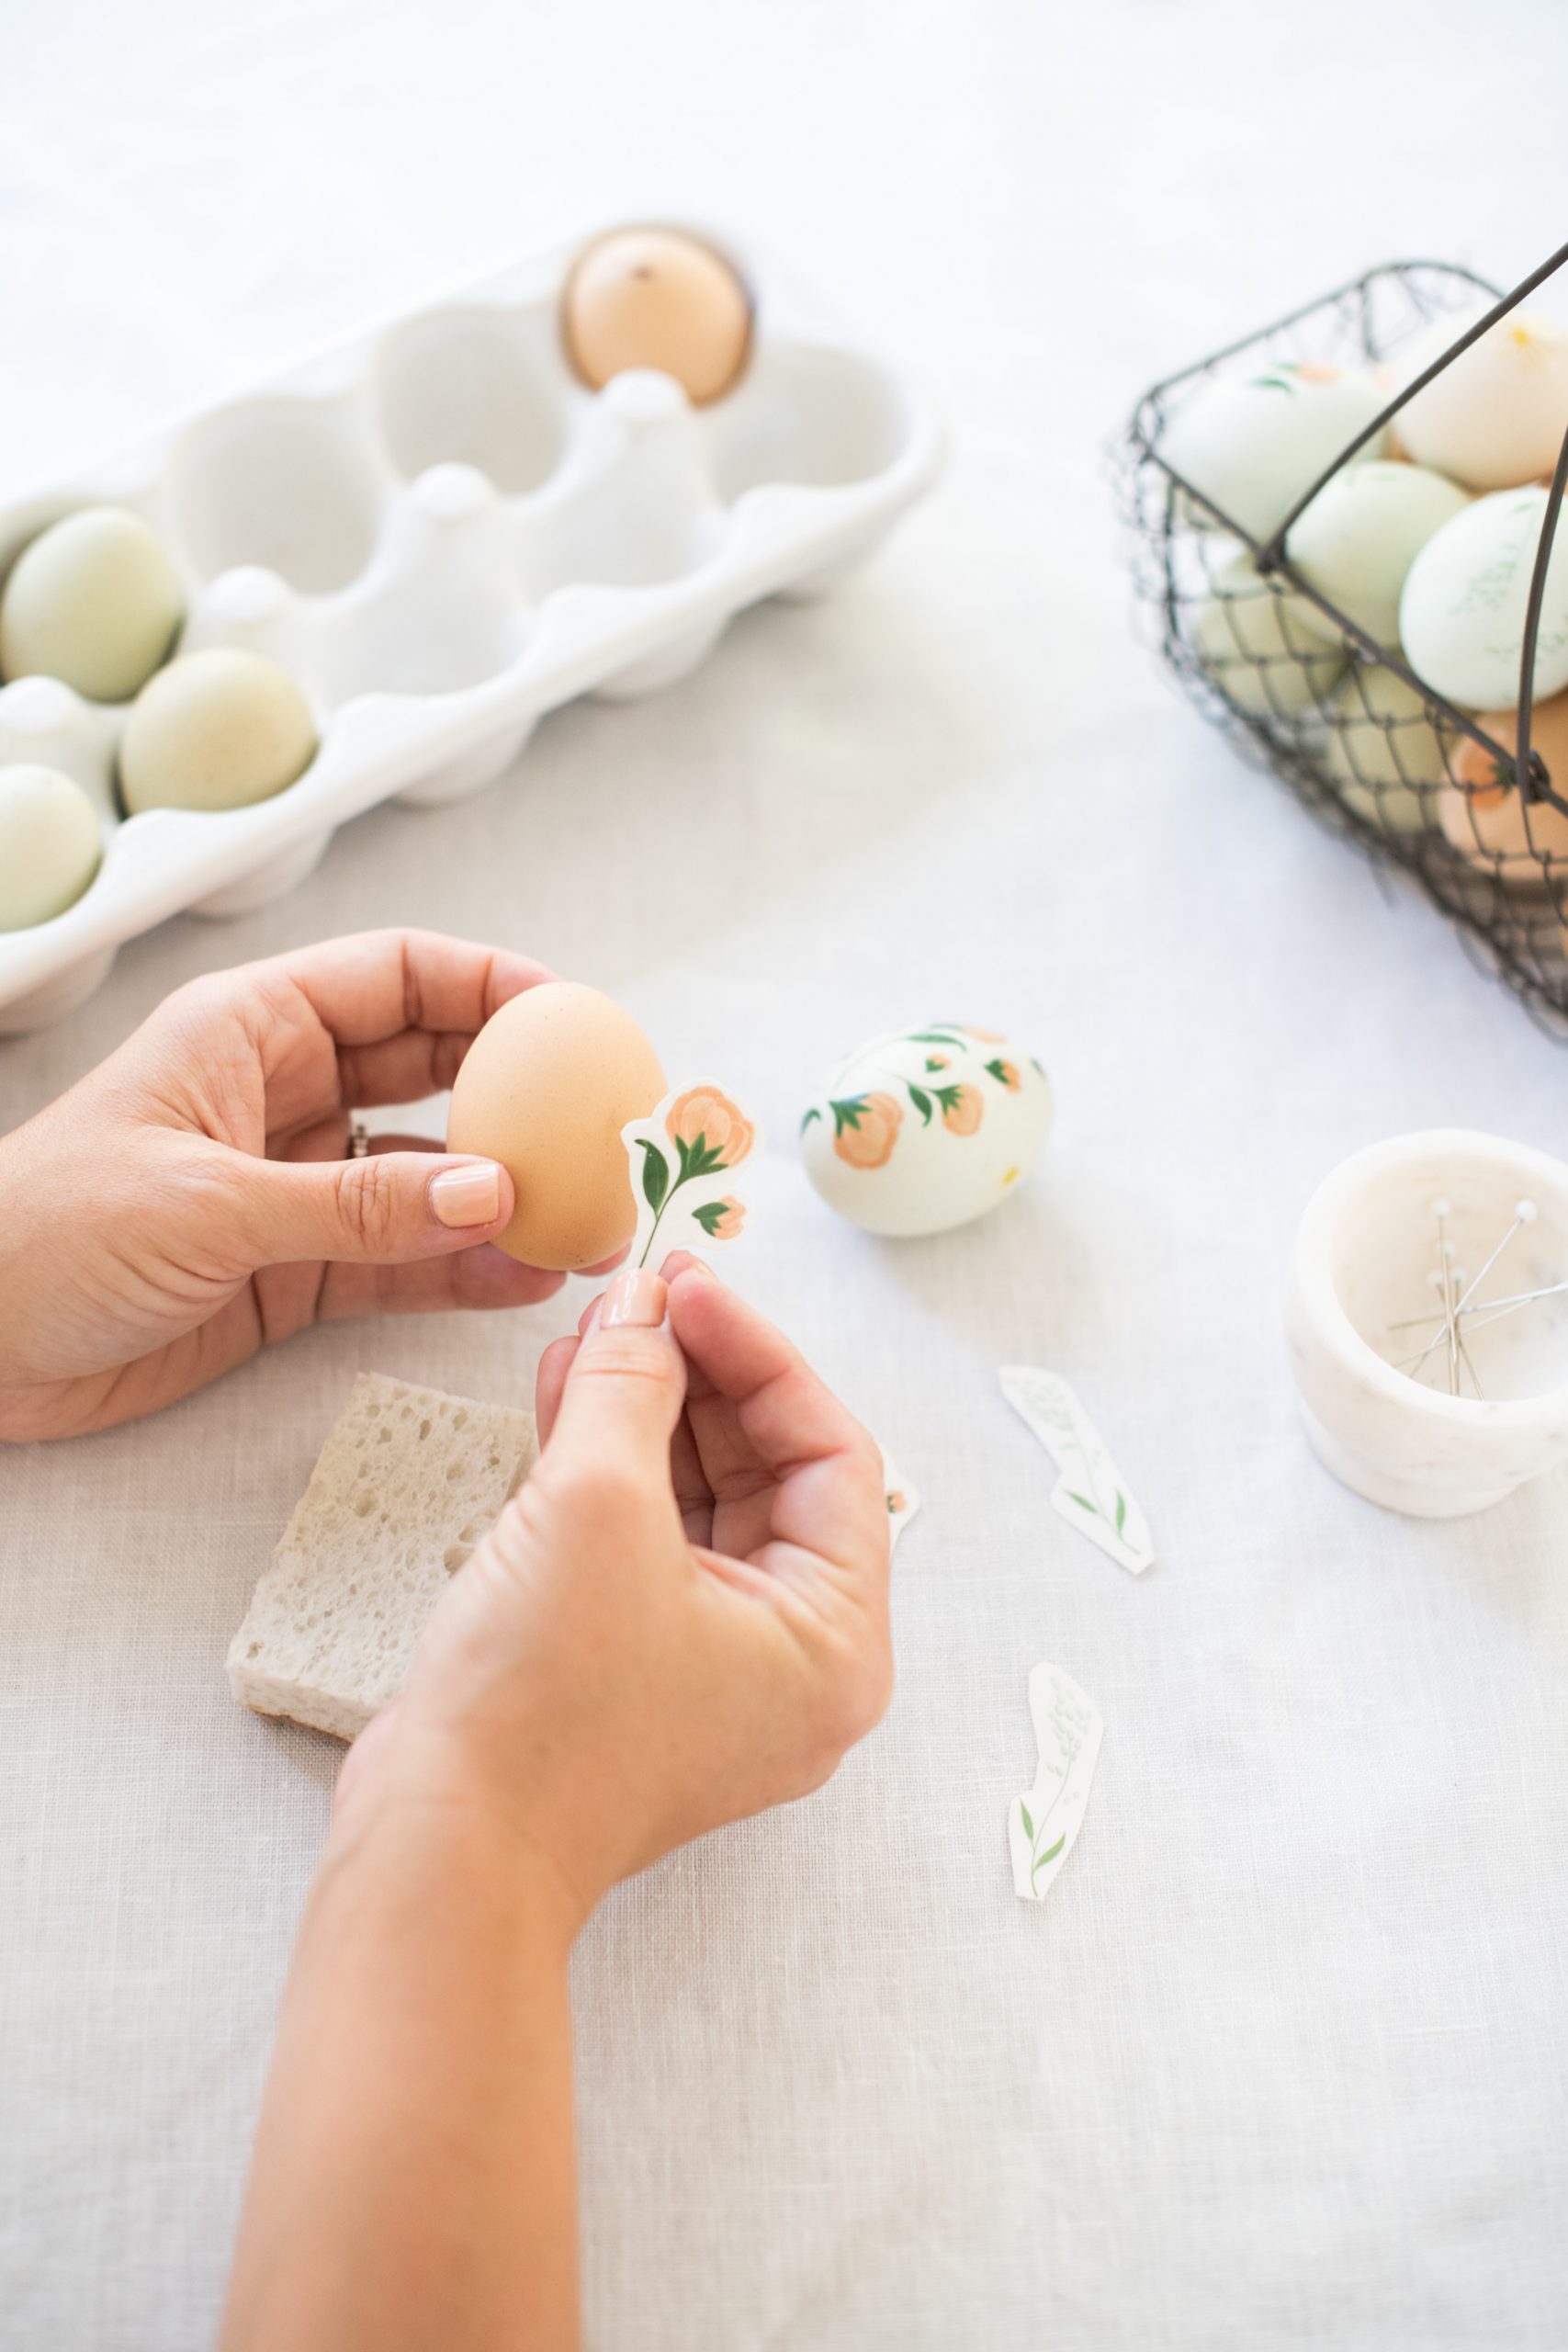
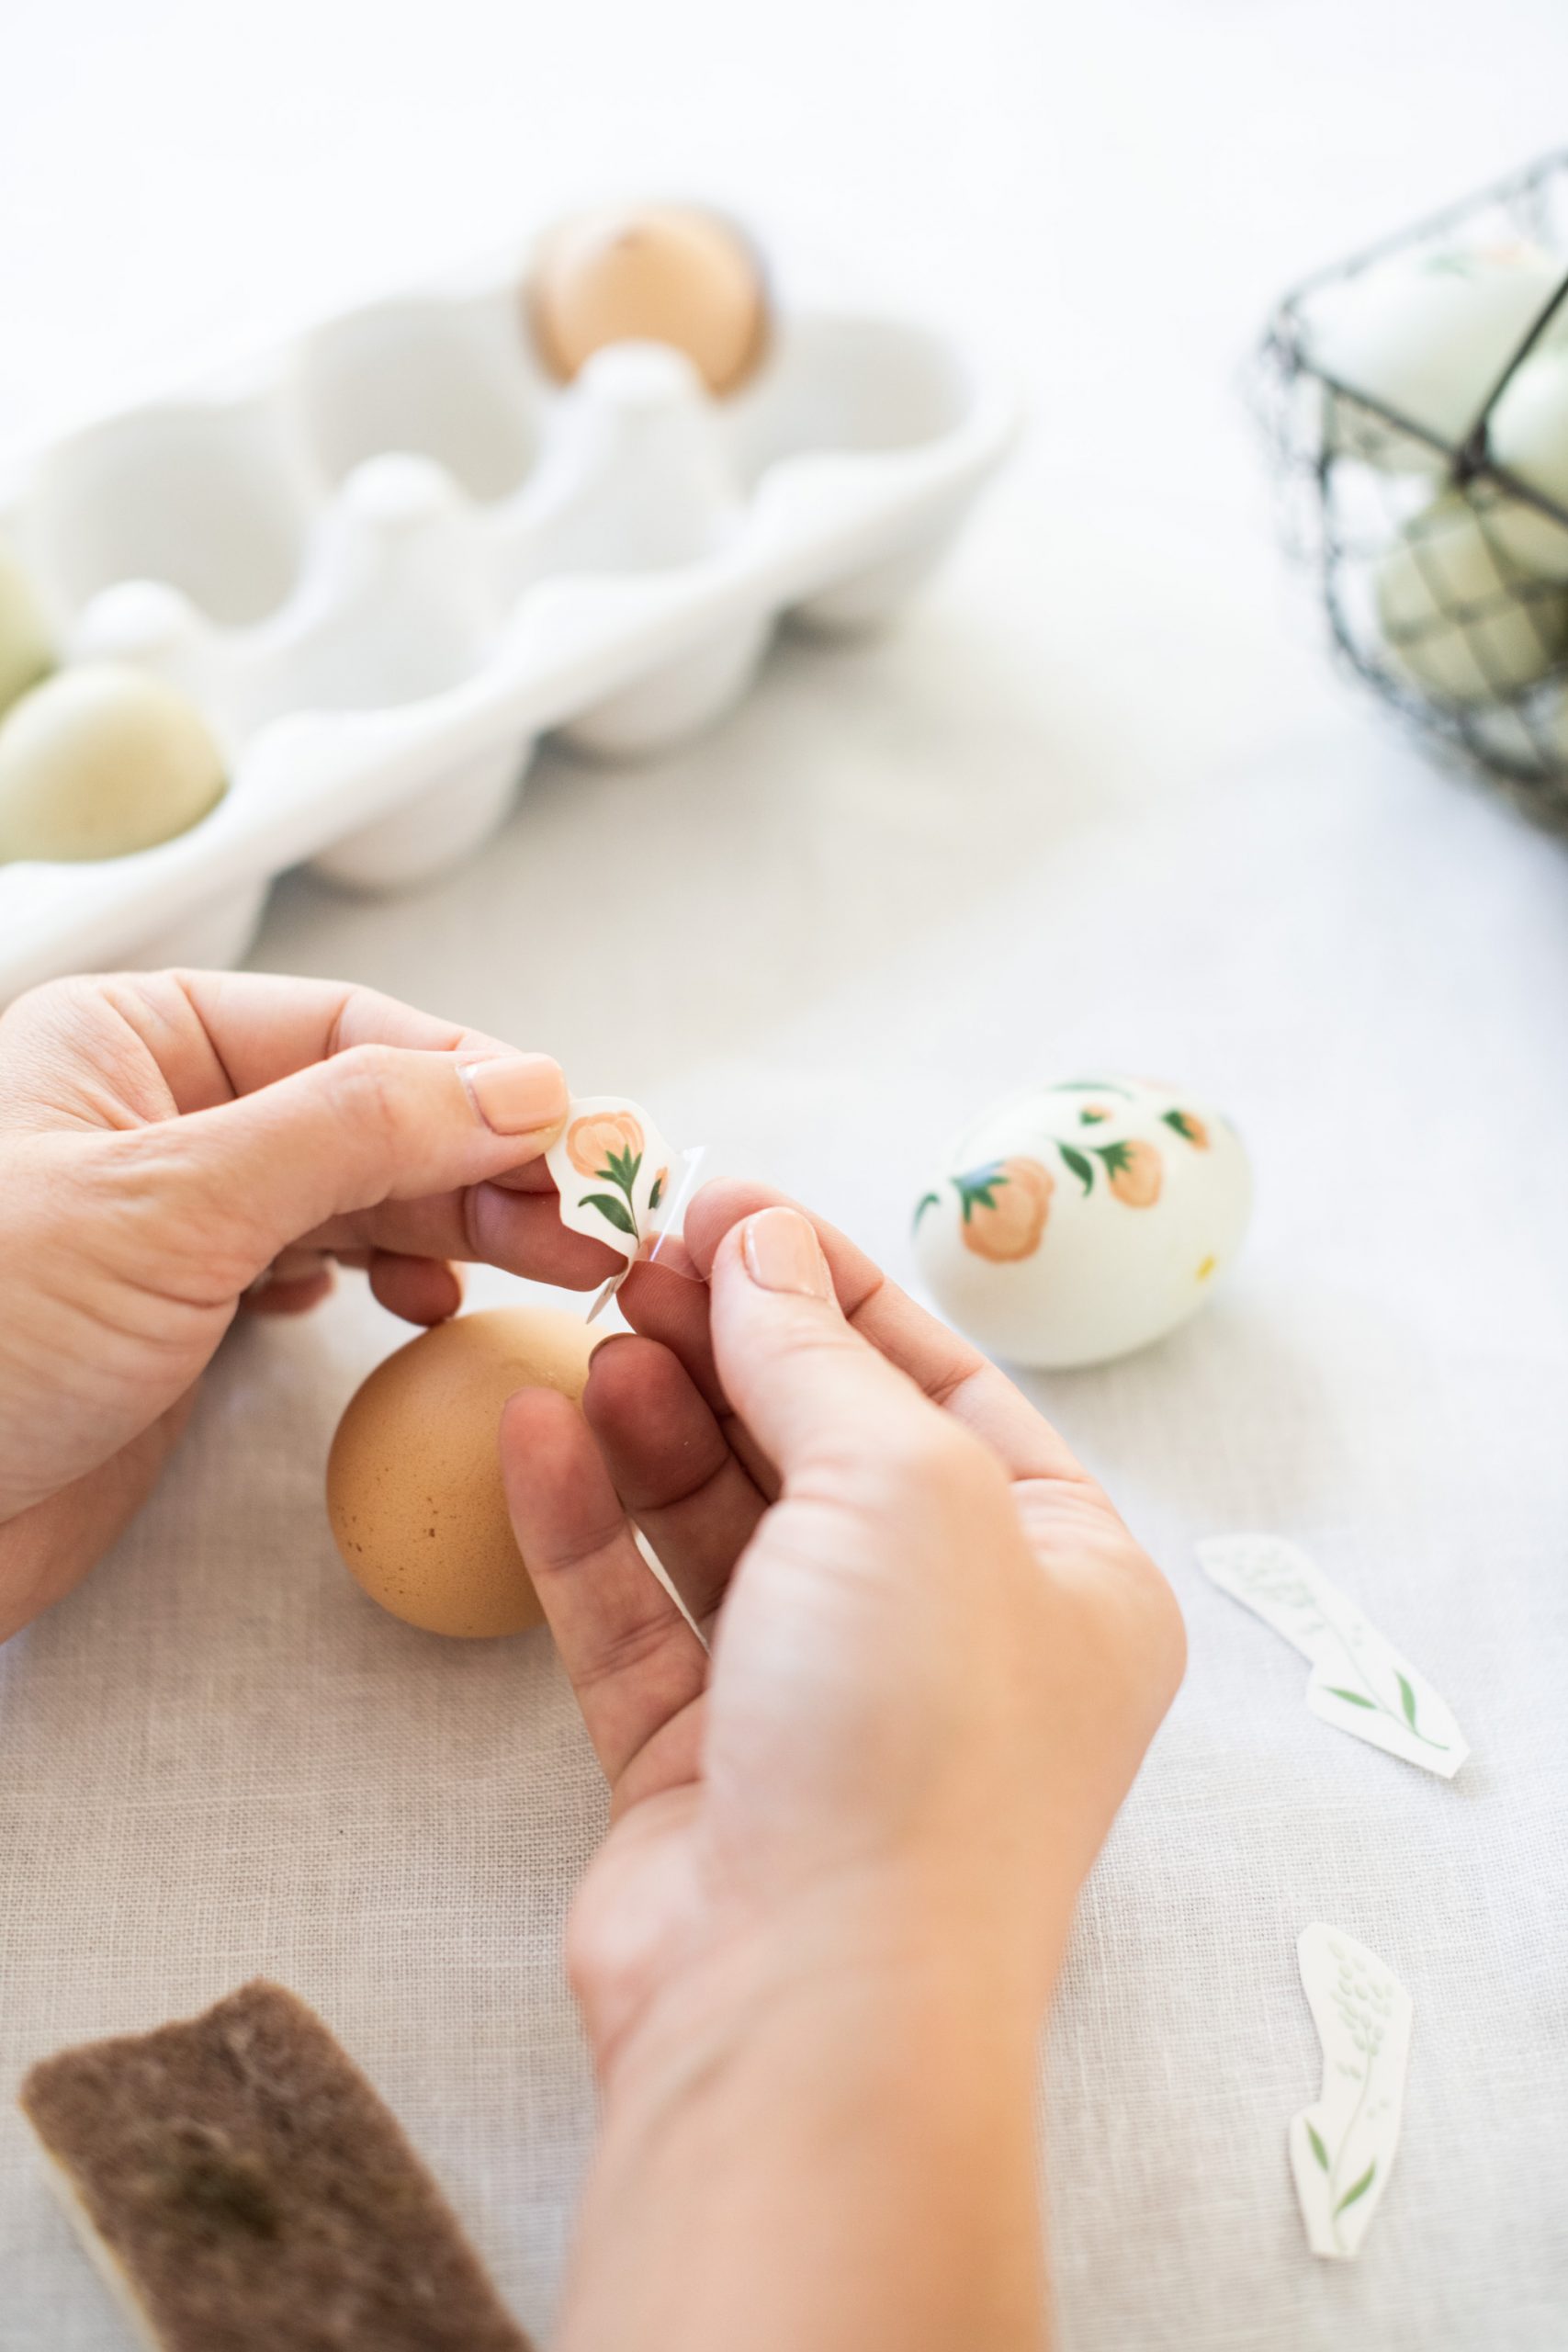

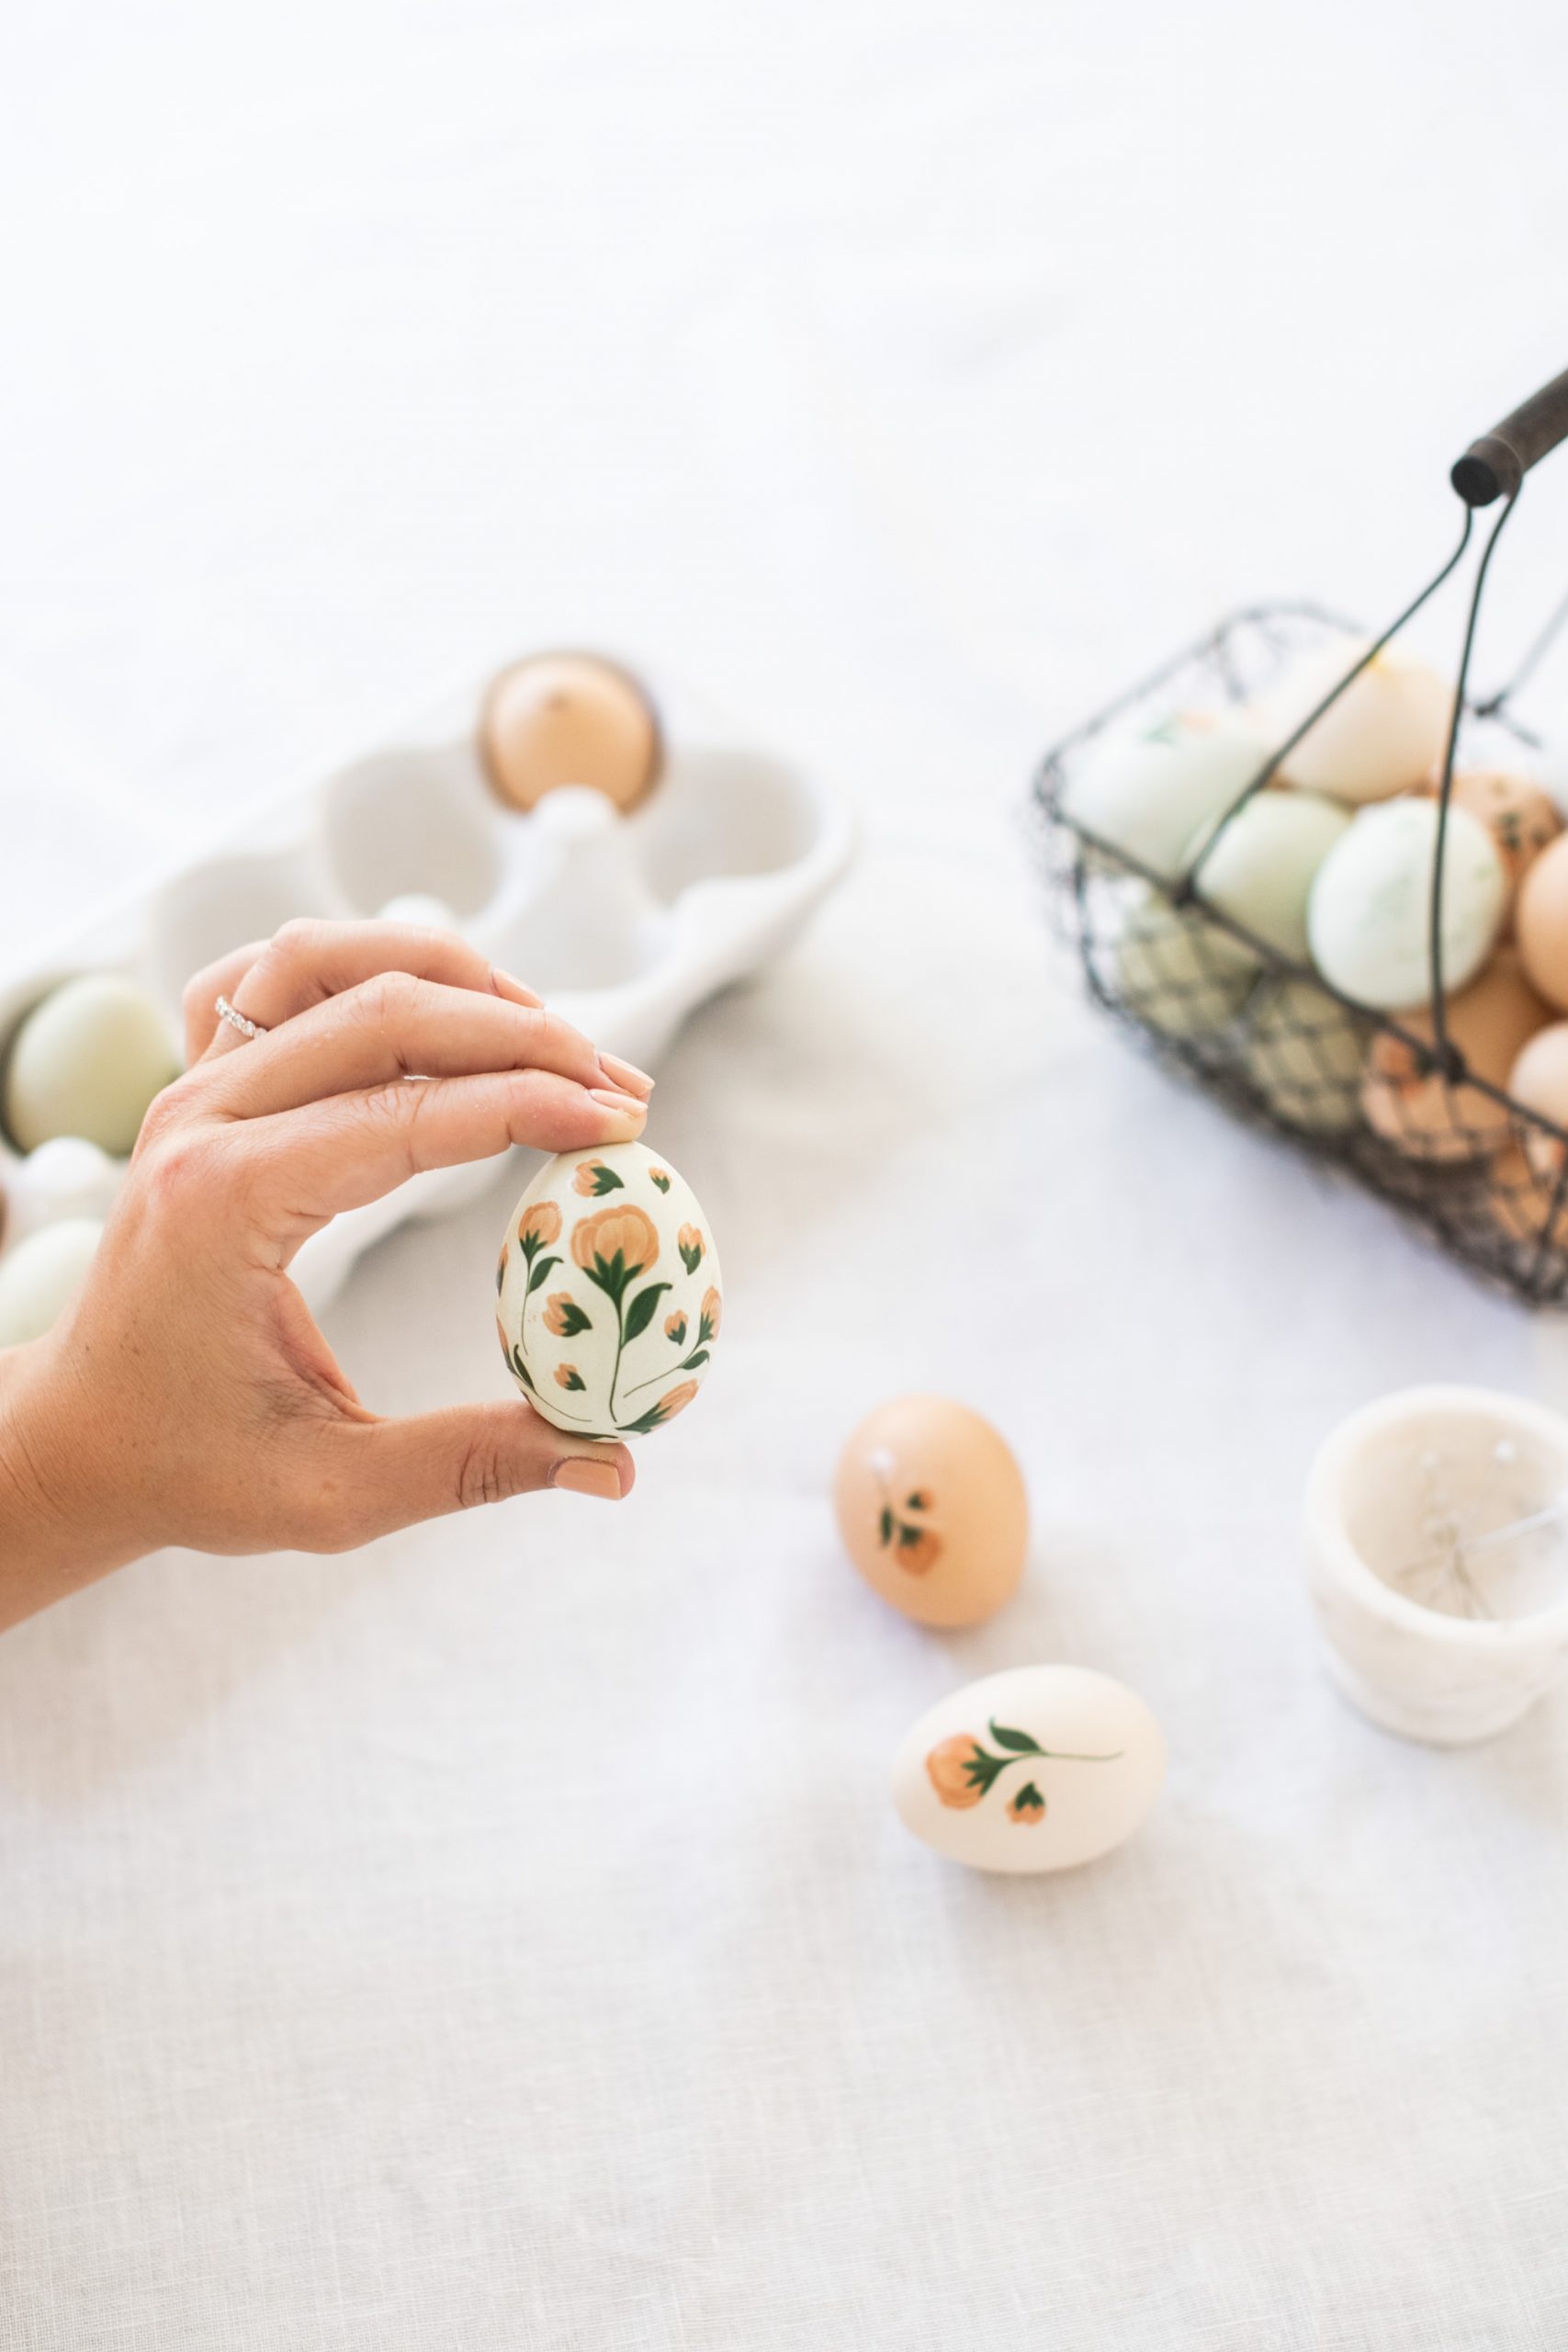
4. Pat dry and slowly pull the paper away from the egg to leave the beautiful design behind. Continue to add designs to the egg as desired.
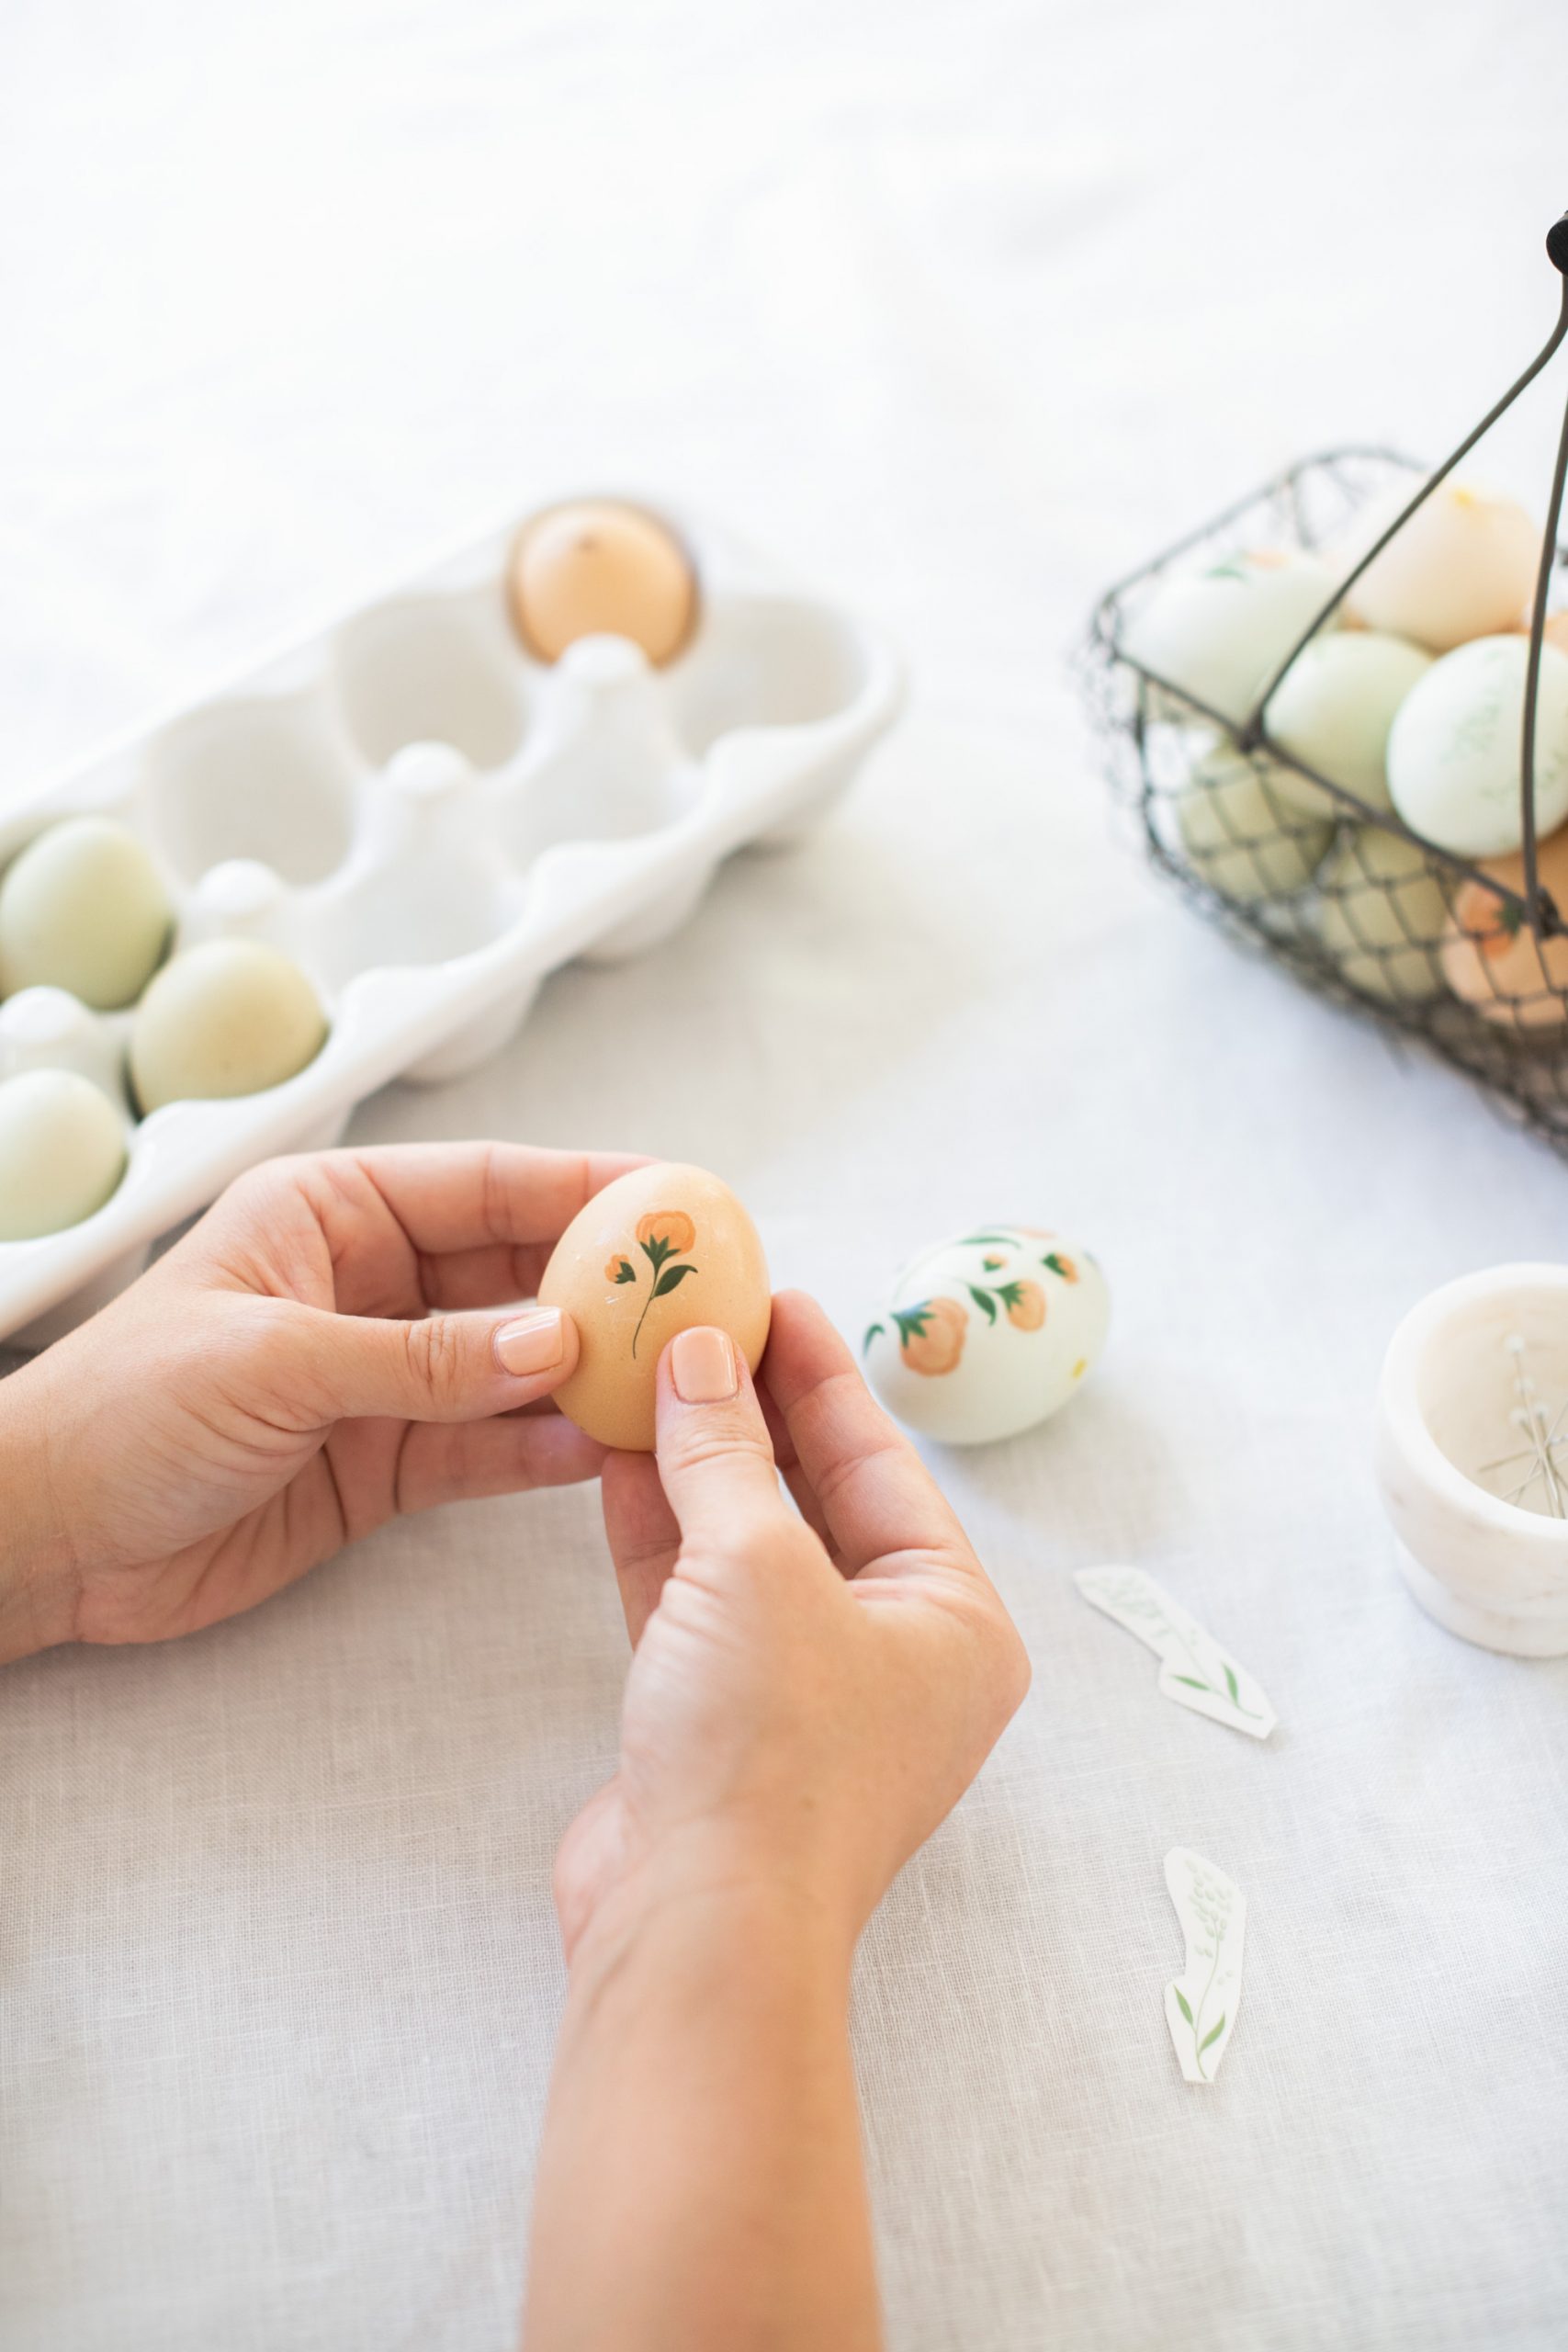
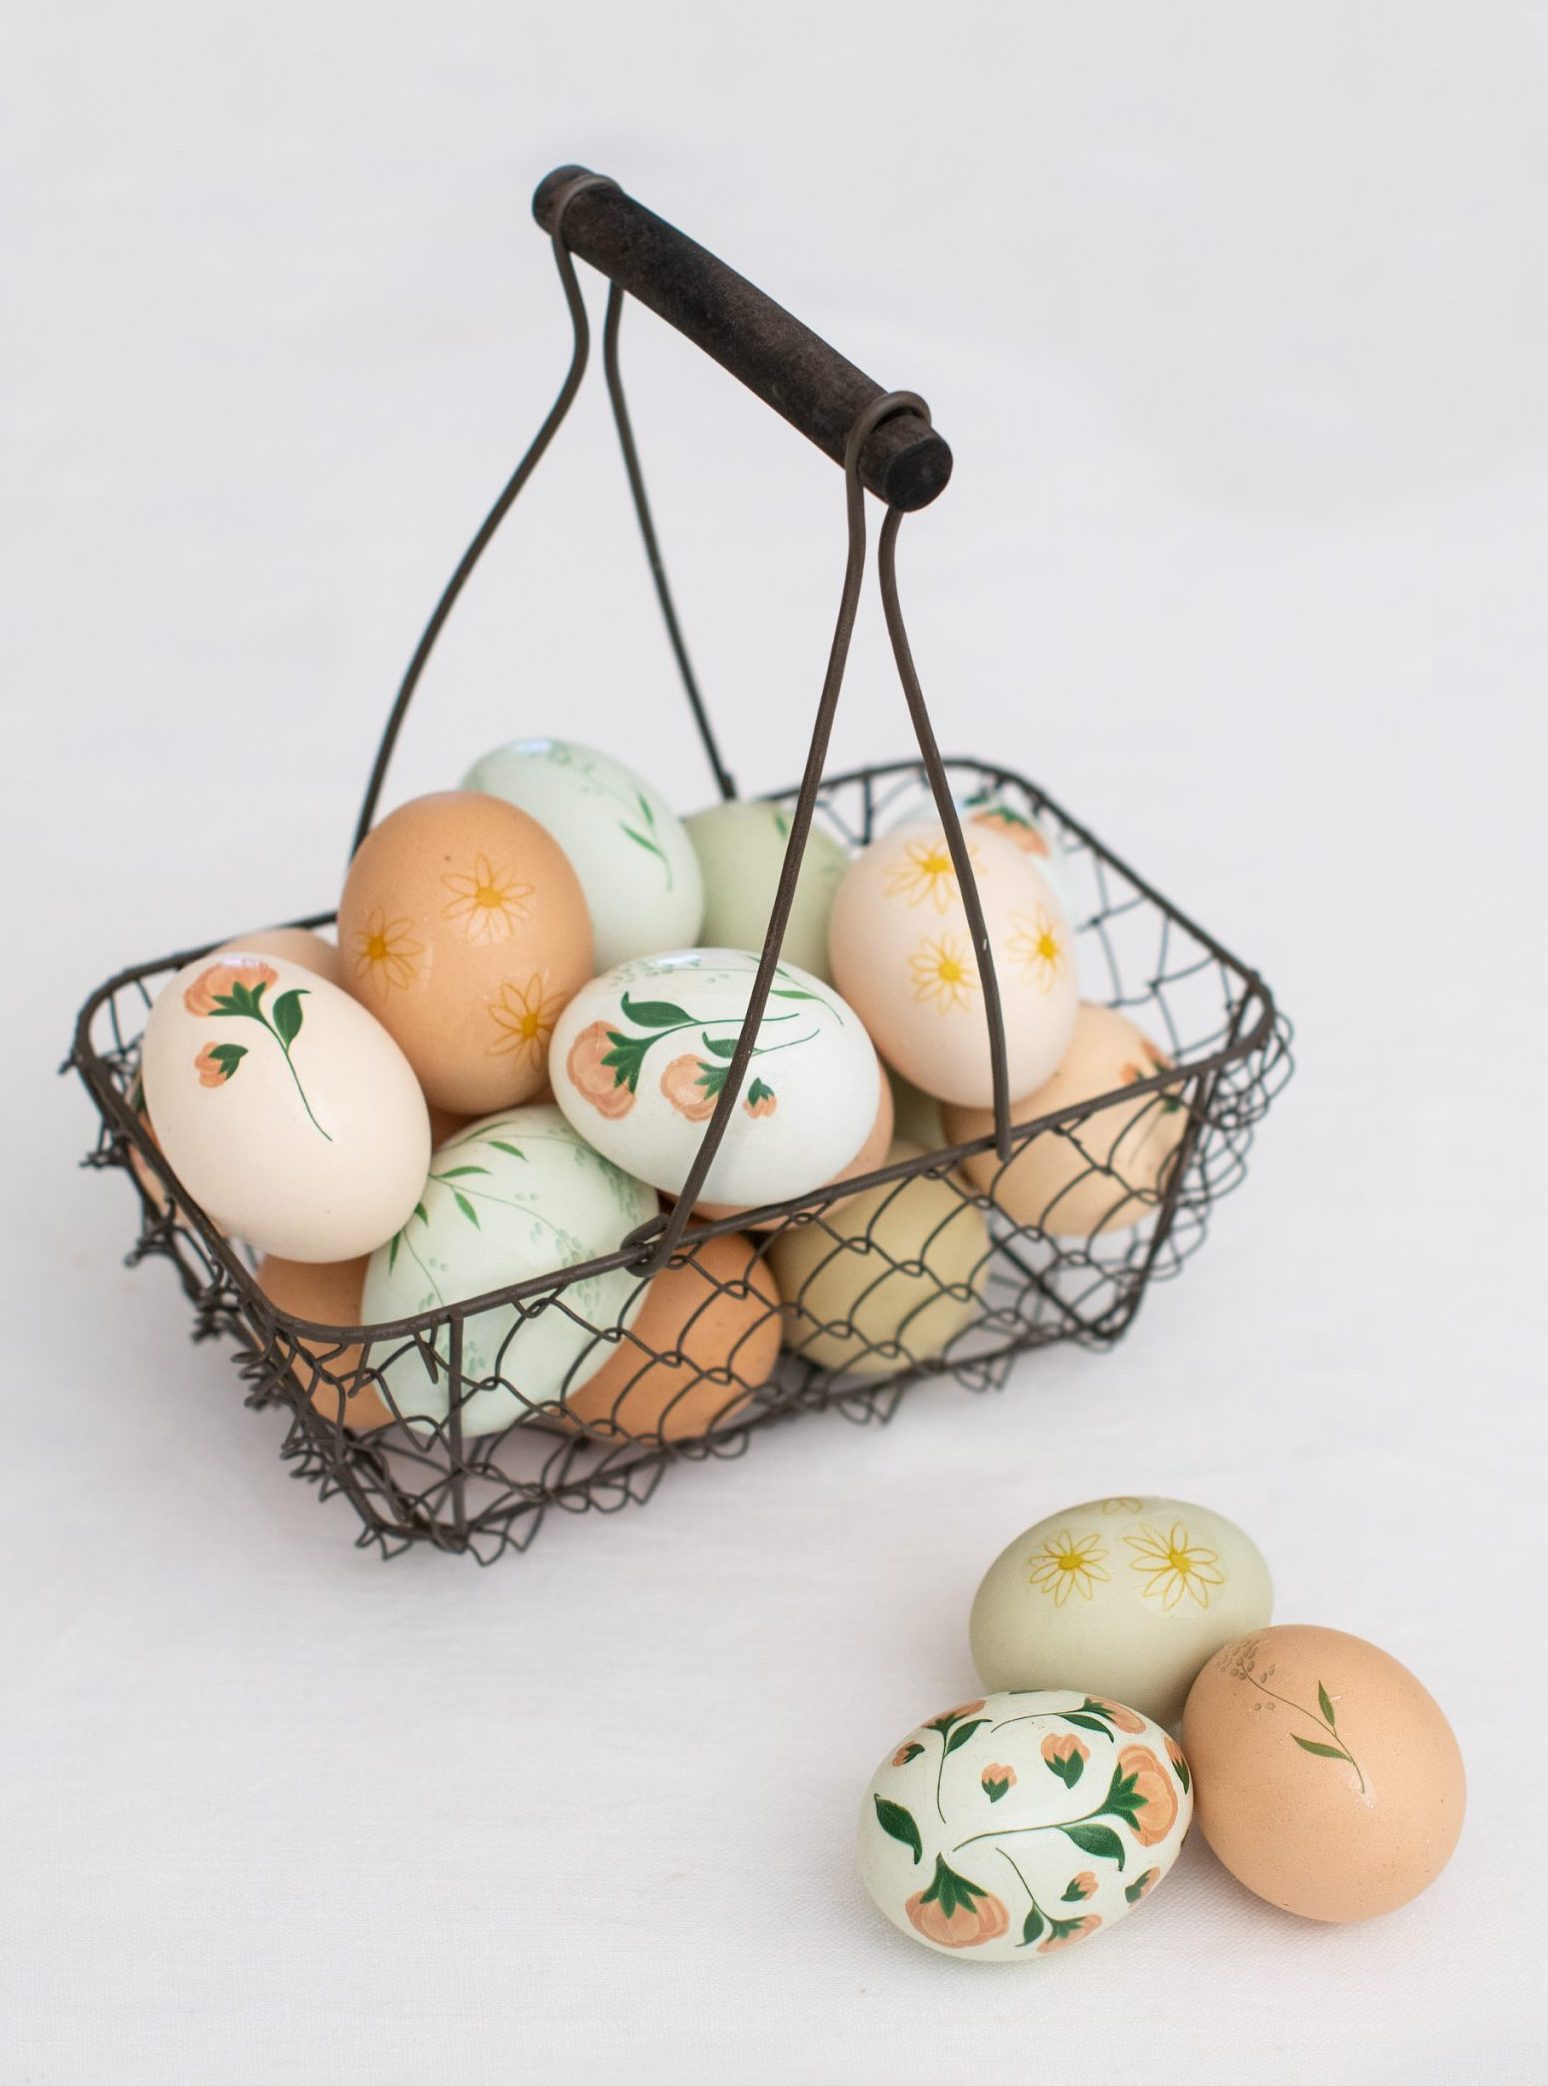
5. You can create a full look by adding multiple designs. Or for a simpler design, add 1 or 2 temporary tattoos to each egg.

Photography by Kristy Ryan
Shop The Post