Holiday Paper Garland
It’s that time of year again. Time to deck the halls and get all the Christmas decorations up! I don’t know about you but decorating for Christmas always brings me back to my childhood memories. It’s exciting that now I get to decorate our home for our family of 5! Hanging up all five stockings just excites me.
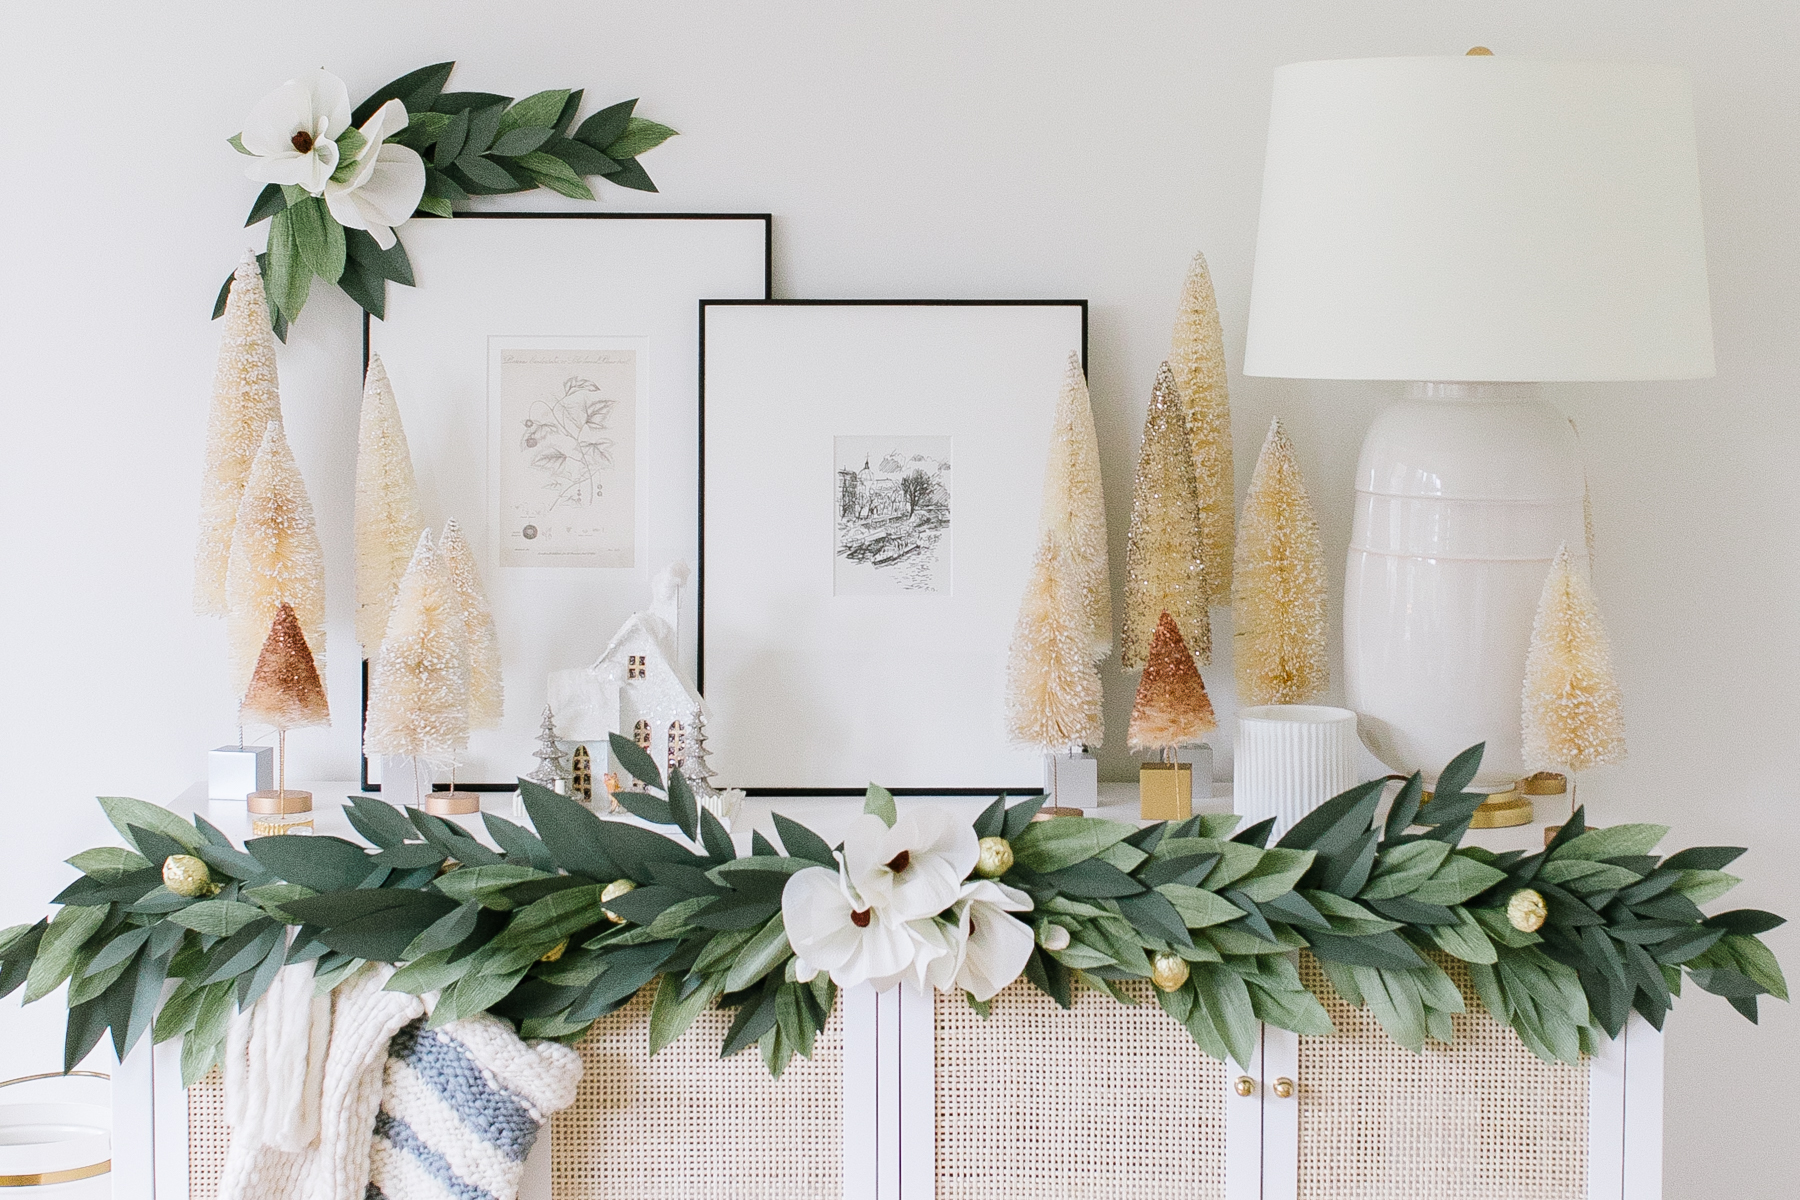
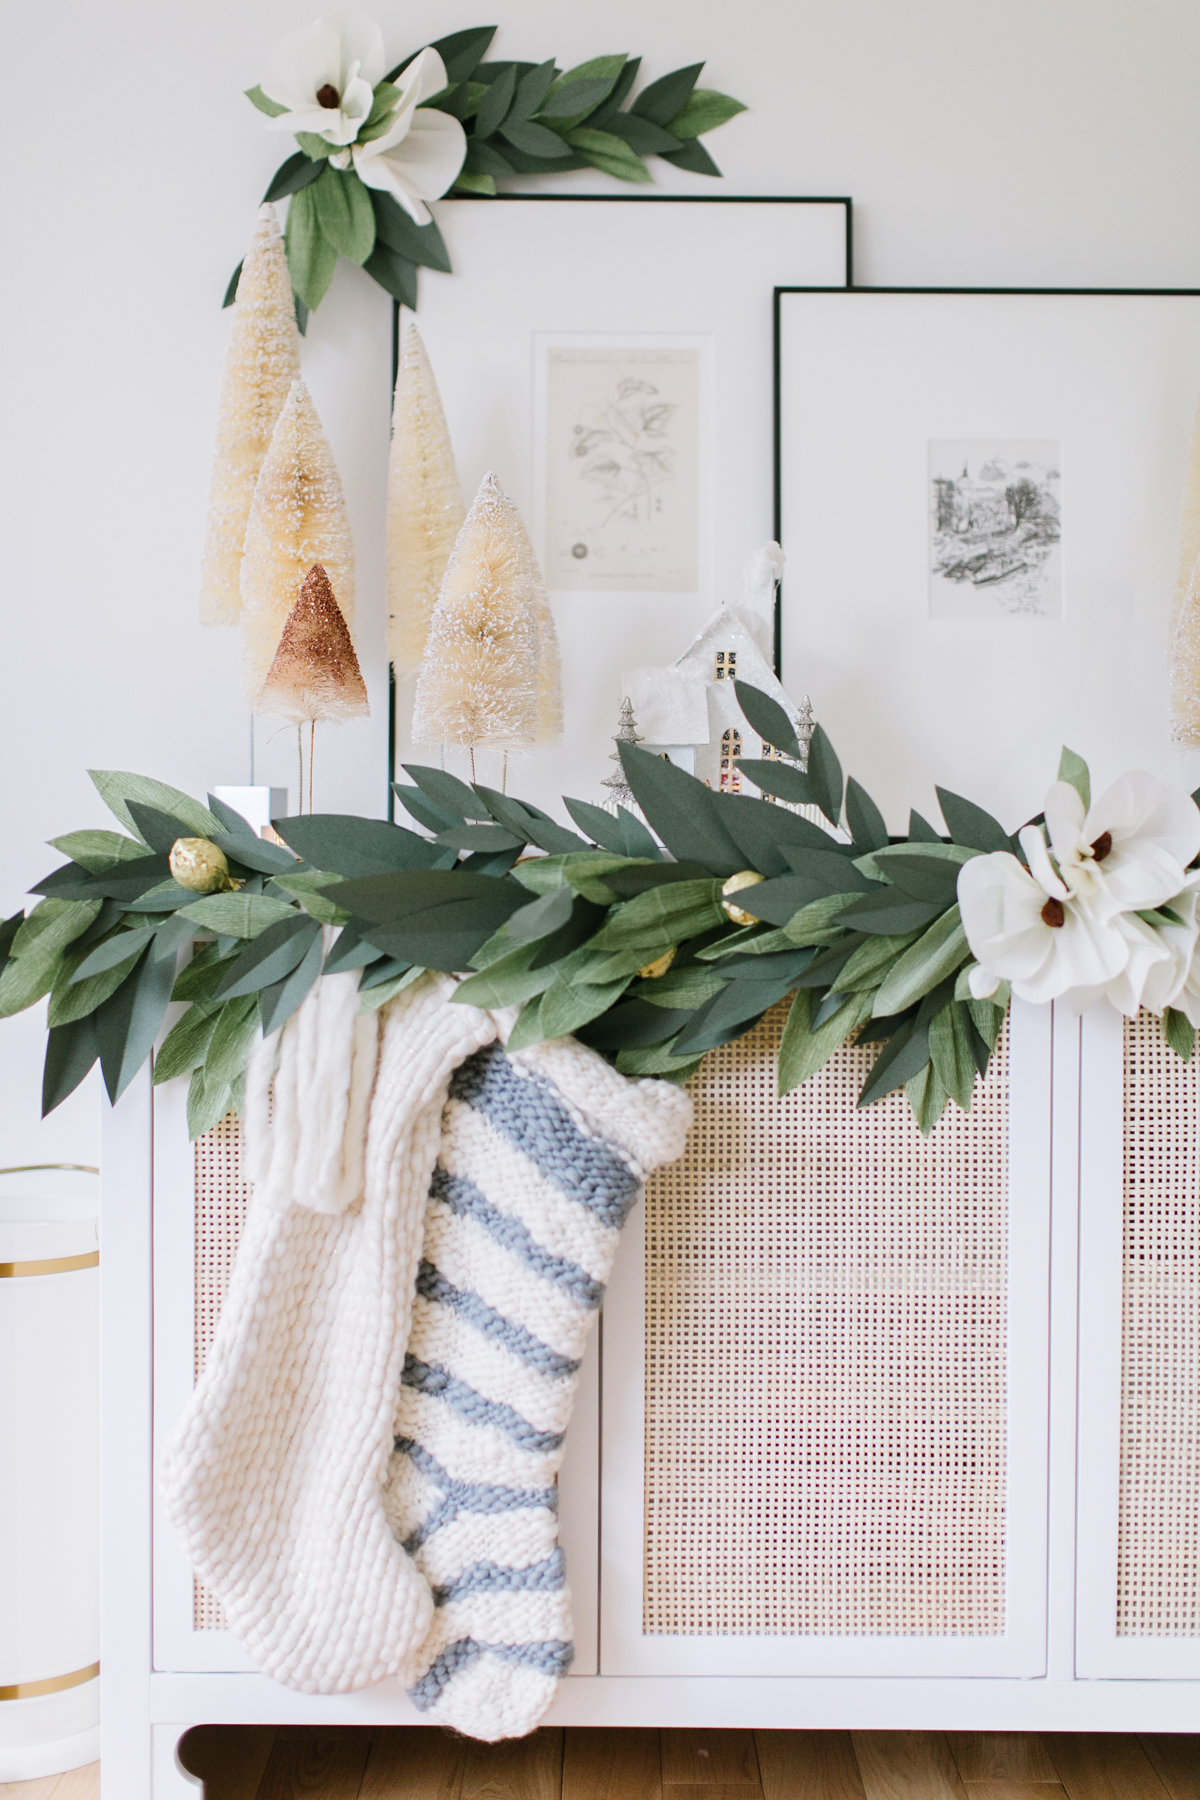
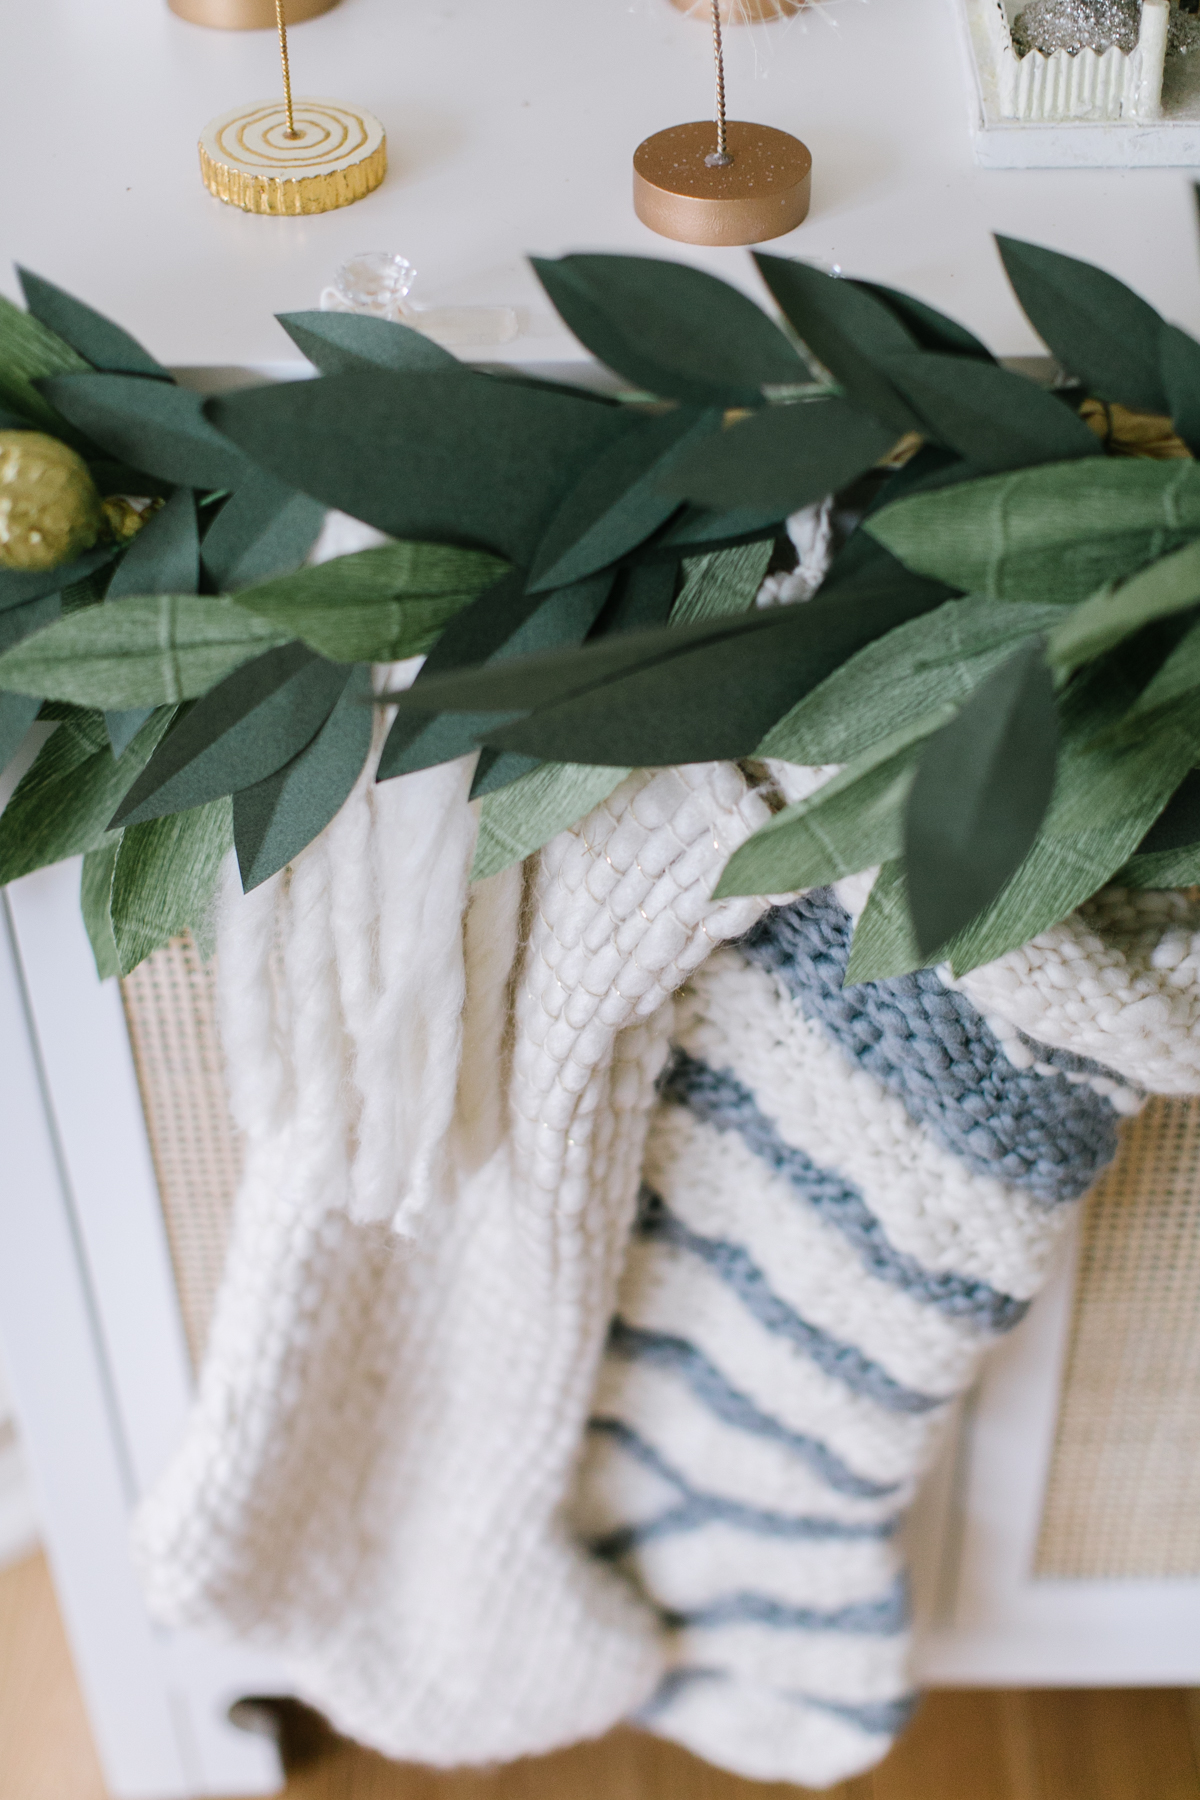
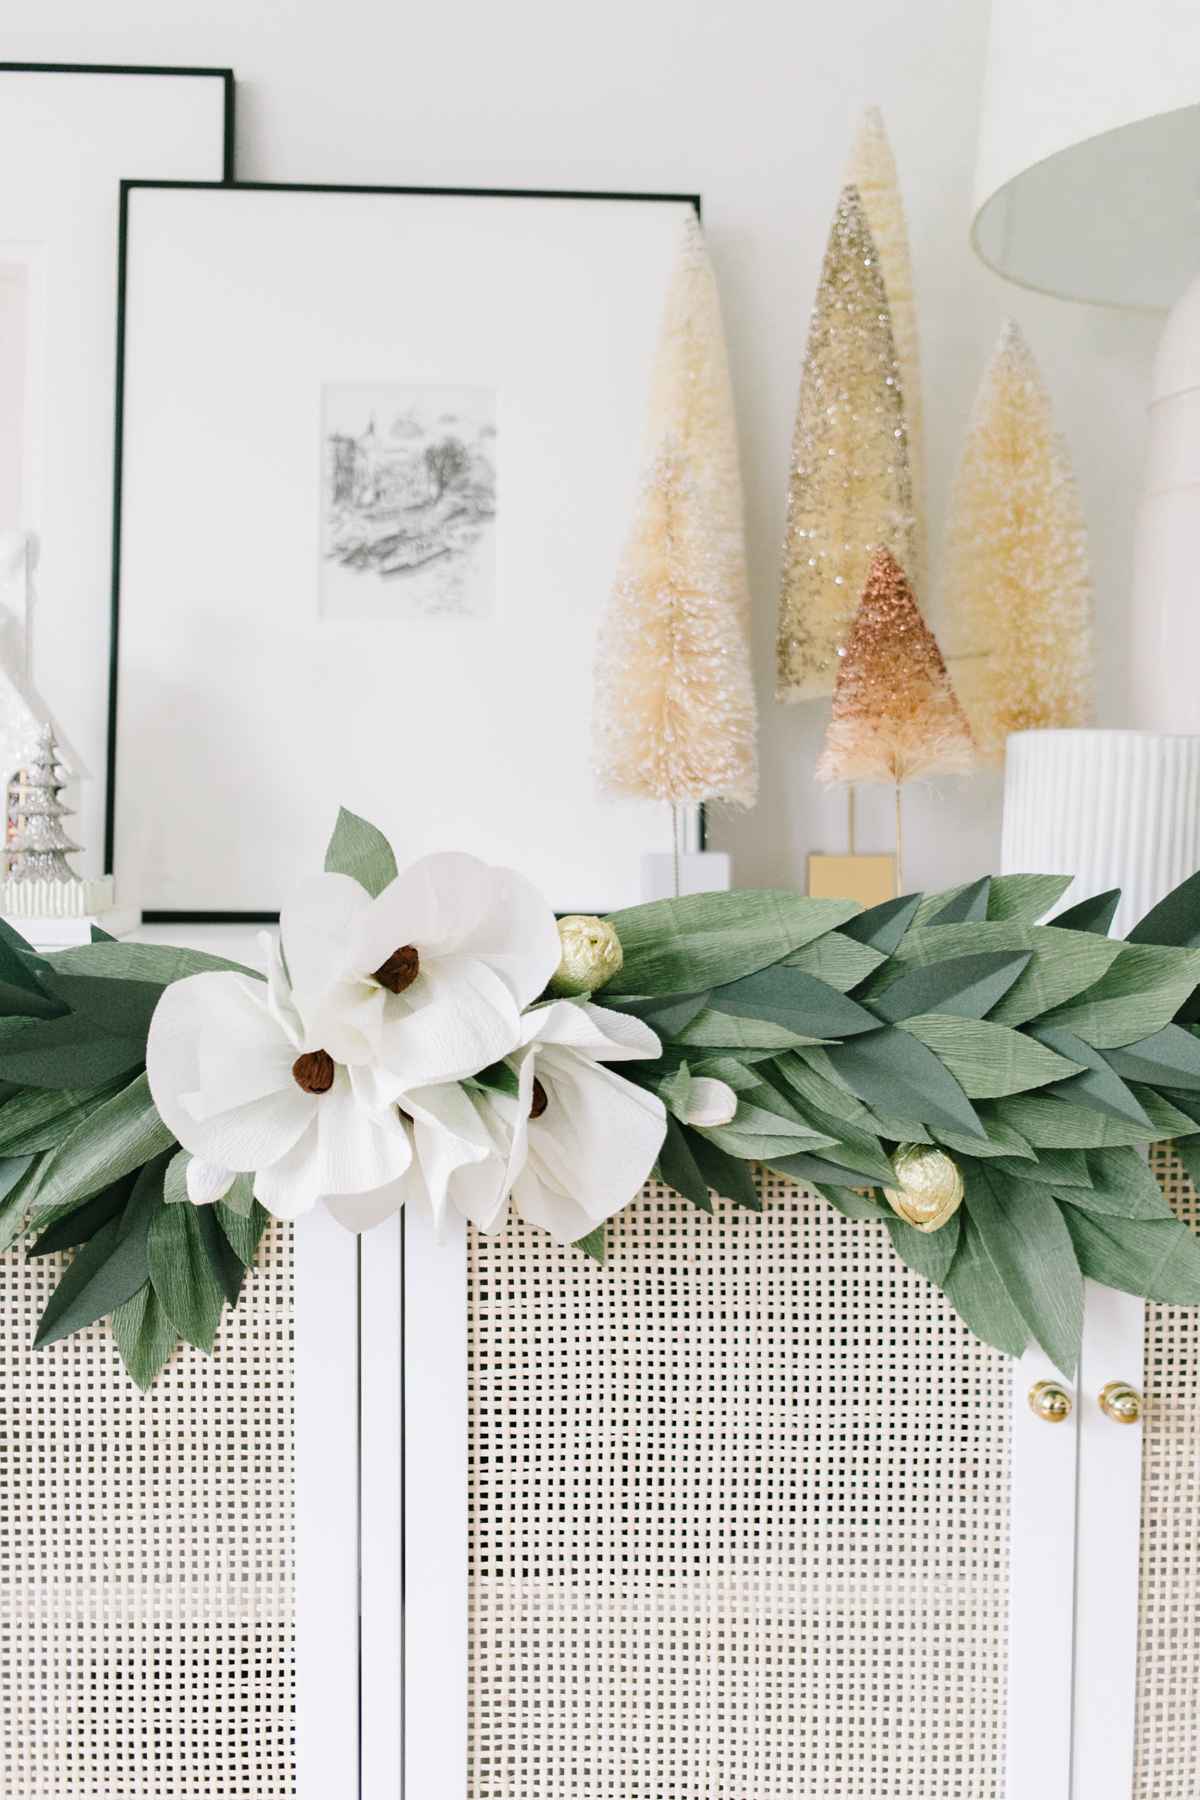
Today we are sharing this beautiful DIY garland made with crepe paper, magnolia flowers, and leaves. Since we are in the bungalow, we have a couple decorating obstacles. We don’t have a mantel, instead we have a beautiful sideboard that is a perfect piece of furniture to adorn with this beautiful garland and hang our stockings. As I do with most of my Christmas decor, I always reach for Command™ Brand products to make all my holiday decorating dreams come true. They’re strong, reliable, and I never feel nervous about using them on all kinds of surfaces. You can dream up whatever your heart desires and use their products to bring your look to life throughout your home. The possibilities are endless!
This DIY is relatively simple. Cutting the leaves can take some time, but it’s the perfect activity to do while you cozy up and watch a Christmas movie! While I love having live greenery in my home, I also like the idea of making this paper garland that can be saved and repurposed for years to come. Using crepe paper for décor, such as flowers and garlands, is a huge trend right now. Give it a try. I promise you’ll love the results!


 Supplies
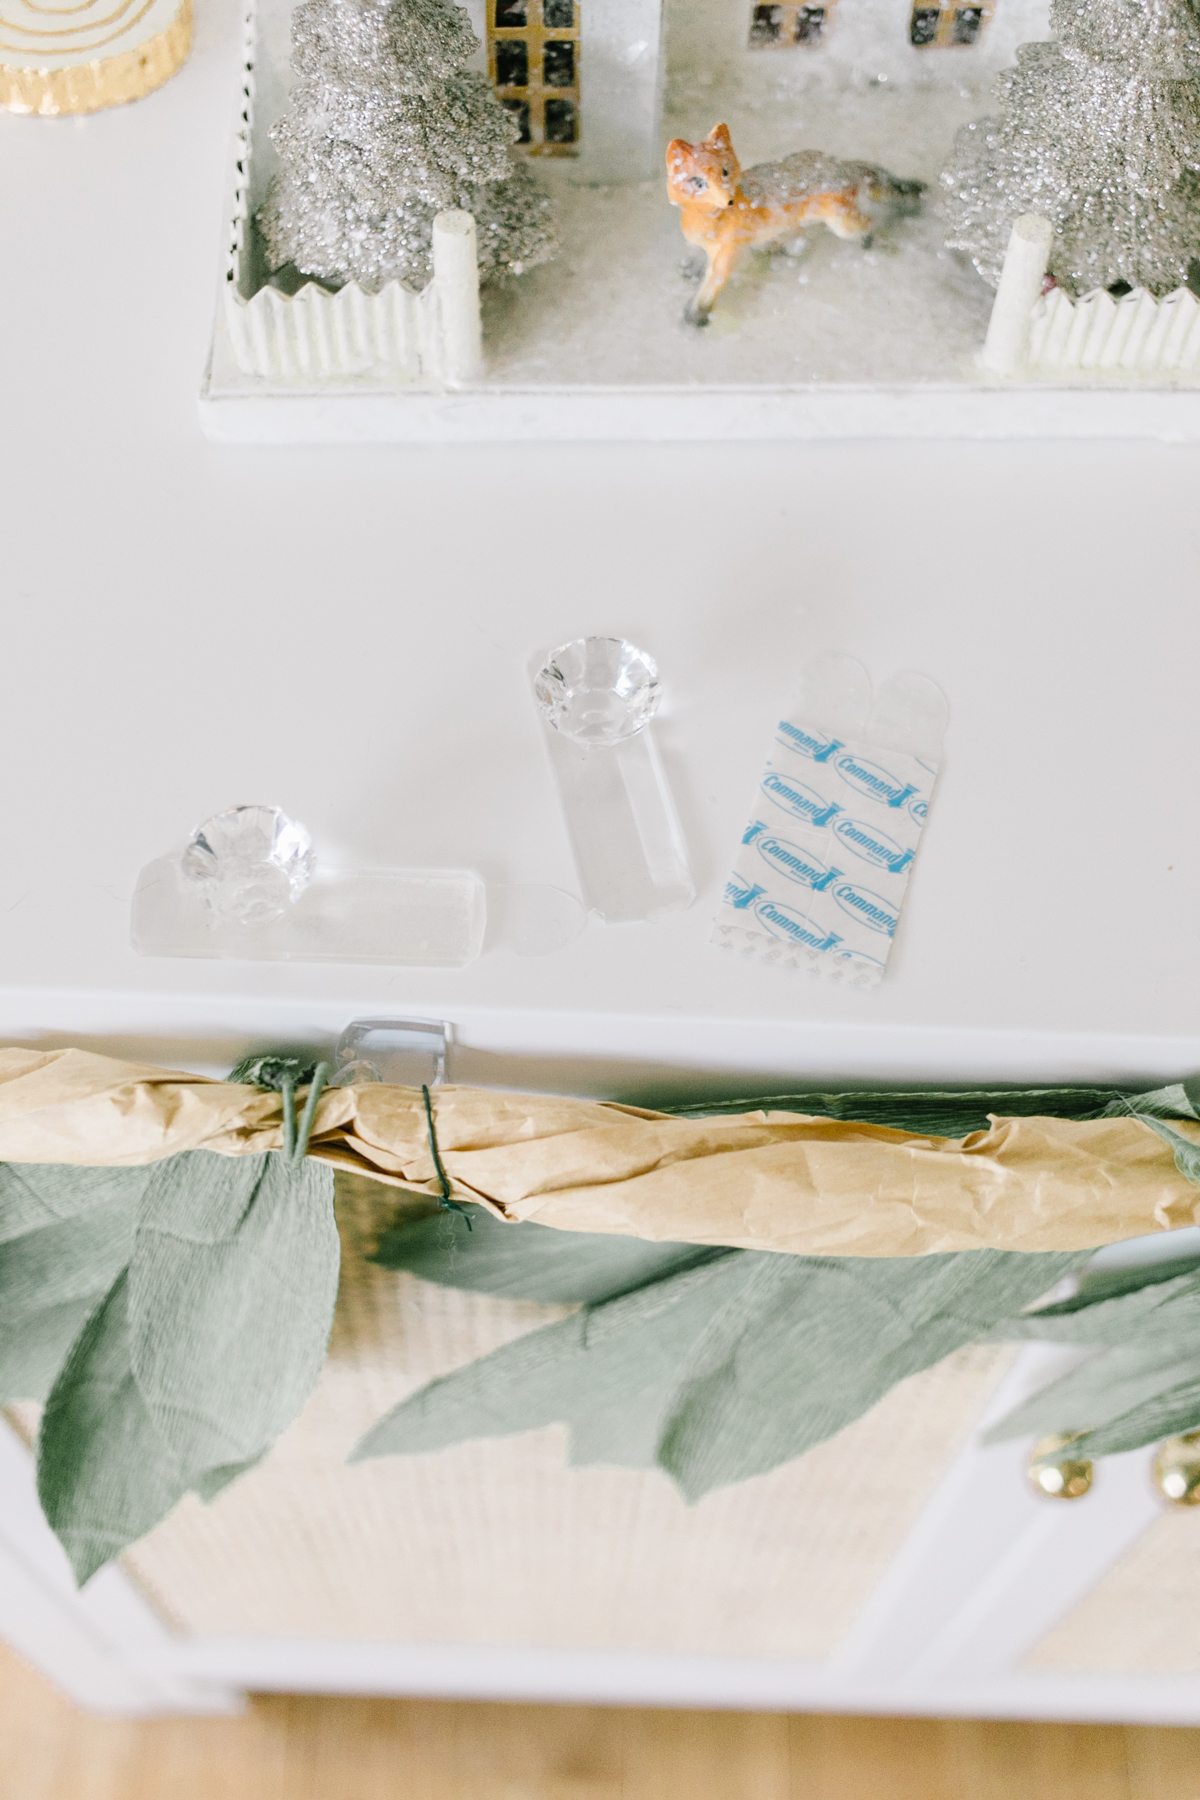
Command™ Clear Mini HooksCommand™ Clear Medium Hooks
Command™ Medium Crystal Hooks
Dark green construction paper
Light green crepe paper 180g
Cream crepe paper 180g
Brown crepe paper 180g
Green fabric-covered floral wire
Floral wire
Green floral tape
Glue gun and glue
Utility knife
Scissors
Templates
Kraft paper
Work surface
Stockings
Steps
For the branches
- Cut out 55 to 65 large leaves out of the green crepe paper.
- Cut out 30 to 40 medium leaves out of the green crepe paper.
- Cut out 20 large leaves from the green construction paper.
- Cut out 20 medium leaves from the green construction paper.
- Cut out 50 small leaves from the green construction paper.
Tip: To add dimension to some construction paper leaves, gently score them down the middle of the leaf (do not cut) from end to end and then fold.
To make a branch, cut the fabric-covered floral wire in half.
To create a mixed branch, you will need 2 large crepe leaves, 1 large construction paper leaf, 2 medium construction paper leaves, and 2 small crepe paper leaves. Start halfway down the floral wire and adhere one of the large crepe paper leaves to the center. Alternate between the leaf styles to create the branch to your liking. You can feel free to add more or less, have fun and make your own design.
To create one of the more delicate branches, simply glue 5-9 small construction paper leaves to one piece of fabric-wrapped floral wire. I started at the top and worked my way down.
For the garland
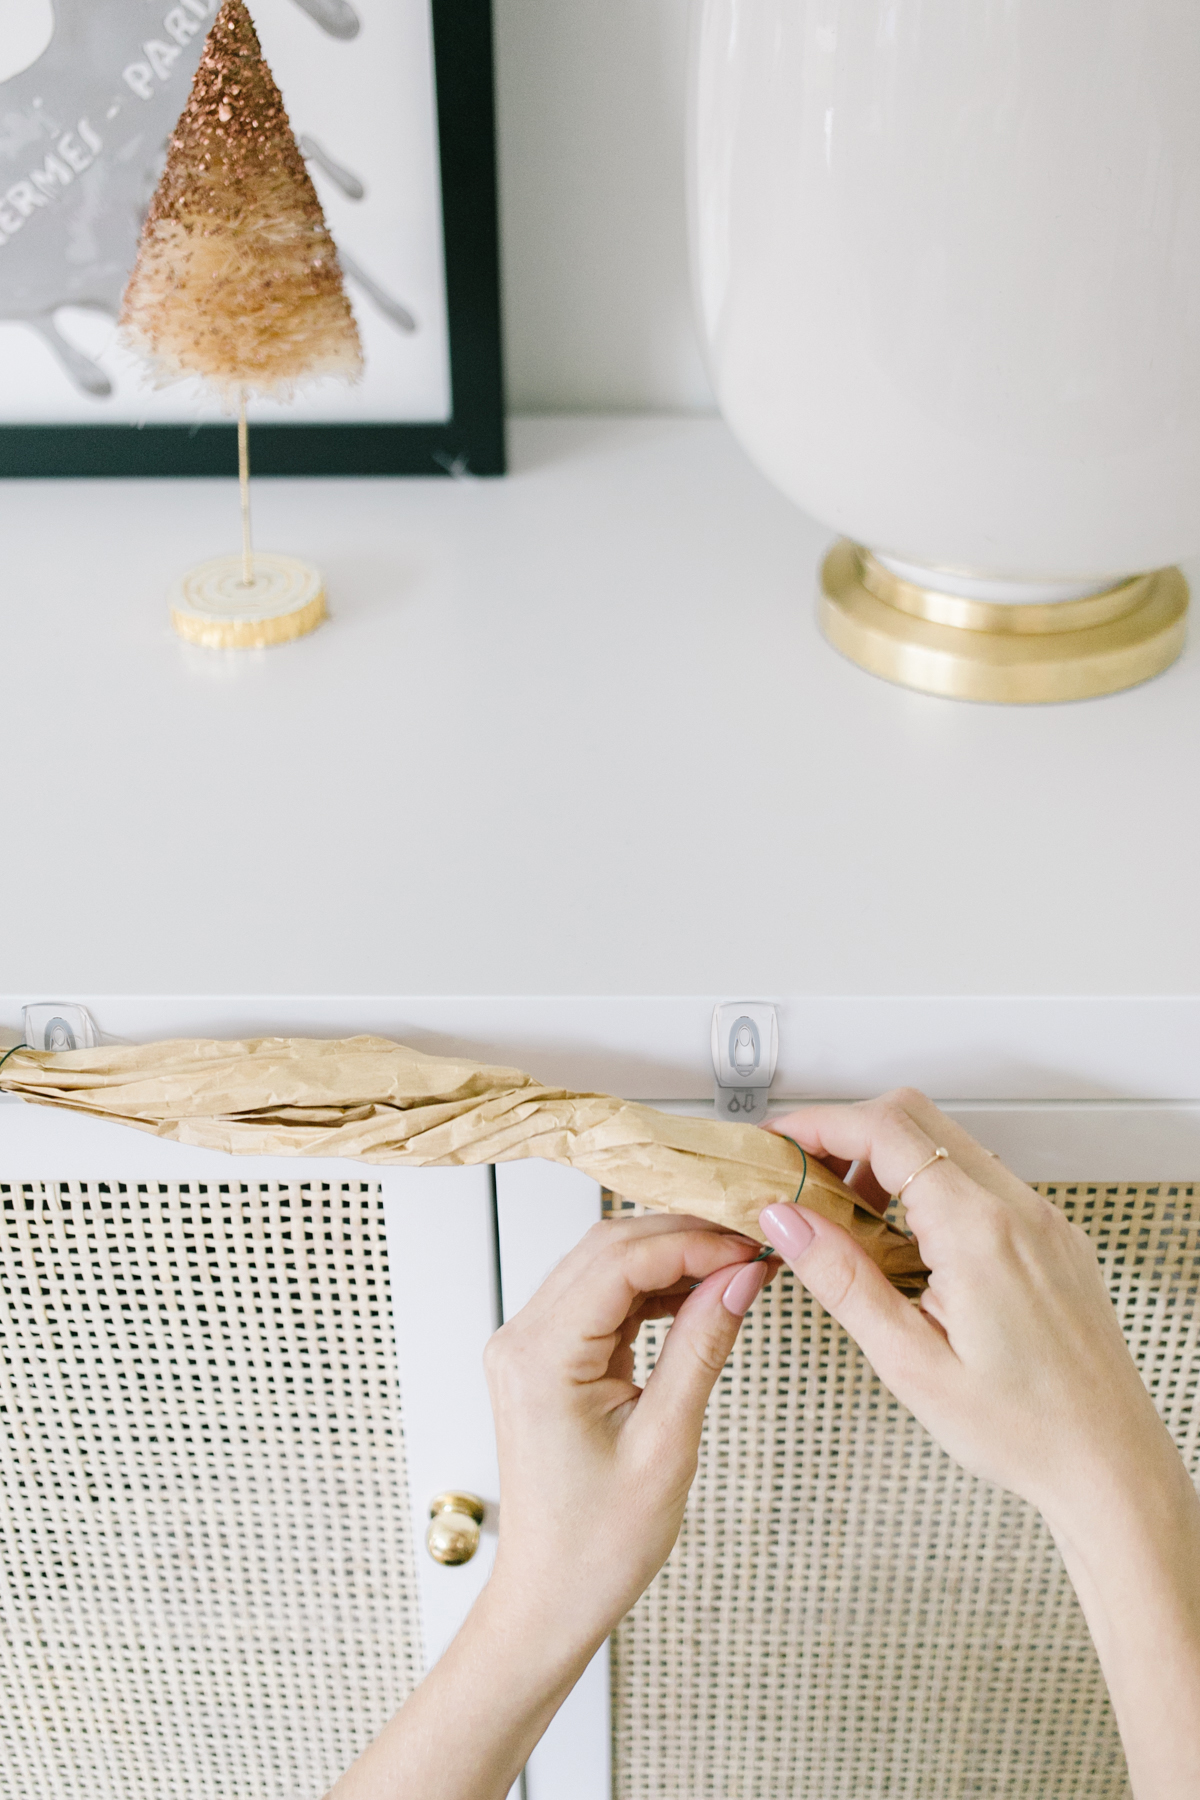
Cut a long piece of kraft paper about 1 foot deep and 2 inches longer than mantel or sideboard where you intend to hang the garland. Twist the kraft paper tightly to create the base of the garland. You can wrap it floral wire around it to make it tighter and also this will be a place to anchor the branches to.
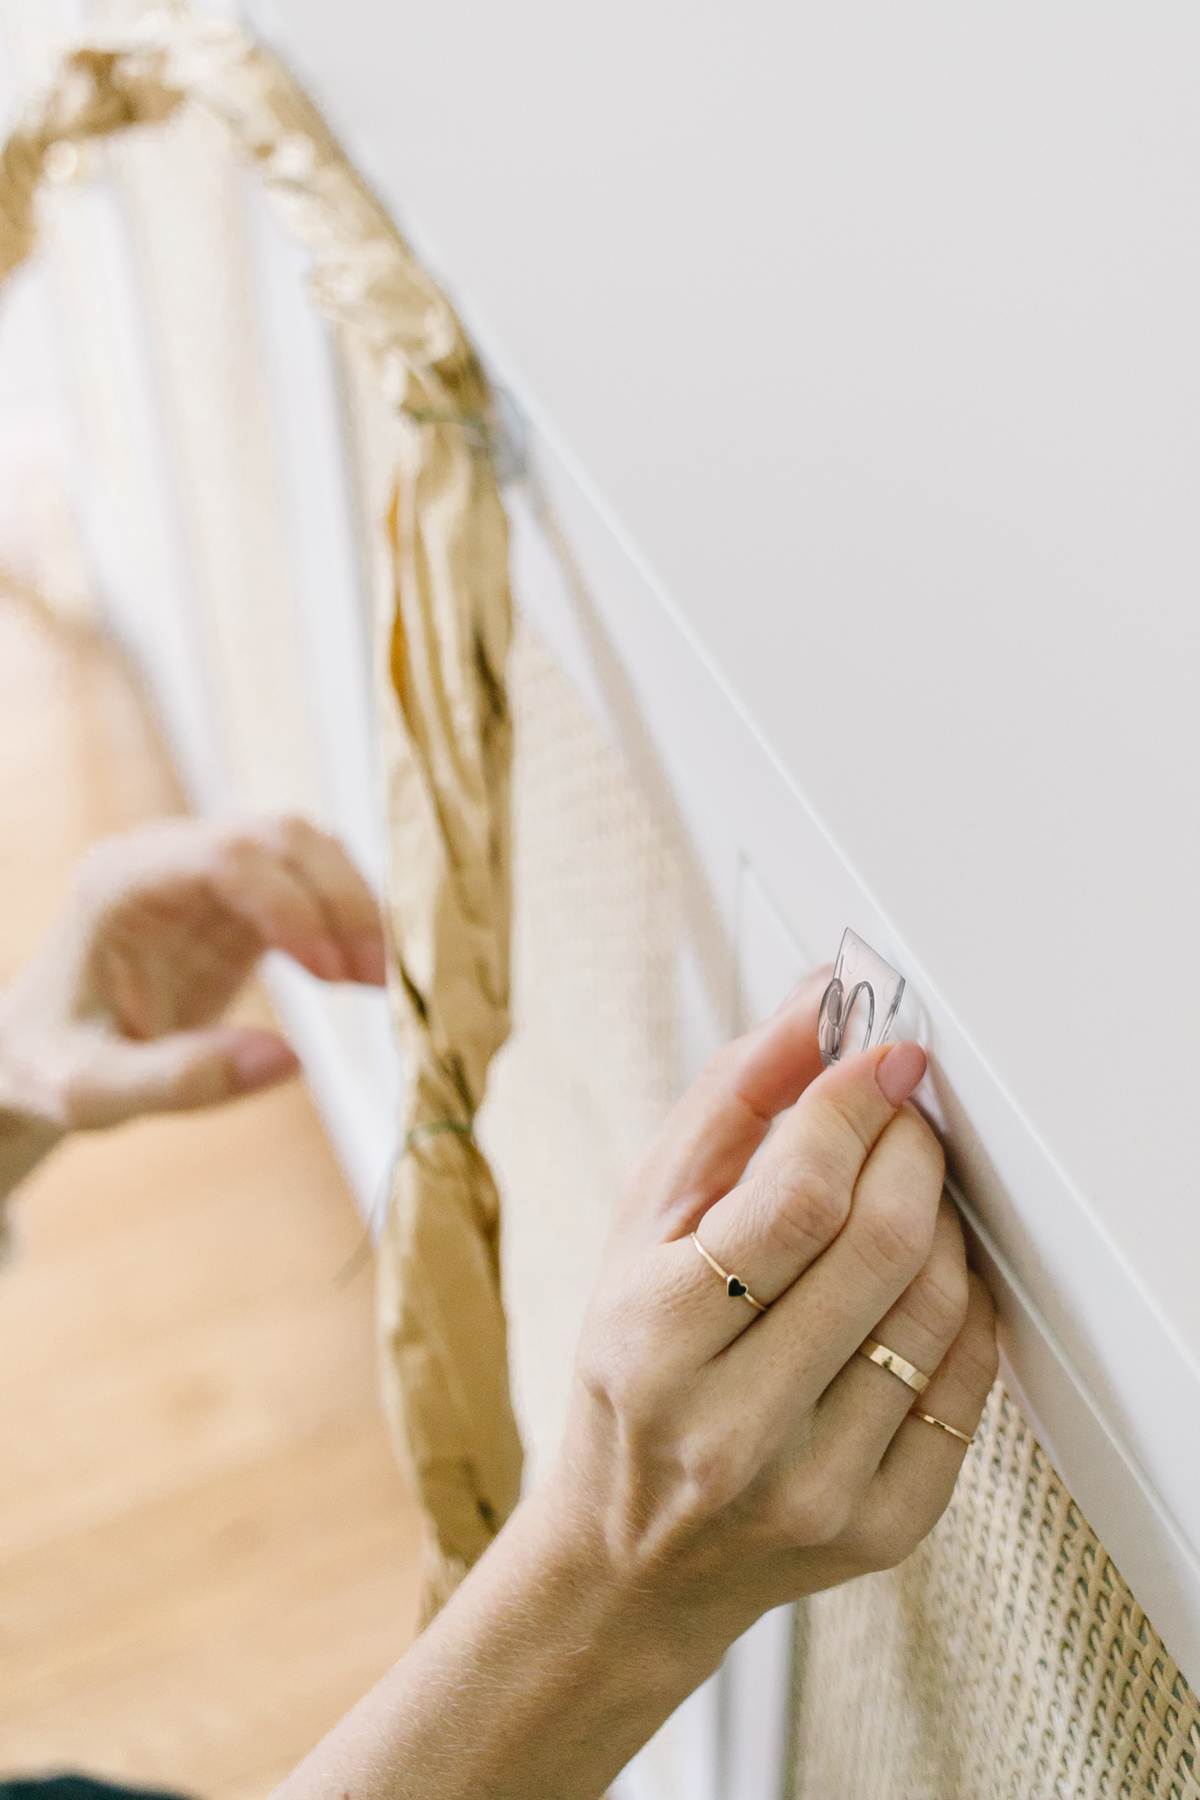
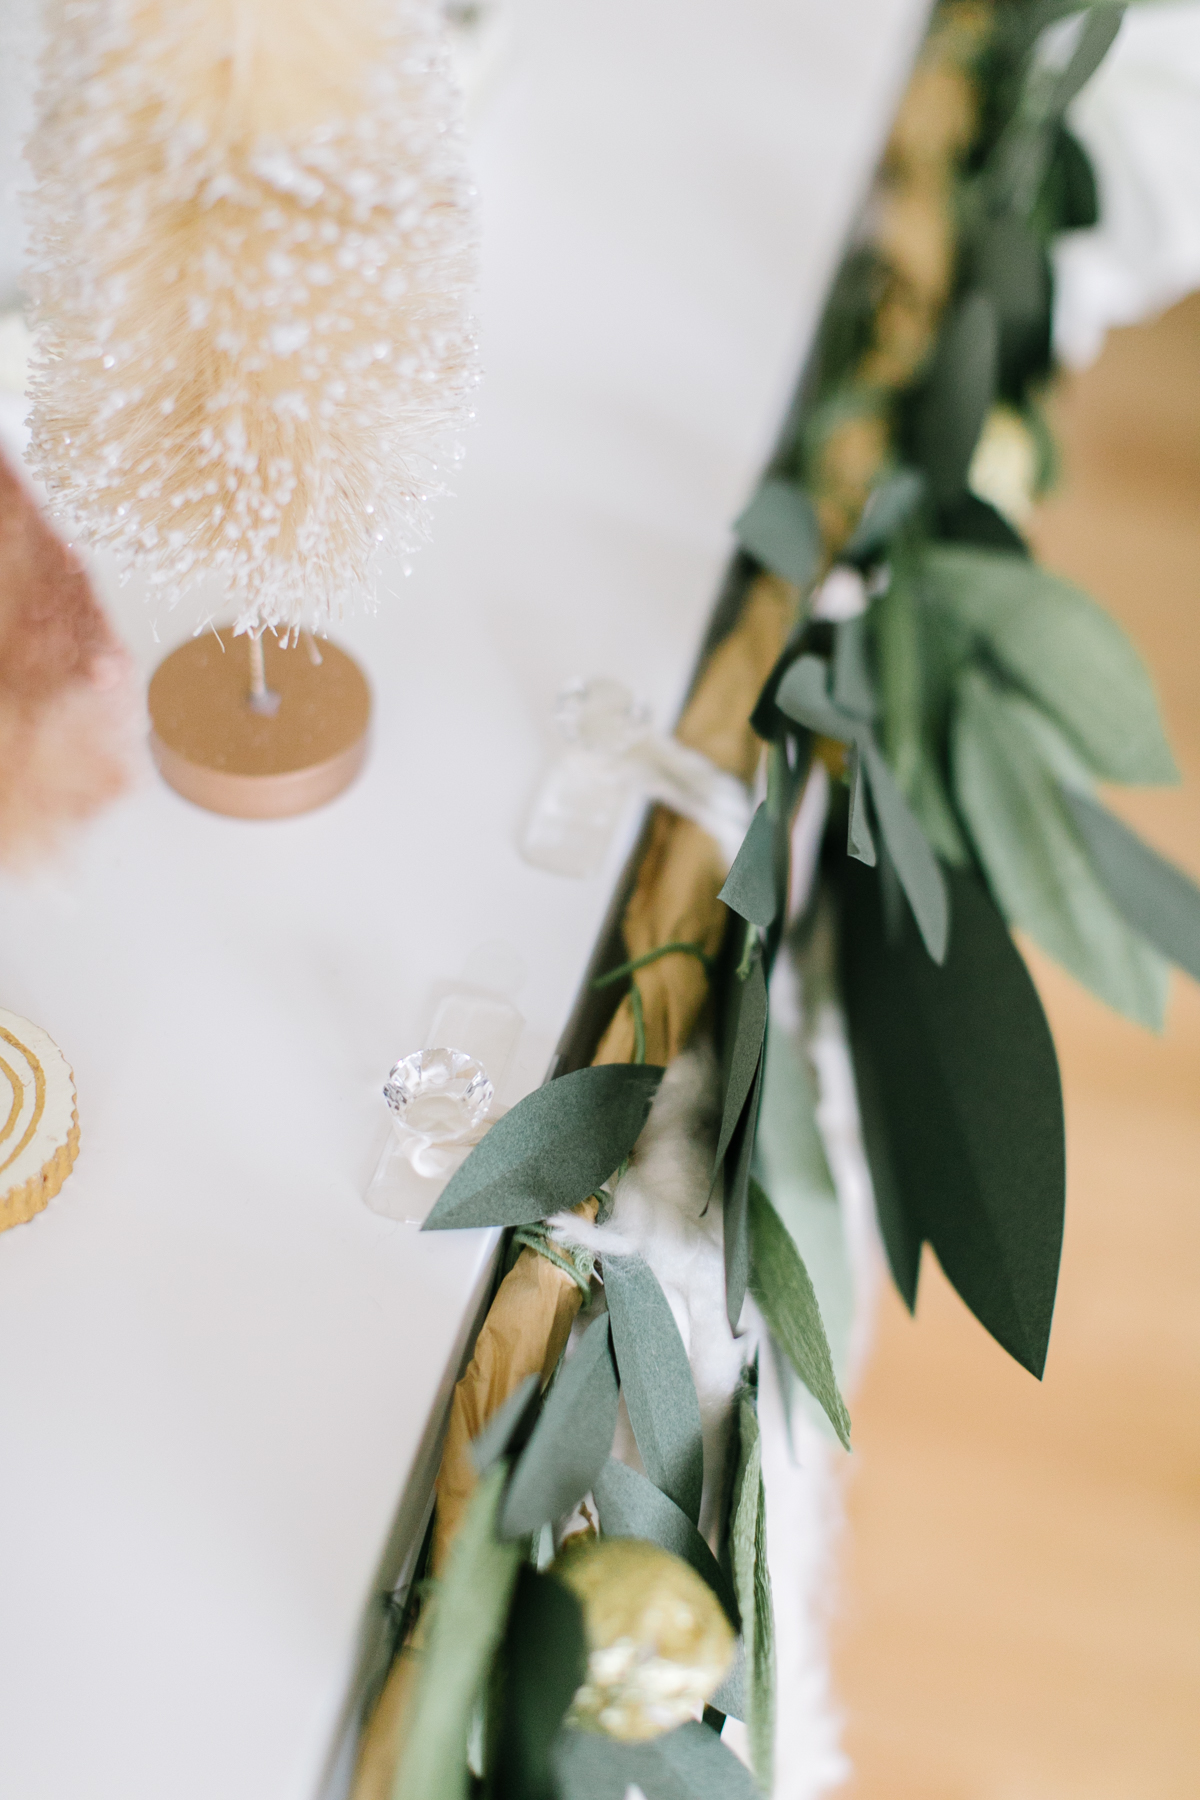
Place the Command™ Clear Mini Hooks 3 inches along the top section of the area where you’ll hang the garland.
Attach the garland base to the Command™ Clear Mini Hooks by wrapping a small piece of wire around the base and then attaching it to the hook.
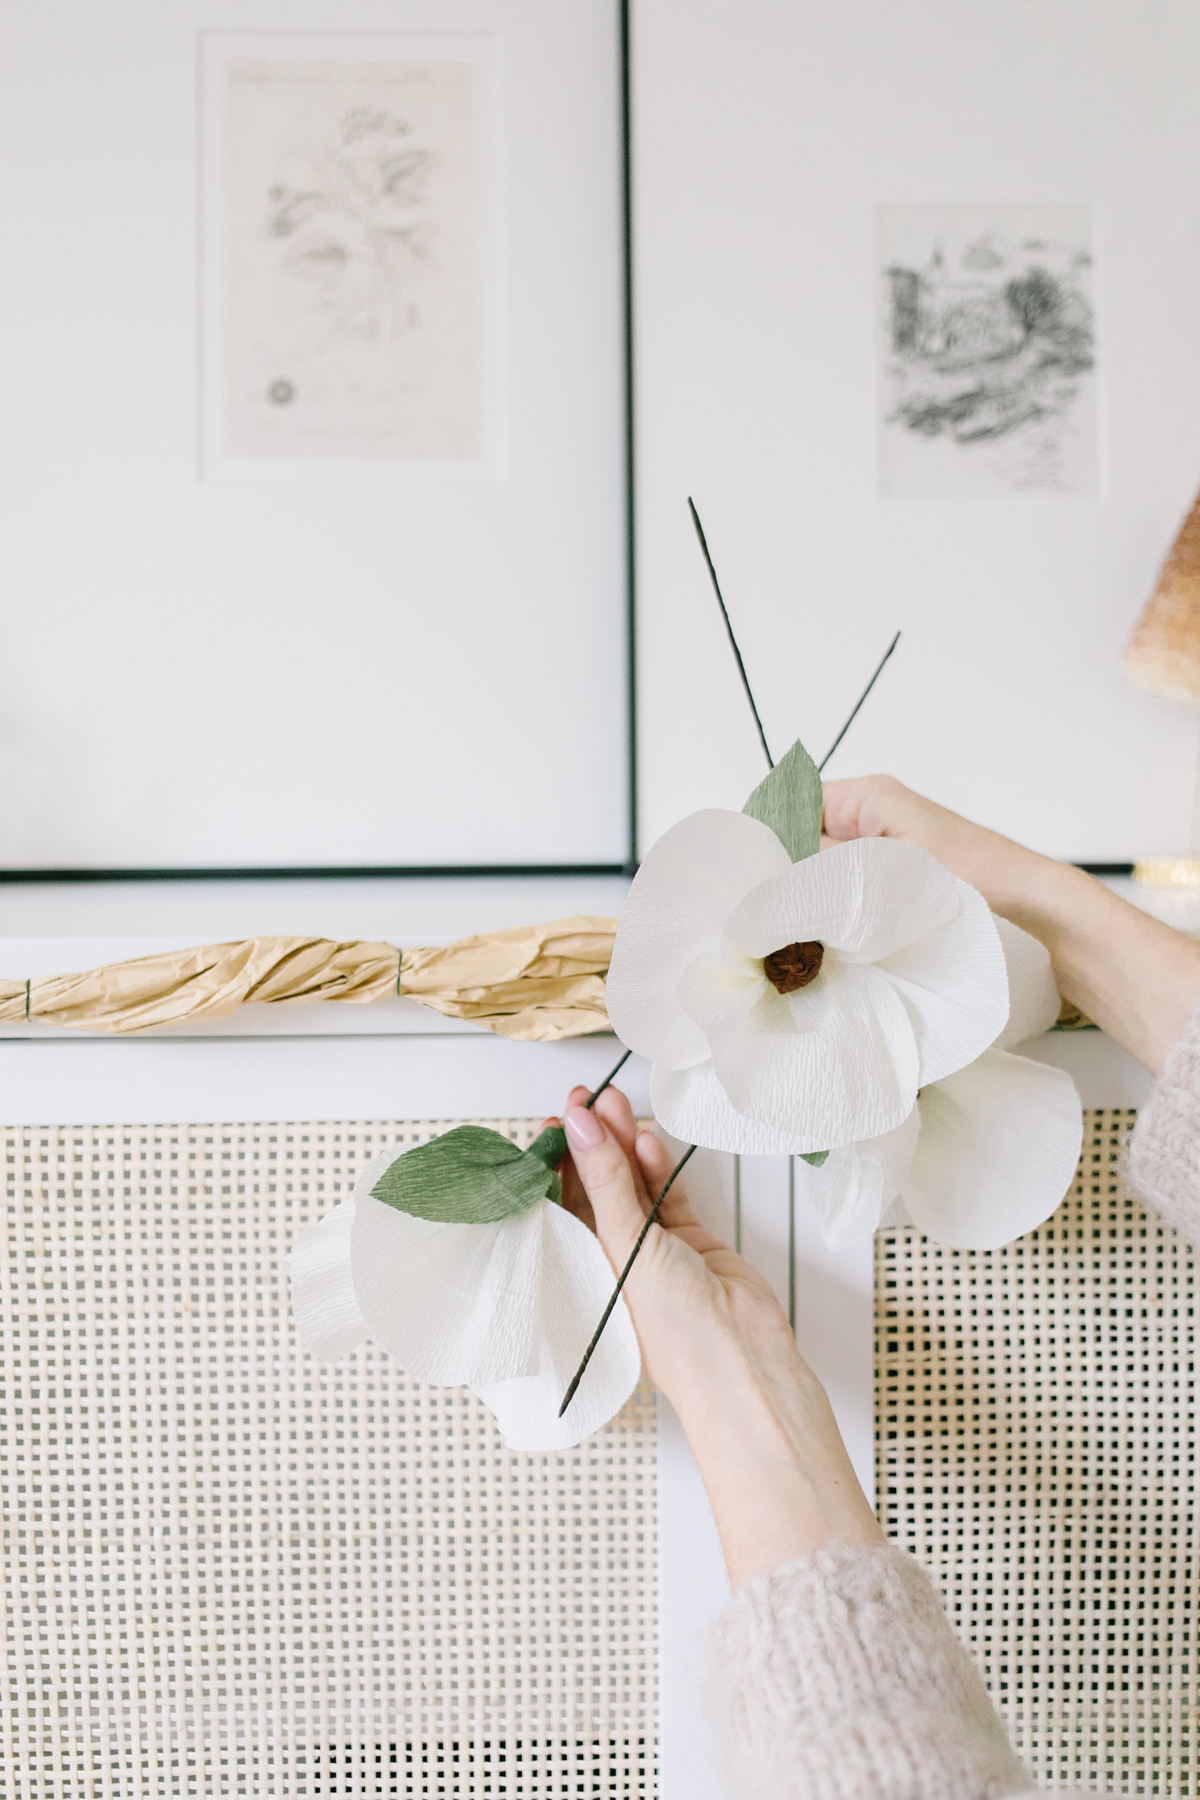
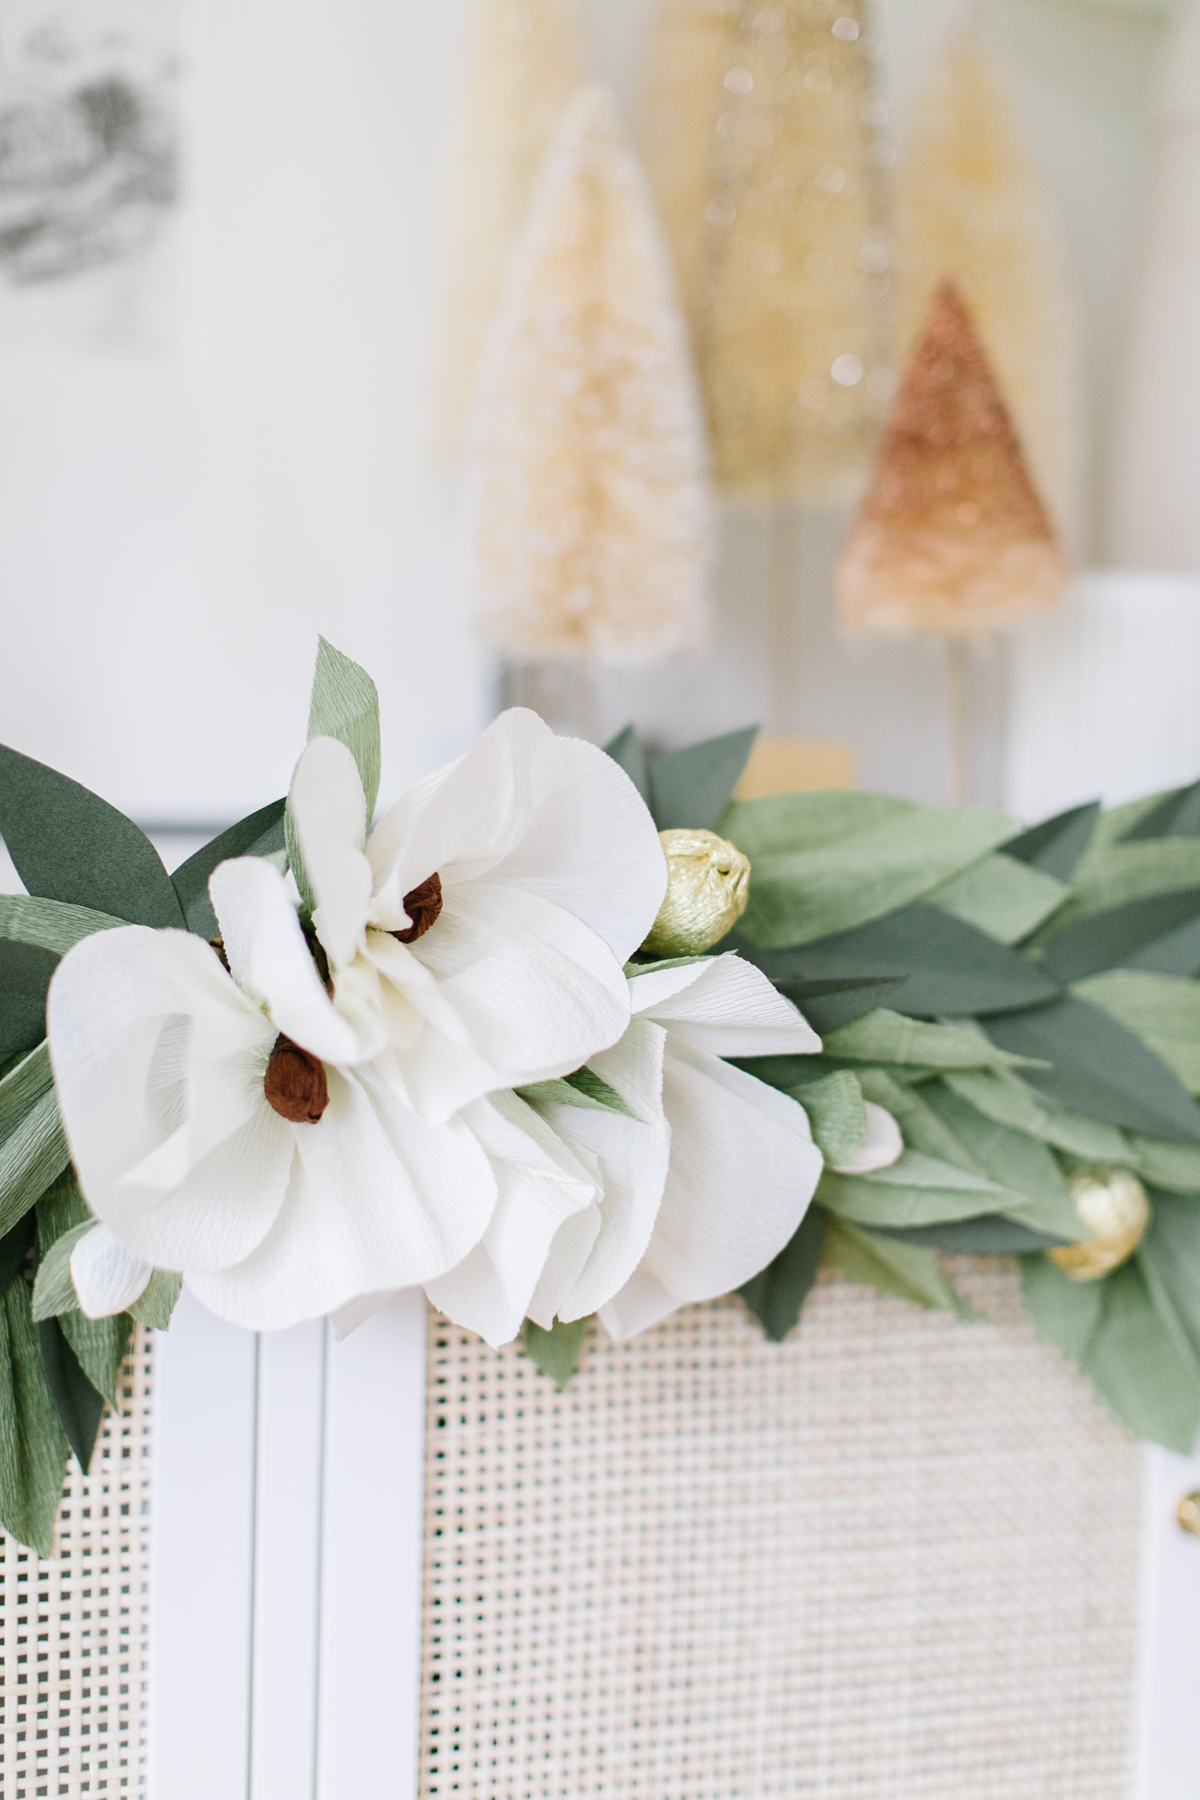
Start layering in your branches. We began by placing the large magnolias in the center to “ground” the garland. Work on either side of the garland, attaching completed branches to the base with the floral wire. Layer them, making sure some face upward and others face downward.
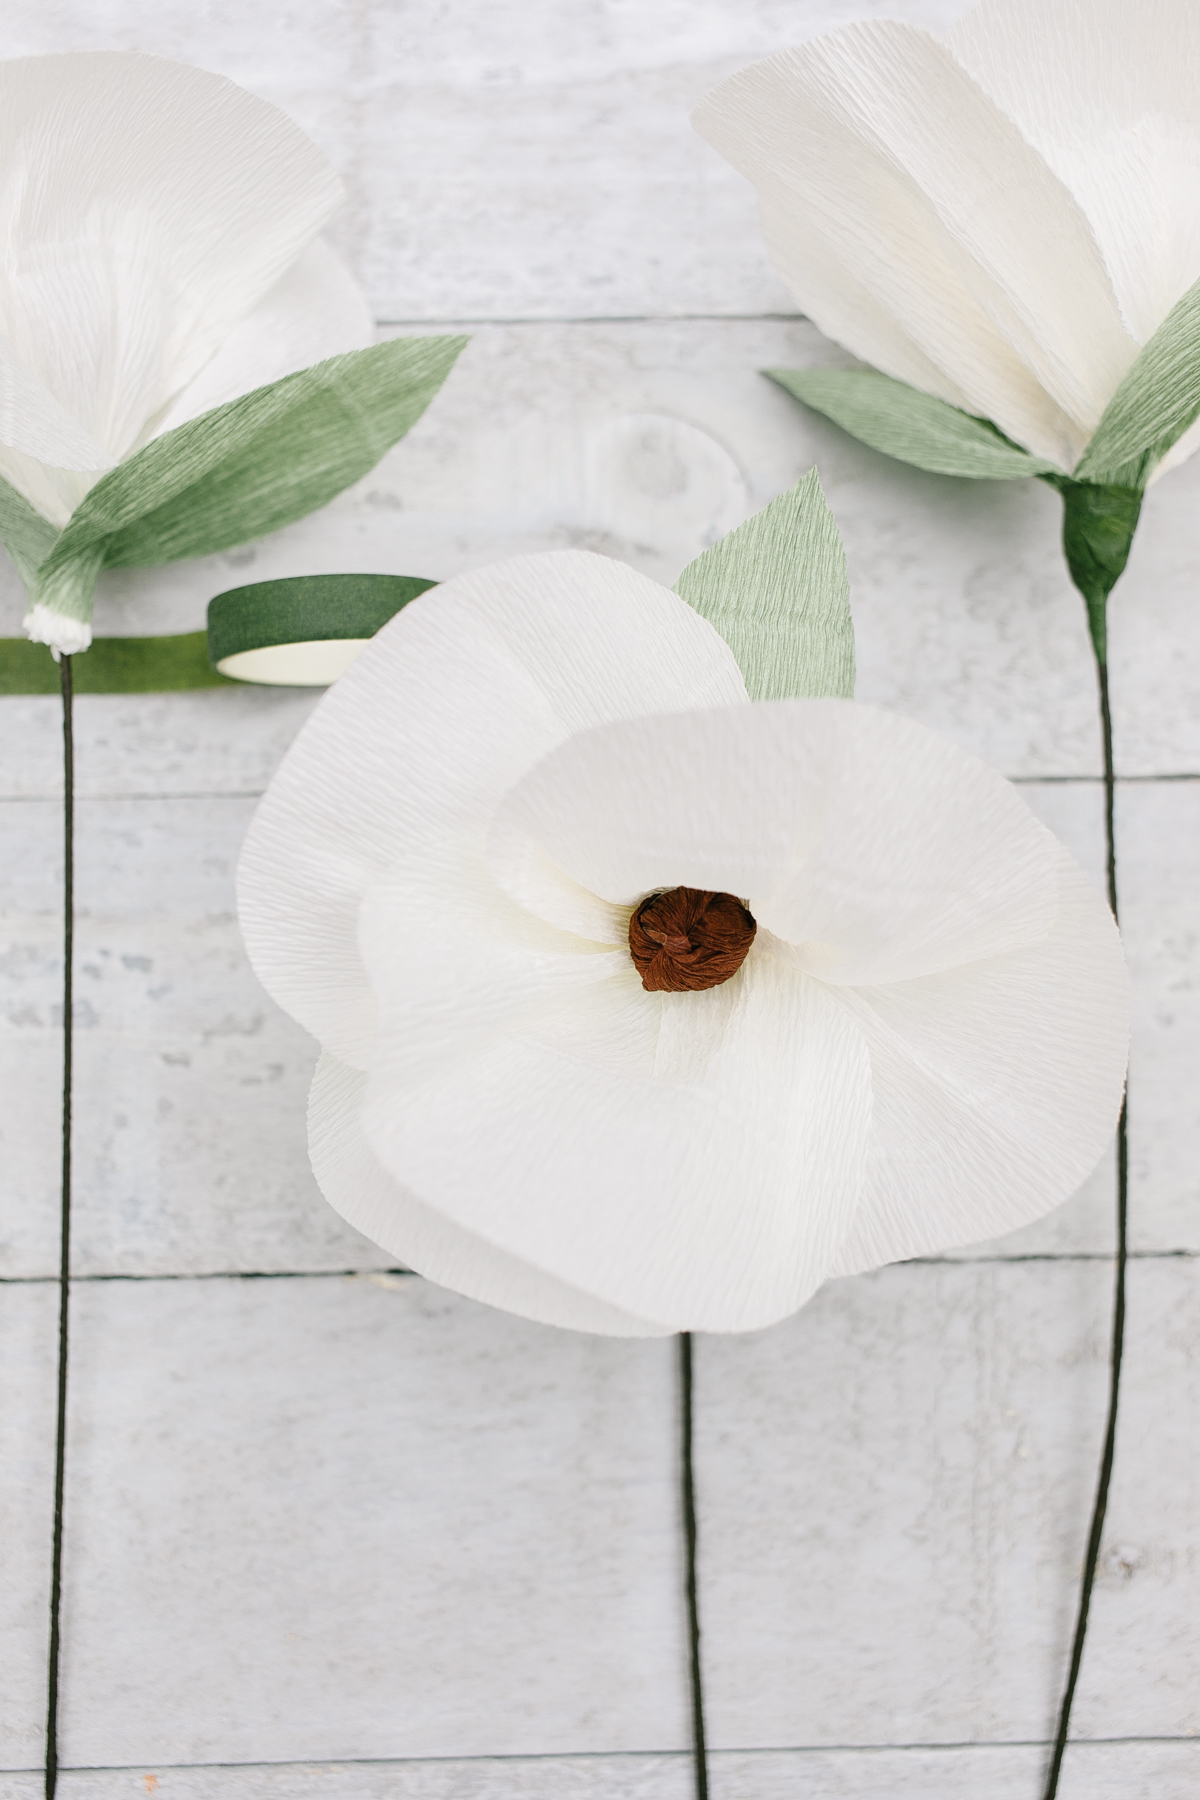
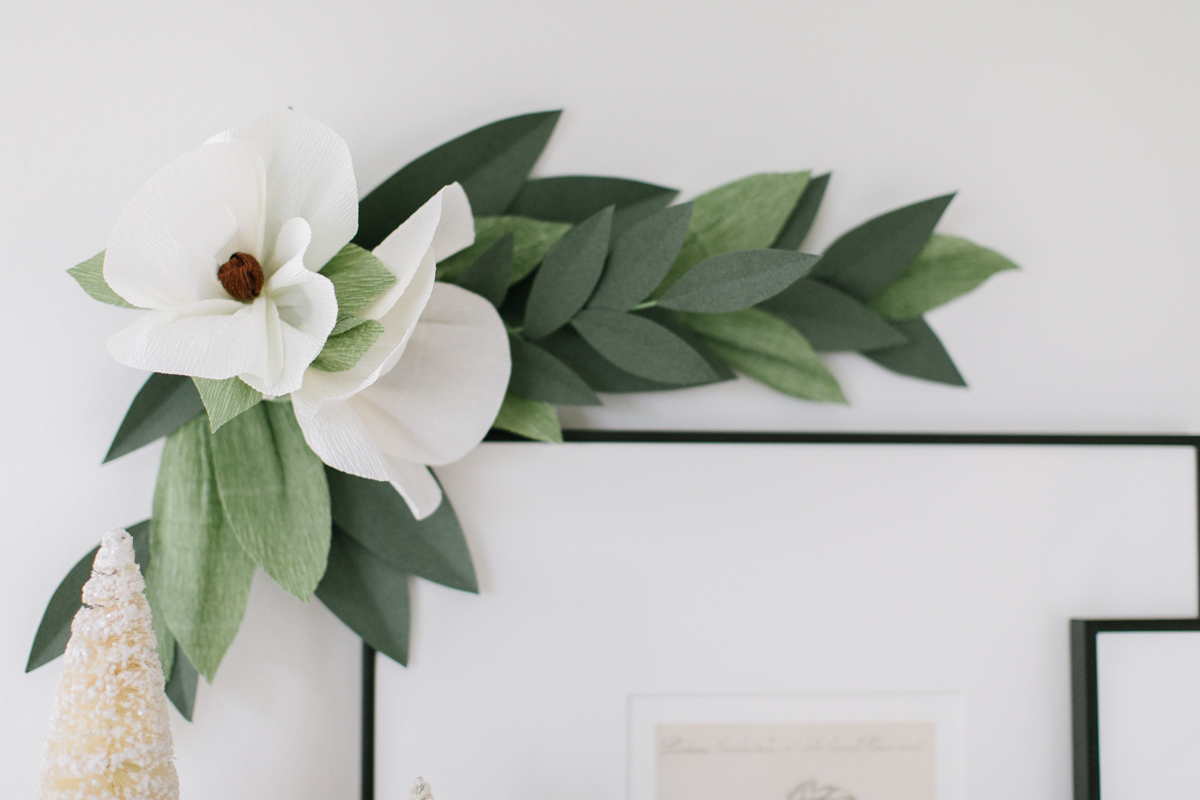
For the magnolias
- Cut out 4 magnolia petals
- Cut out 2 to 4 medium green leaves
- Wrap the floral wire with brown floral tape.
- Bend the top of the wire around a crumpled ball of crepe paper to create the center of the flower. Wrap with the floral tape to secure.
Use the template to cut out a strip of brown crepe paper. Twist the paper at the center and wrap around the top of the wire with the crumpled ball. Wrap the ends around the floral wire and secure with floral tape.
Cup the flower petals and stretch them to give a realistic petal look. Twist the ends together.
Glue the base of the petal to the bud. Repeat with all four petals.
Cup the green leaves and stretch them out a little. Glue the base of the leaf to the base of the petals.
Wrap the flower base with green floral tape. If you find the tape is not sticking to the crepe paper, add a small dab of glue.
Bend the petals and leaves back to open up the flower.
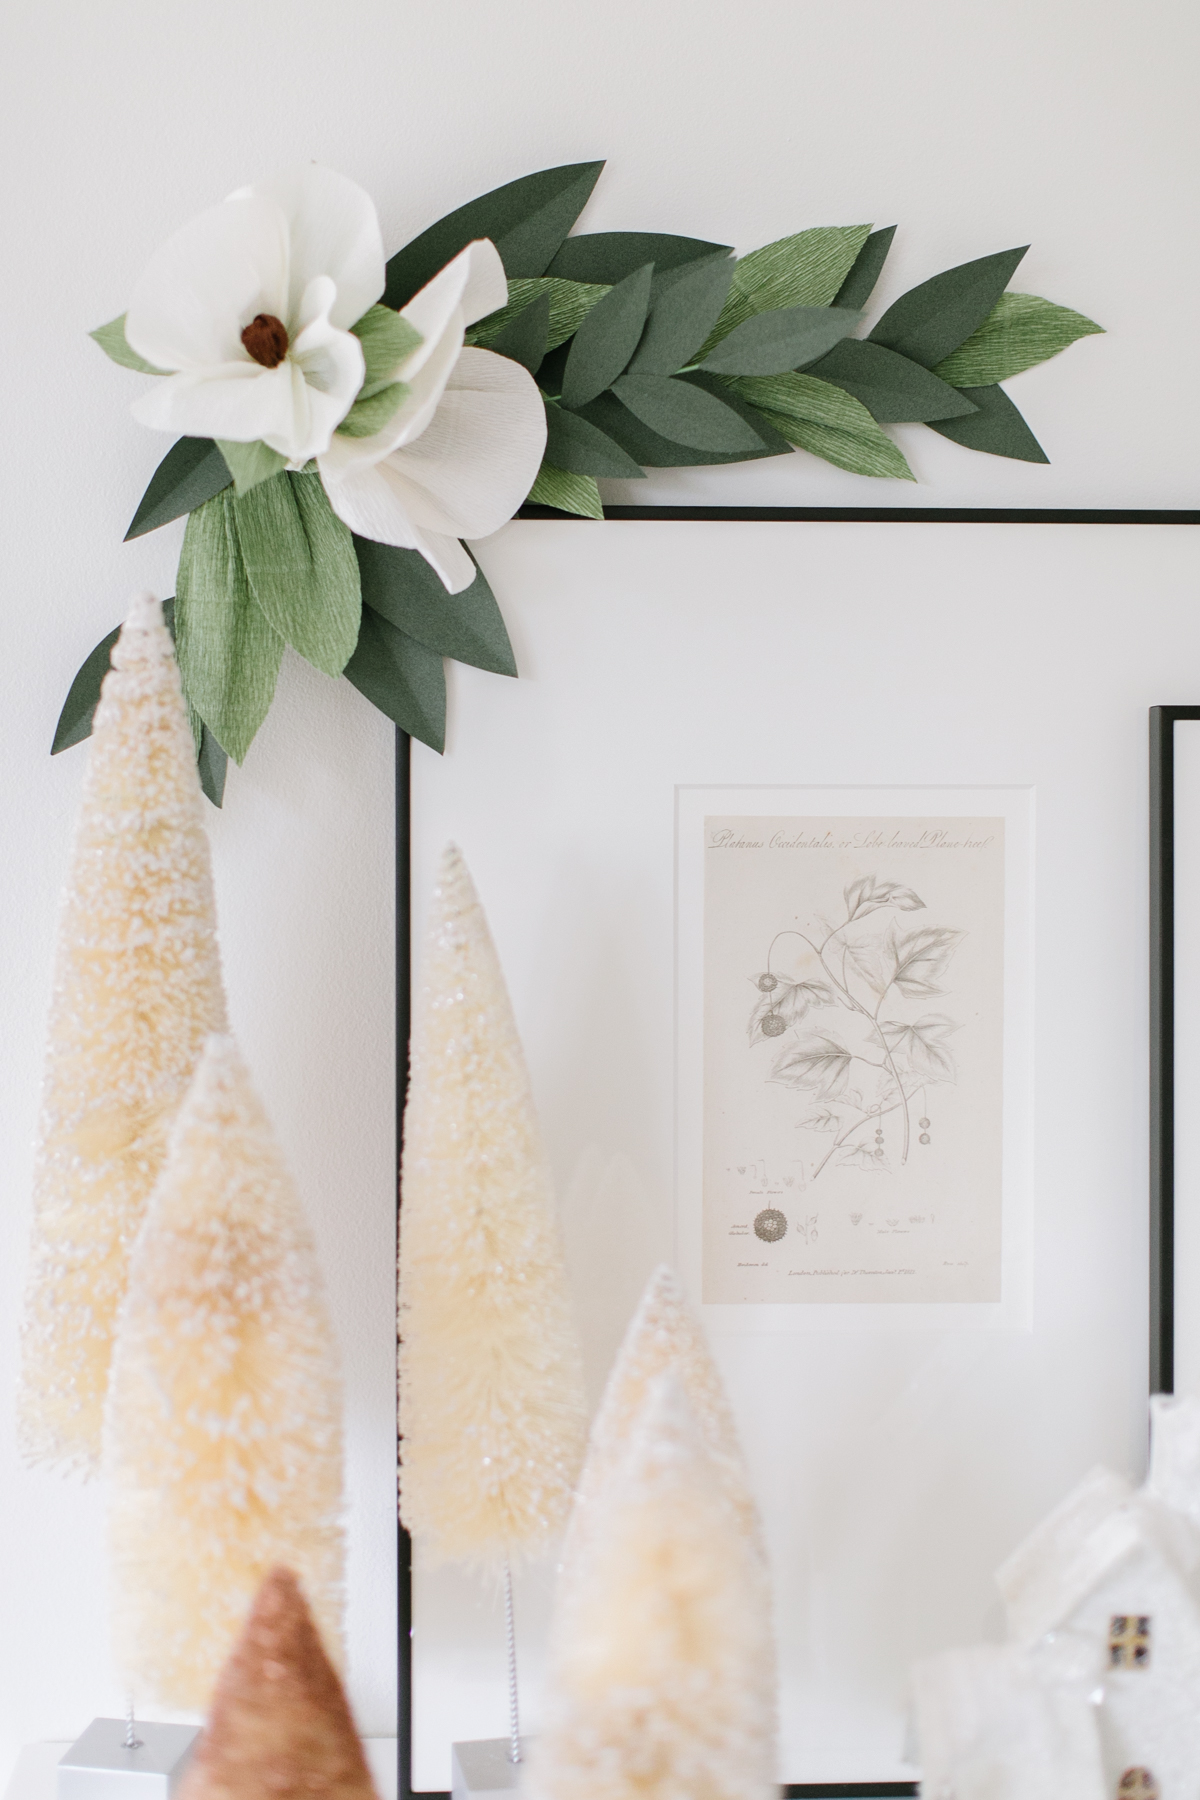
If you already have a faux garland you would like to use (or maybe some live greenery), you could use it as the base for the crepe paper magnolia flowers. Attach Command™ Clear Mini Hooks to your mantel or sideboard (or maybe even an archway!) Wrap wire around sections of the garland and attach it to the Command™Clear Mini Hooks . It’s that simple! Hanging it from a Command™ Clear Mini Hook every 4 to 5 inches seems to do the trick. Use a couple extra hooks if your garland is heavy!
It’s so easy to hang your stocking using the Command™ Medium Crystal Hooks we simply attached them to the top of the sideboard and used those to hang the stocking, they are discrete and don’t take away from the garland which I like. We had some extra leaves left over and decided to make an extra couple of Magnolias to make this fun little accent garland that really finishes of the look. We were able to achieve the floating look by using the Command™ Clear Medium Hook, we simply attached them to the wall and then attached the accent garland with floral wire!
Download the garland template here!
Shop The Post


Wow, this looks amazing! Great job!
http://innapishtoy.com/
Thank you Inna!