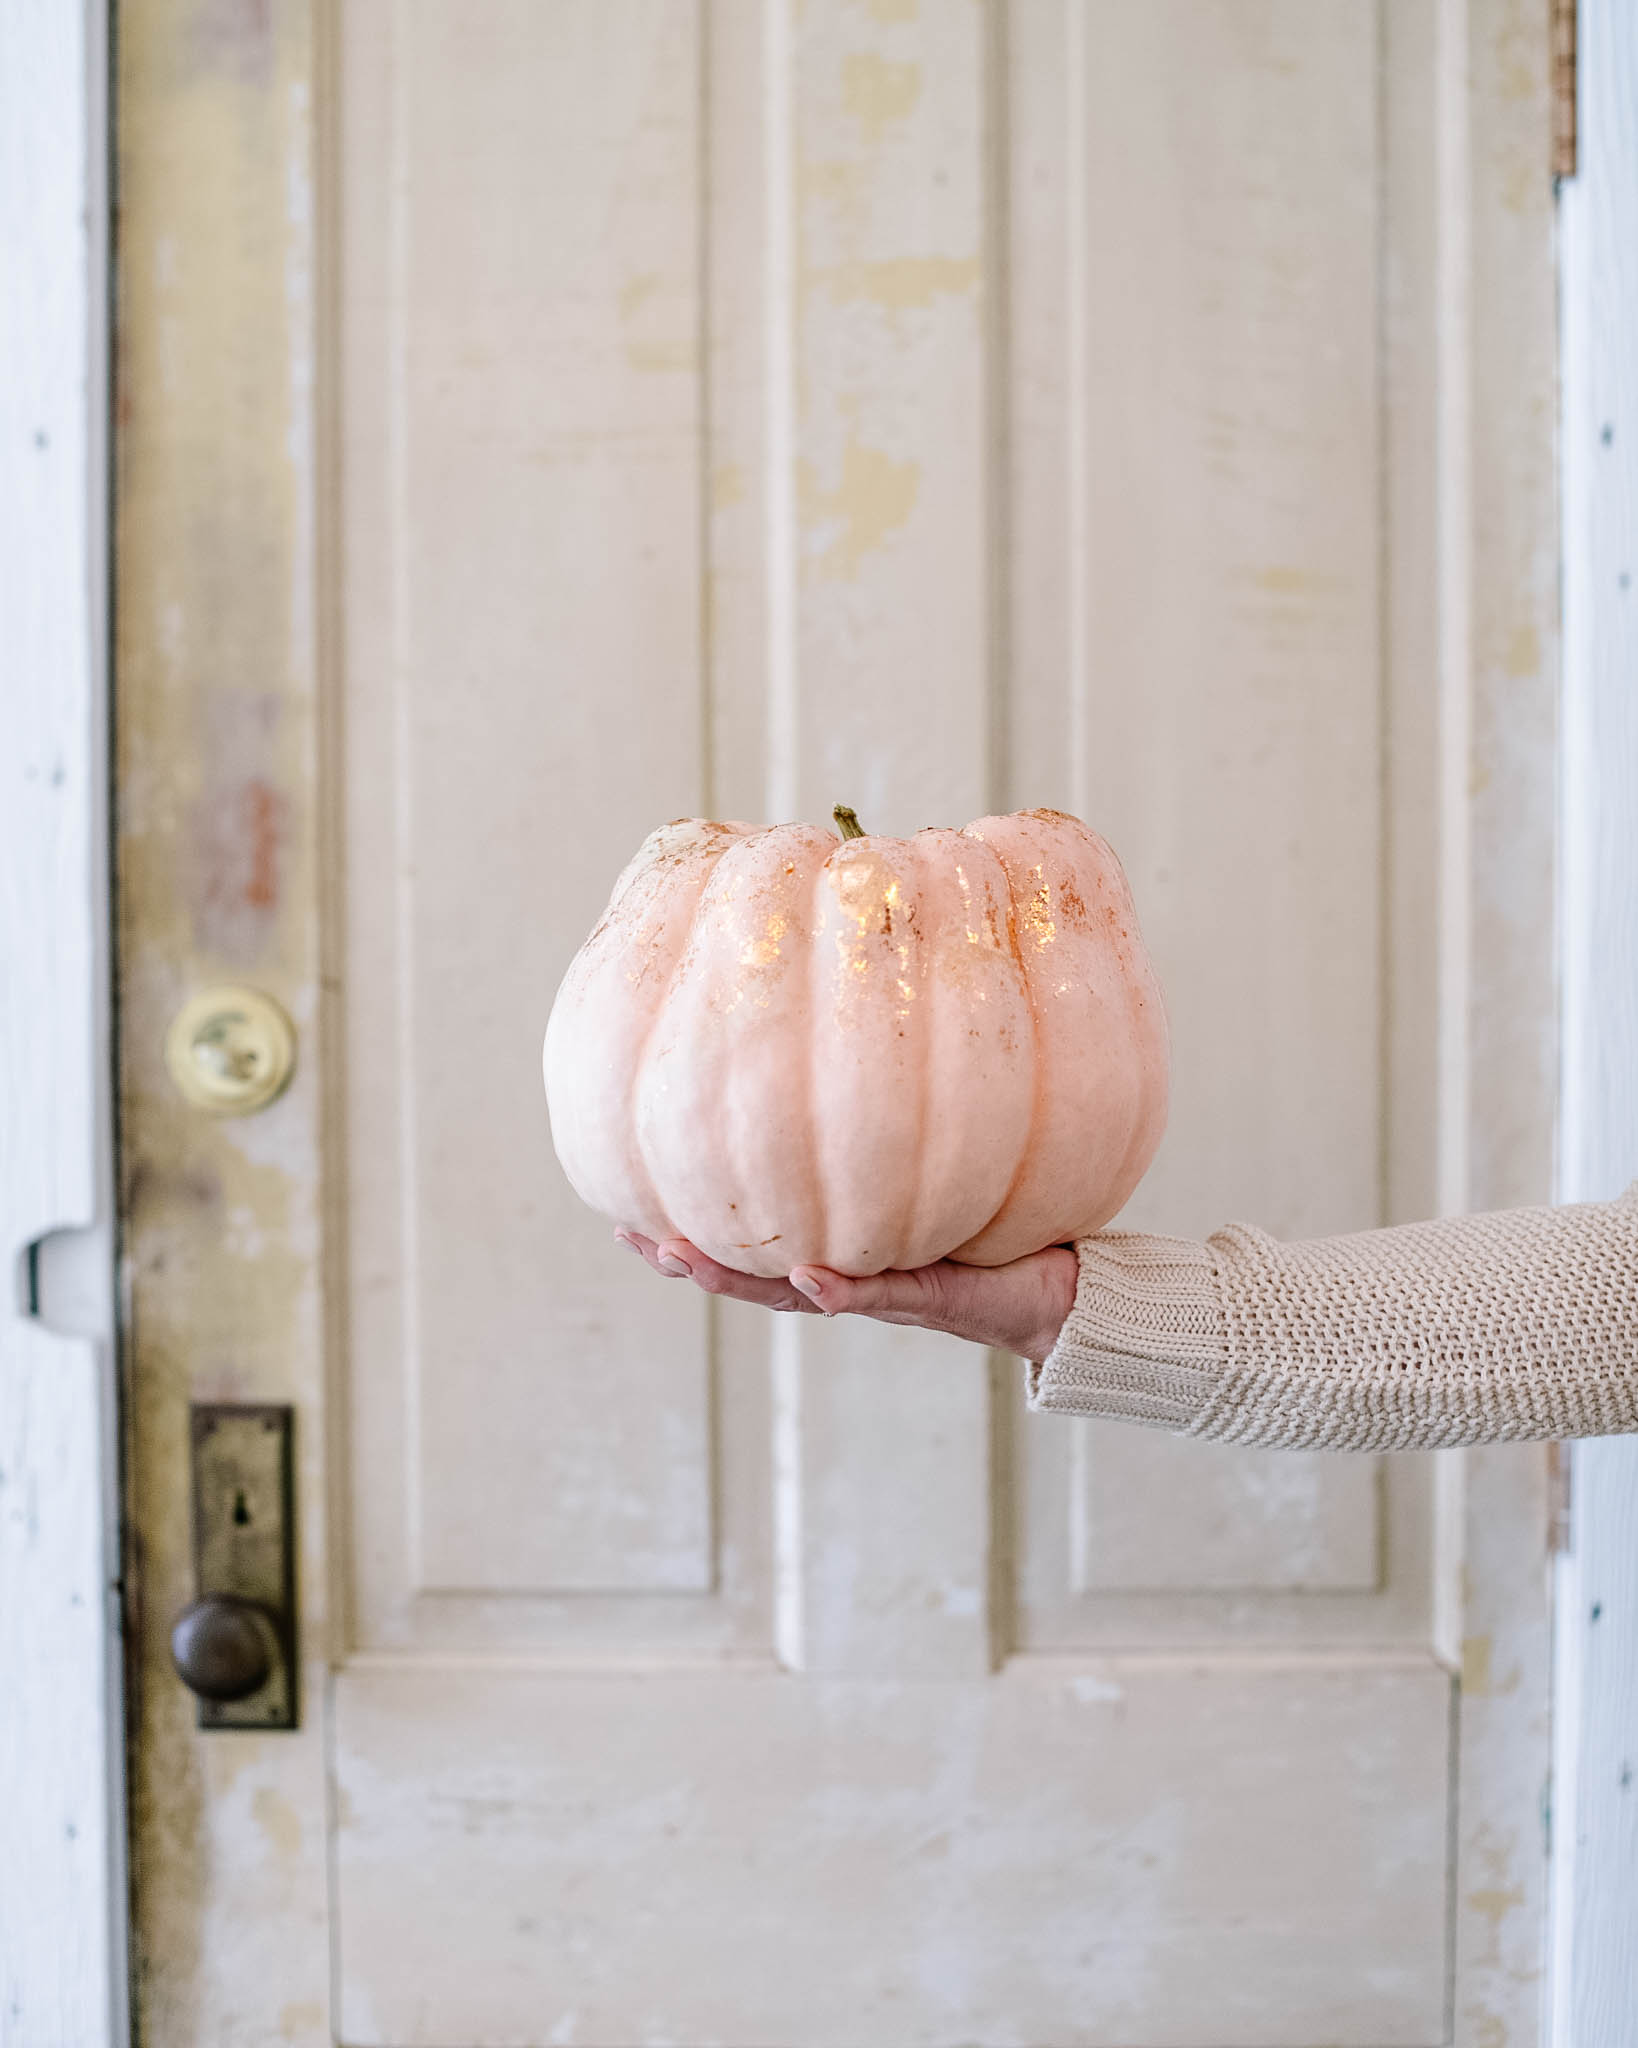
Metallic Foiled Pumpkins and Gourds

Now that it’s officially Fall I wanted to go back into my book, “Gather At Home” and flip the pages into the Fall section, sharing some of my favourite DIY’s & recipes with you all here on the blog. Most of you are probably thinking of decorating your homes for Fall, now that the leaves are falling and the air is crisp. Displaying pumpkins and gourds is a festive way to bring the feeling of fall into our home. I always try something new when it comes to decorating pumpkins and gourds. I want to elevate a traditional festive arrangement and give them more interest. I discovered a fun and easy technique that uses gold leaf sheets to bring a subtle touch to the tops of the pumpkins and gourds. The result is a delicate metallic finish that really elevates the look of your typical fall decor. You’ll find all the instructions below as well as an example of how to beautifully display them in your home.
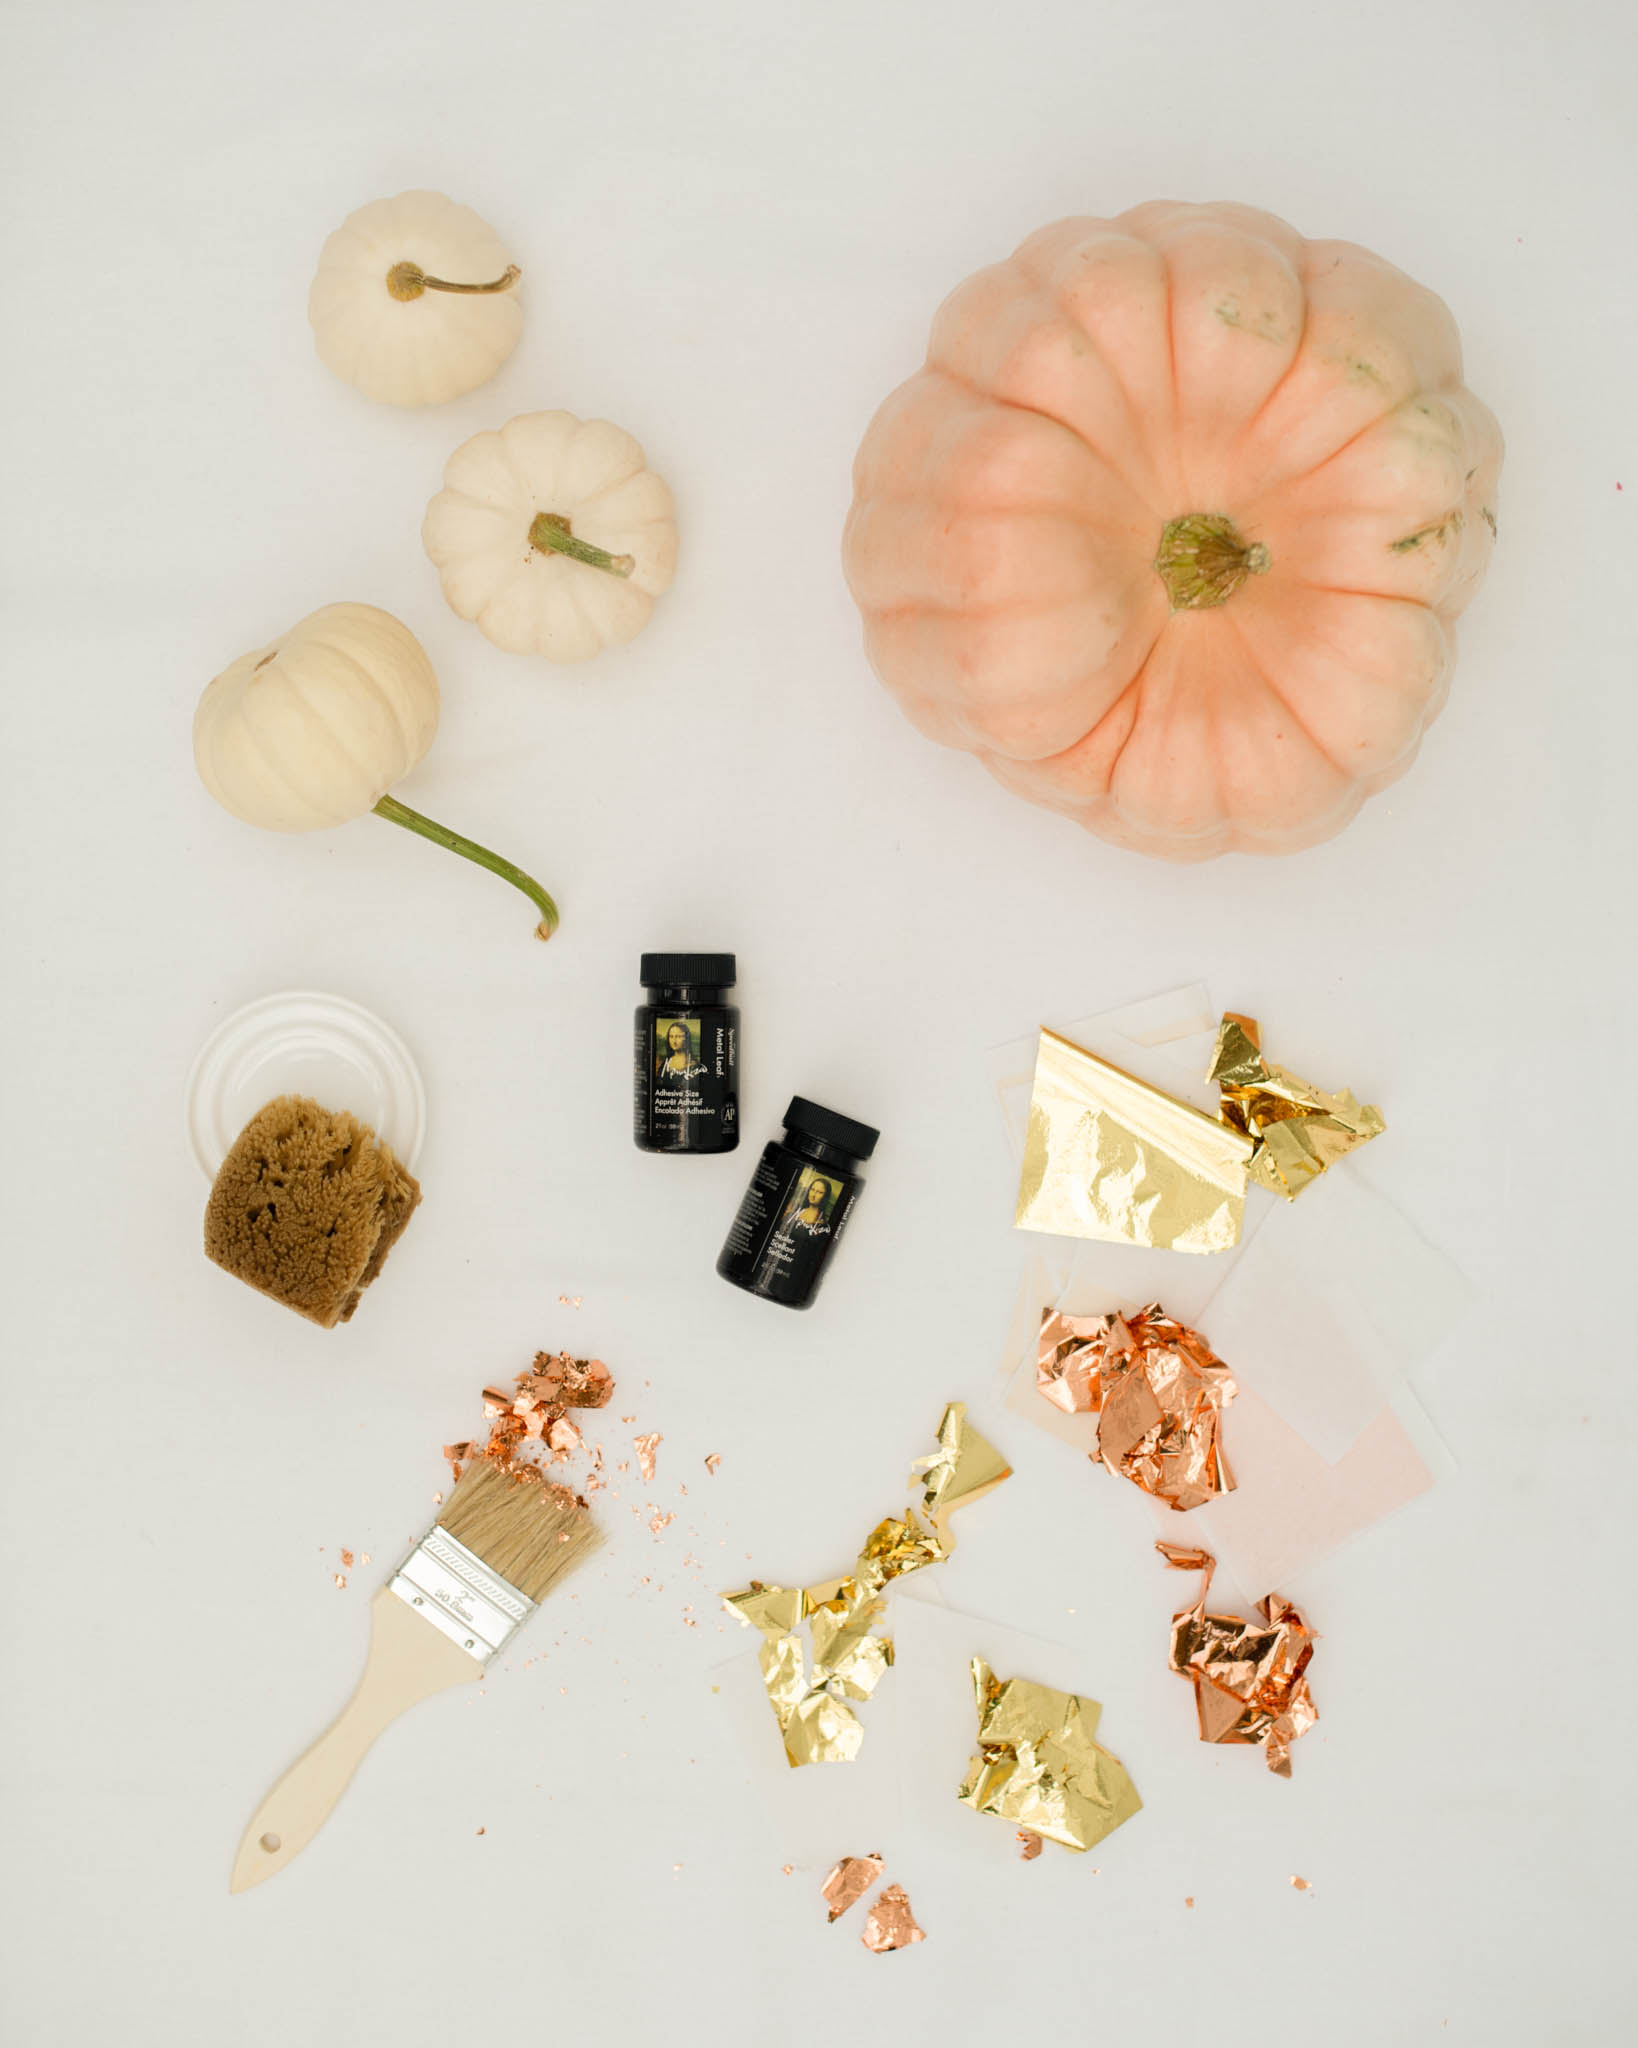
Materials:
Kraft paper
A variety of gourds and small pumpkins in a range of sizes (see MH Tip)
Wooden tray or serving bowl (the one shown is 22 × 12 inches/55 × 30 cm)
Metal leaf adhesive
Small bowl
Sea sponge
Gold and/or rose gold leaf sheets
2-inch (5 cm) stiff-bristle paintbrush
Metal leaf sealer
Directions:
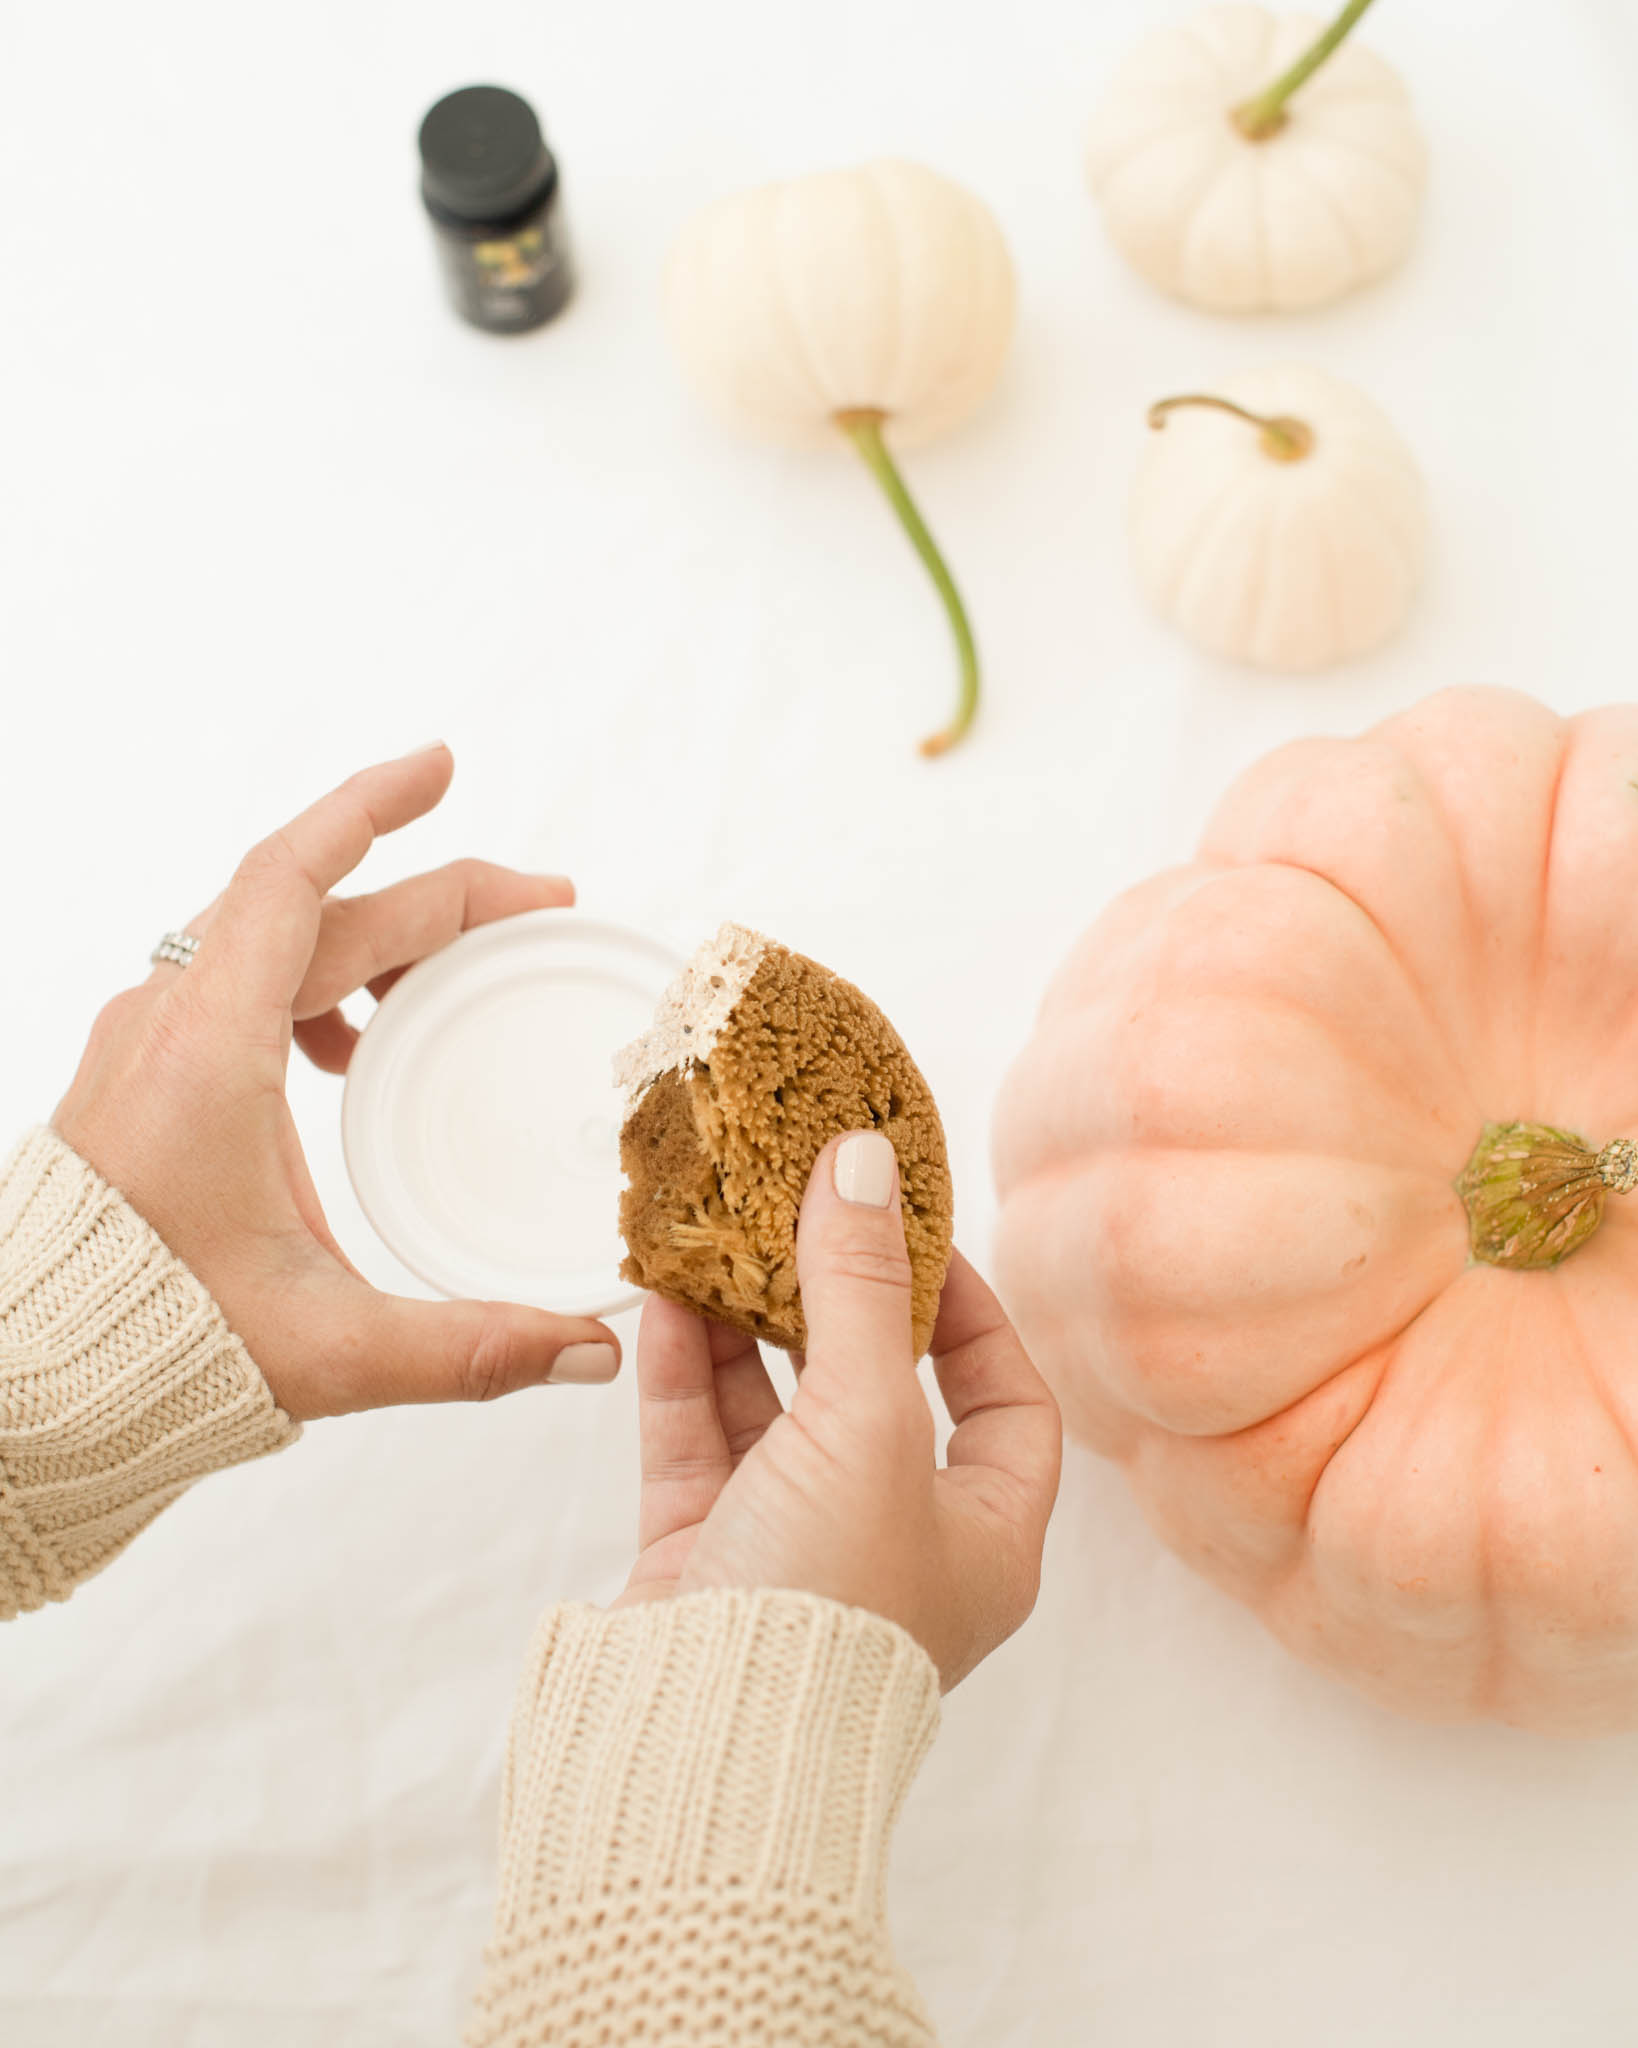
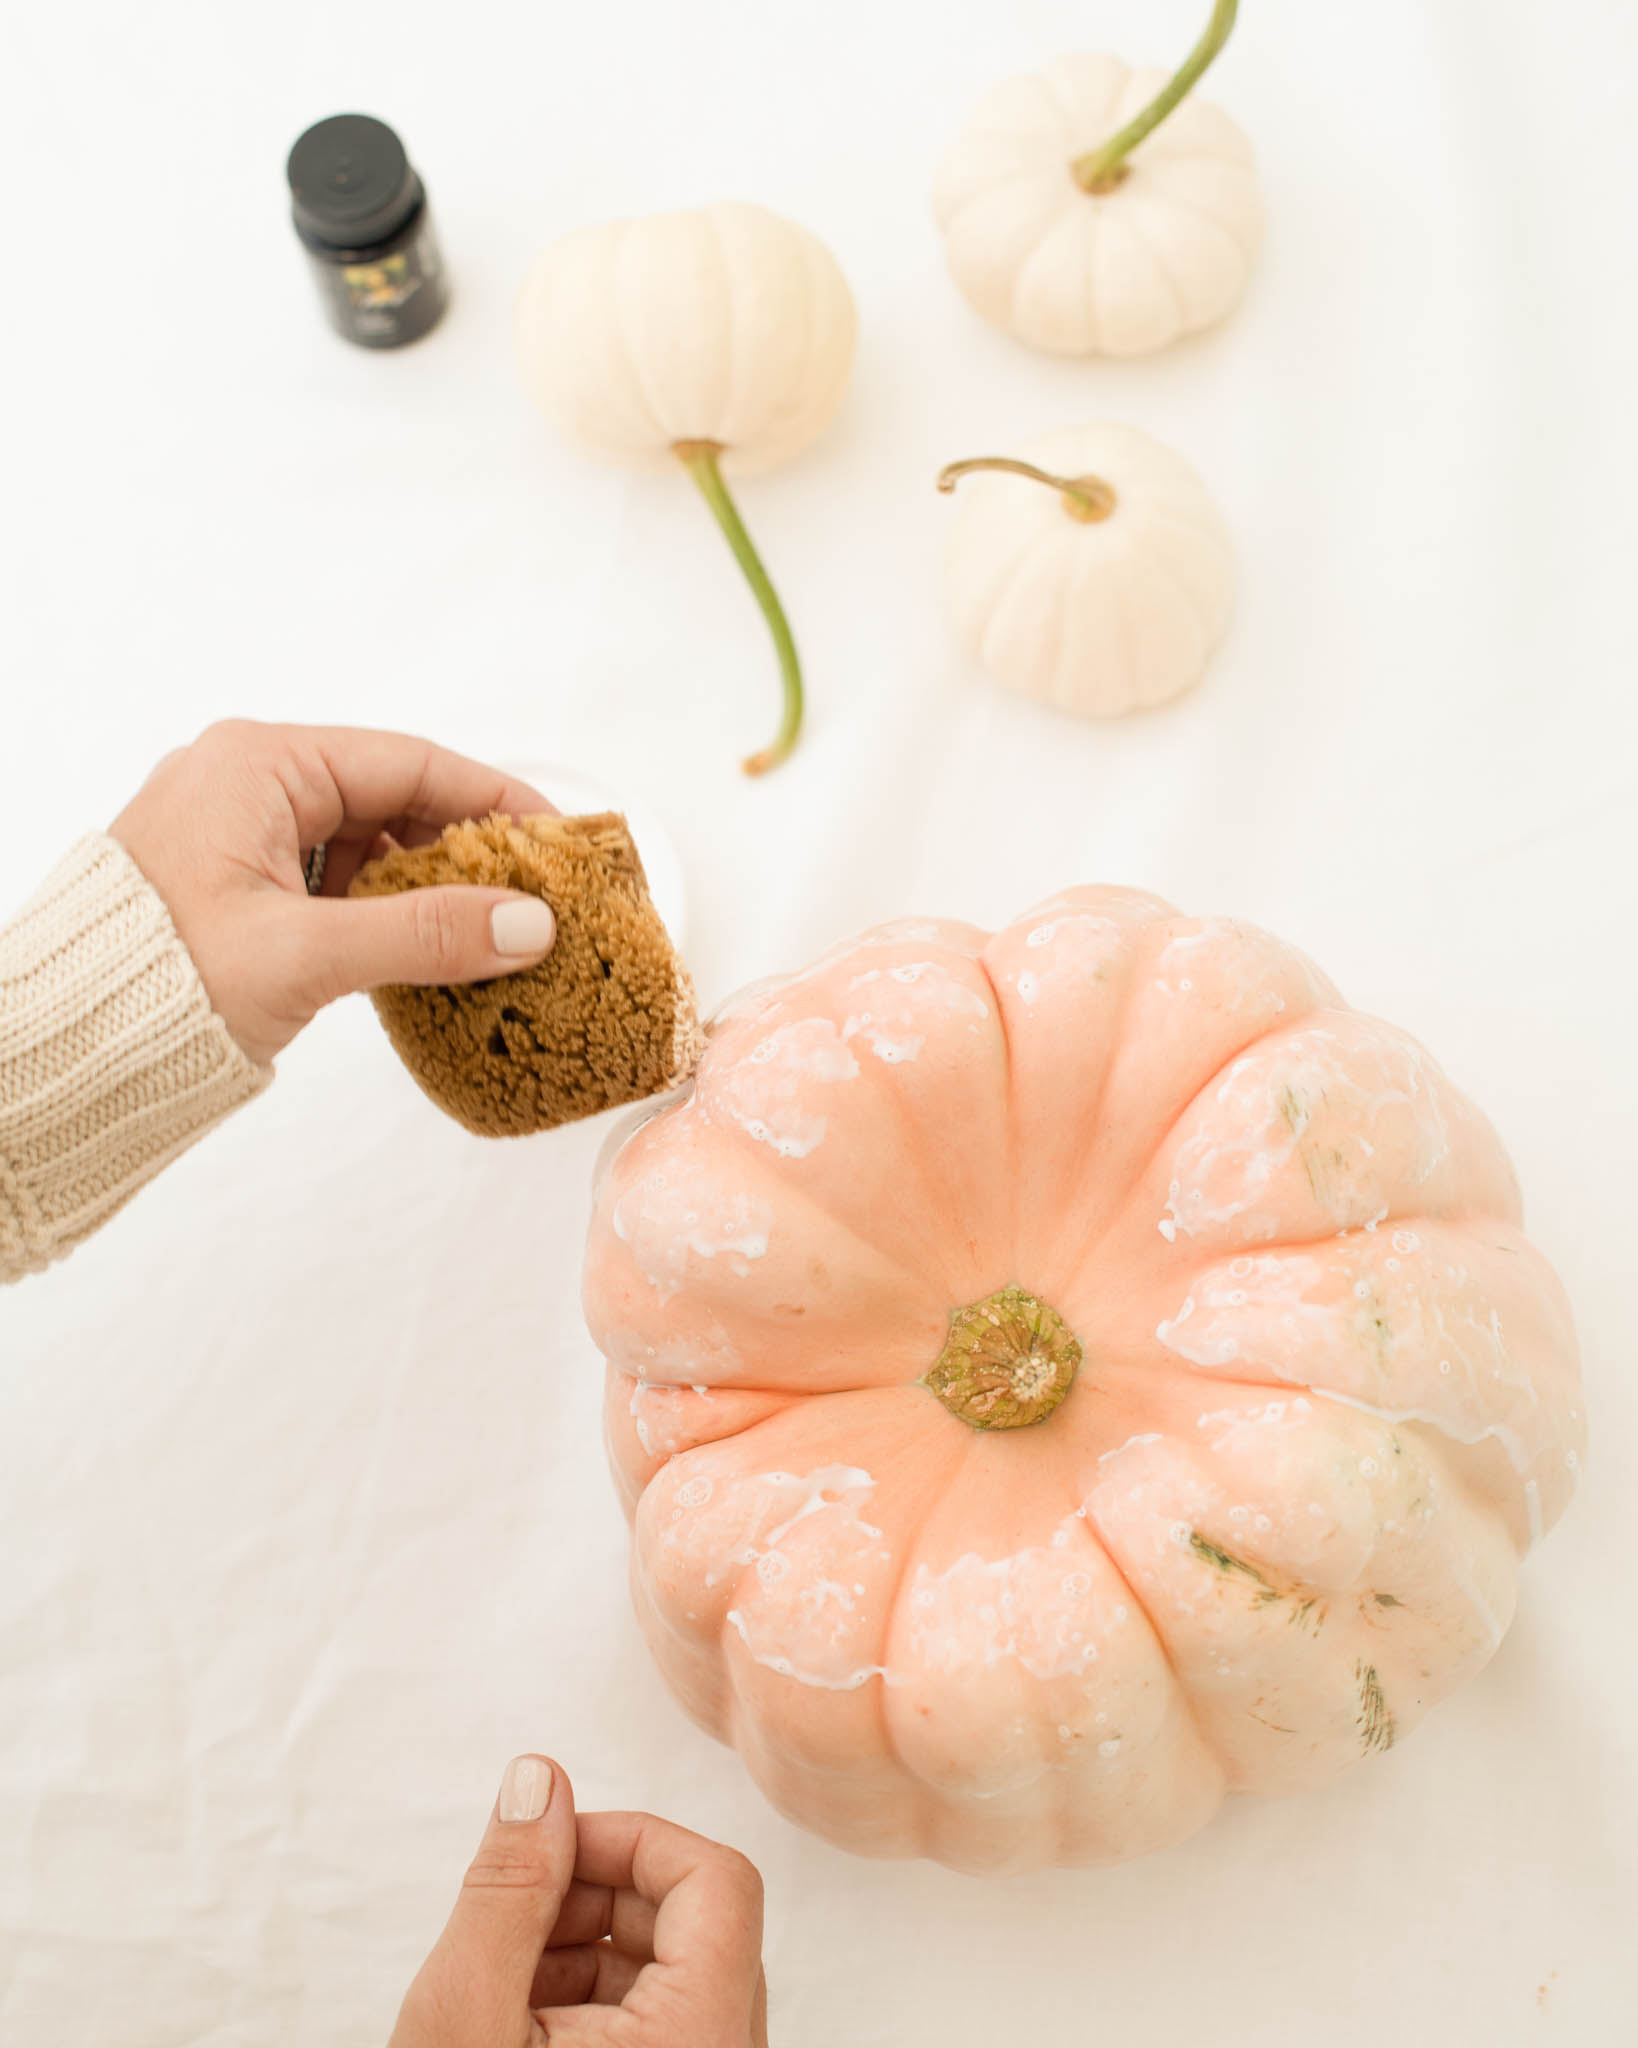
1. Prepare a work surface by rolling out a large sheet of kraft paper on a table or counter. Wipe the pumpkins and gourds with a damp cloth to ensure that they are clean. Let dry.
2. Decide which pumpkin or gourd will be the focal point of your arrangement. It should take up about a third of the display. Layer the remaining space on the tray with small and medium-size pumpkins and gourds and miniature pumpkins. Once you’ve established your desired arrangement, it’s time to start foiling.
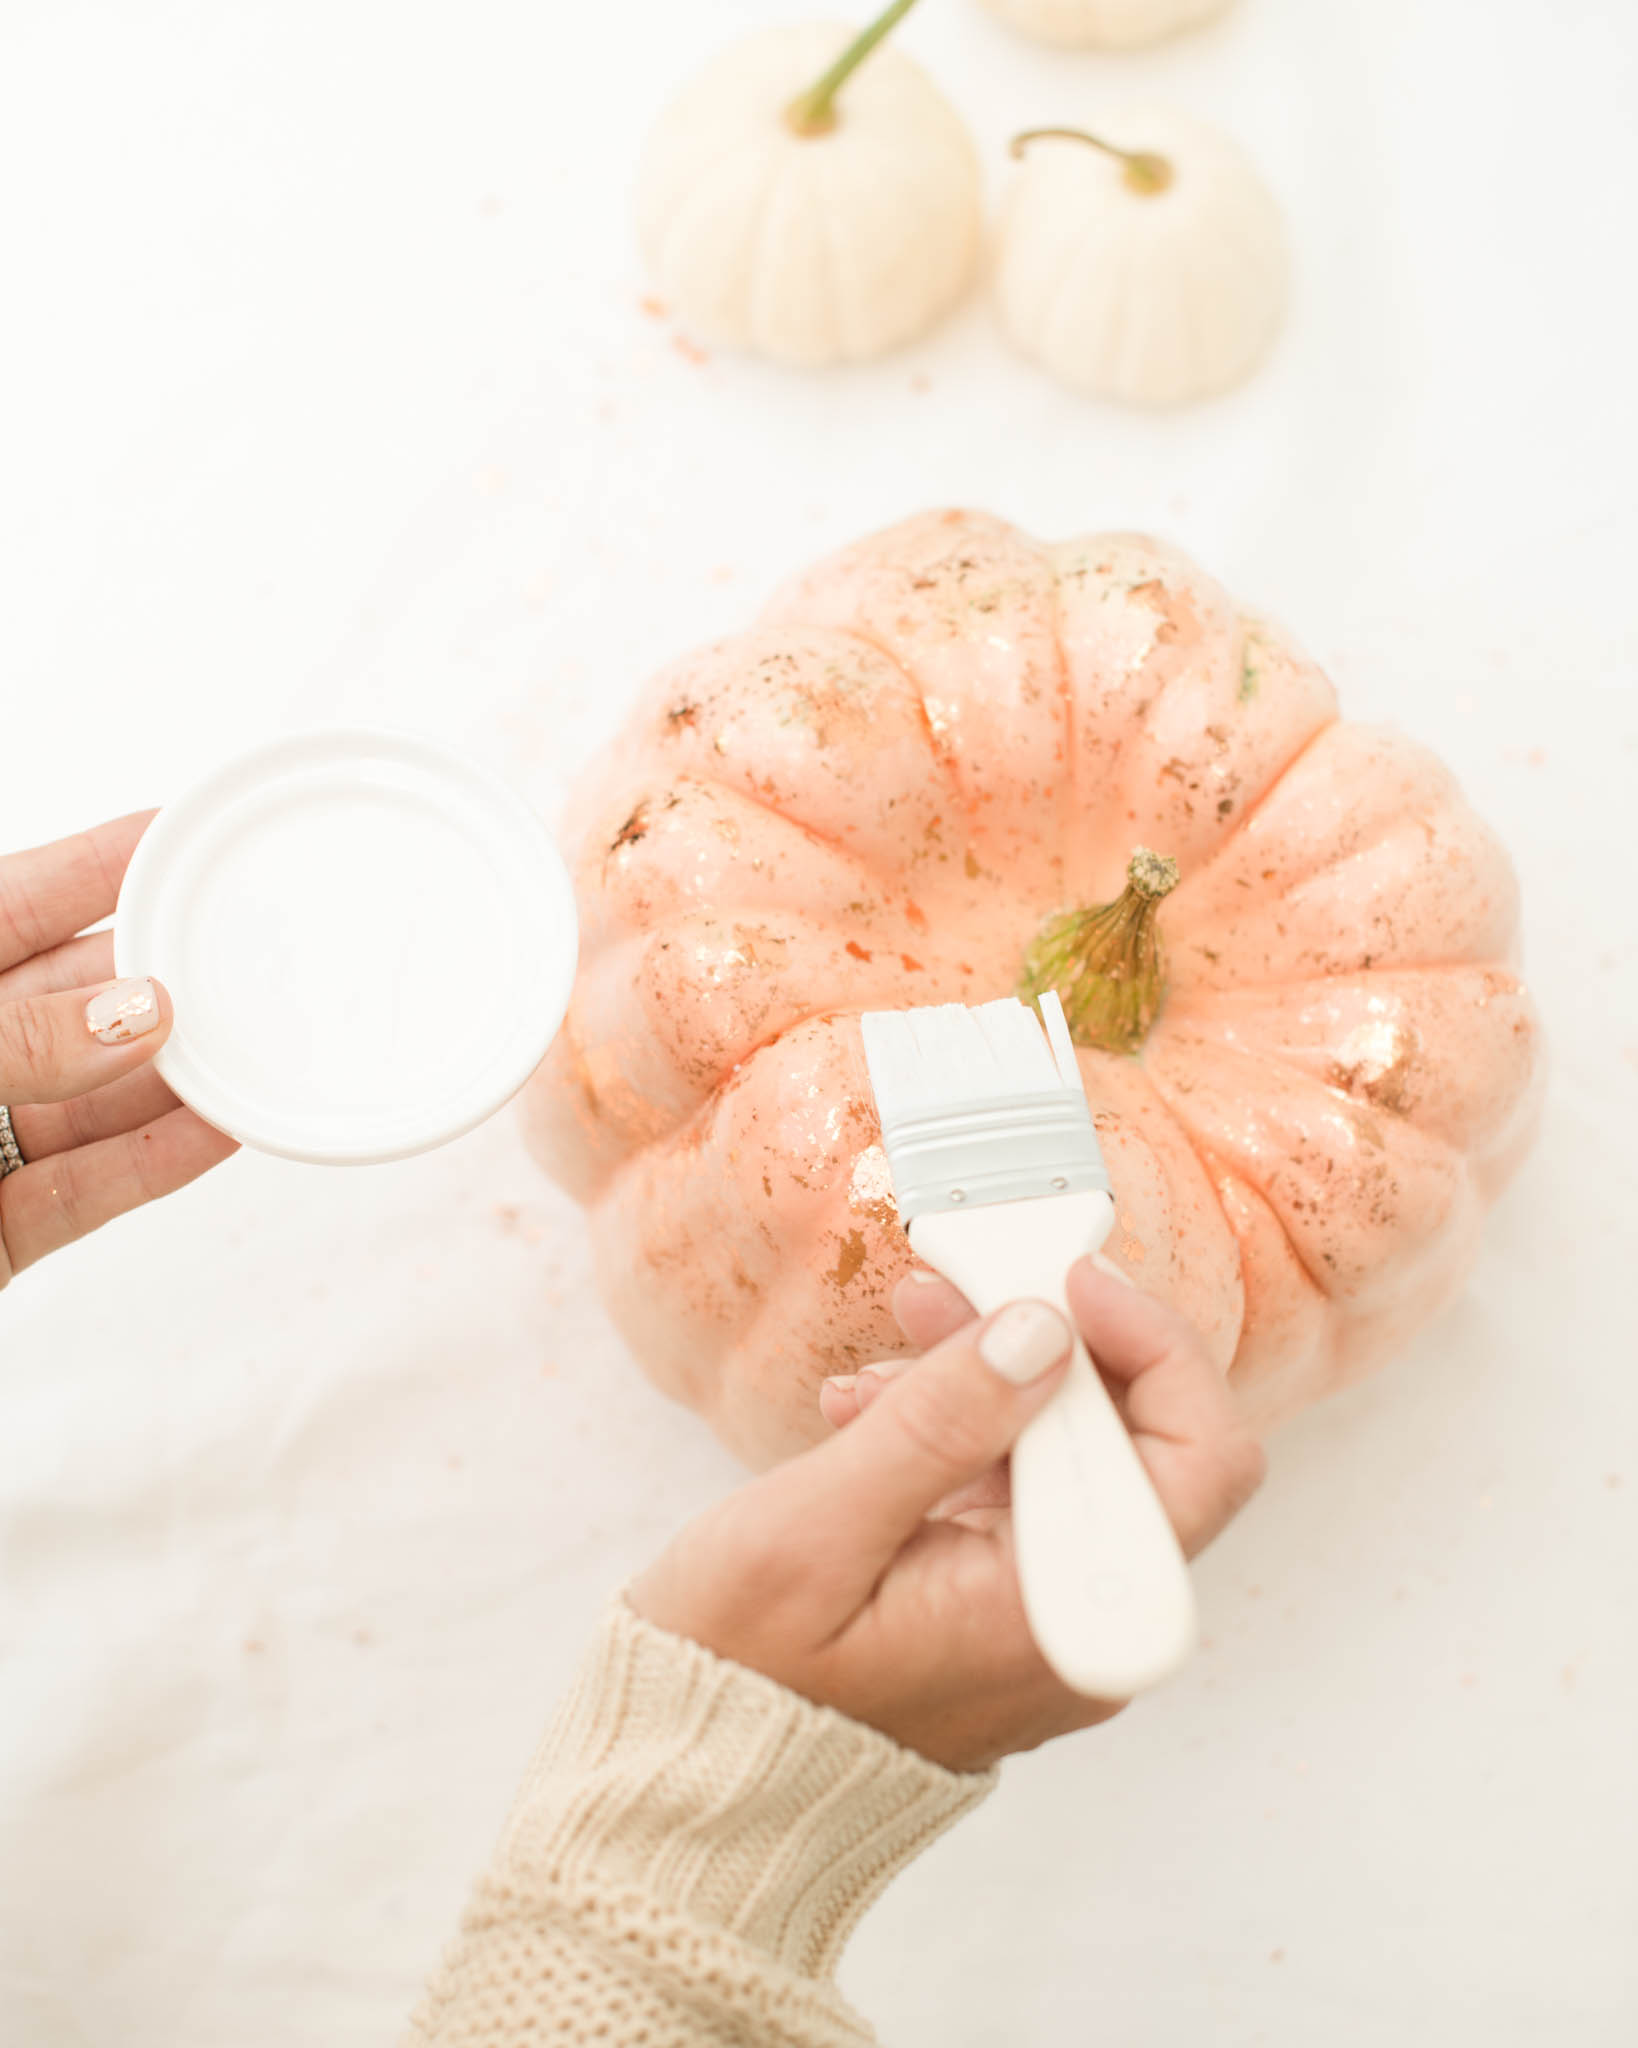
3. Pour a small amount of adhesive in a small bowl. Dip the sea sponge in the adhesive and delicately blot it onto random areas on the top half of each pumpkin or gourd. Be mindful of where you apply the adhesive, as you will want to place the gold leaf on the sticky areas. Let dry for about 10 minutes, or until the adhesive becomes clear (be sure to review the manufacturer’s instructions).
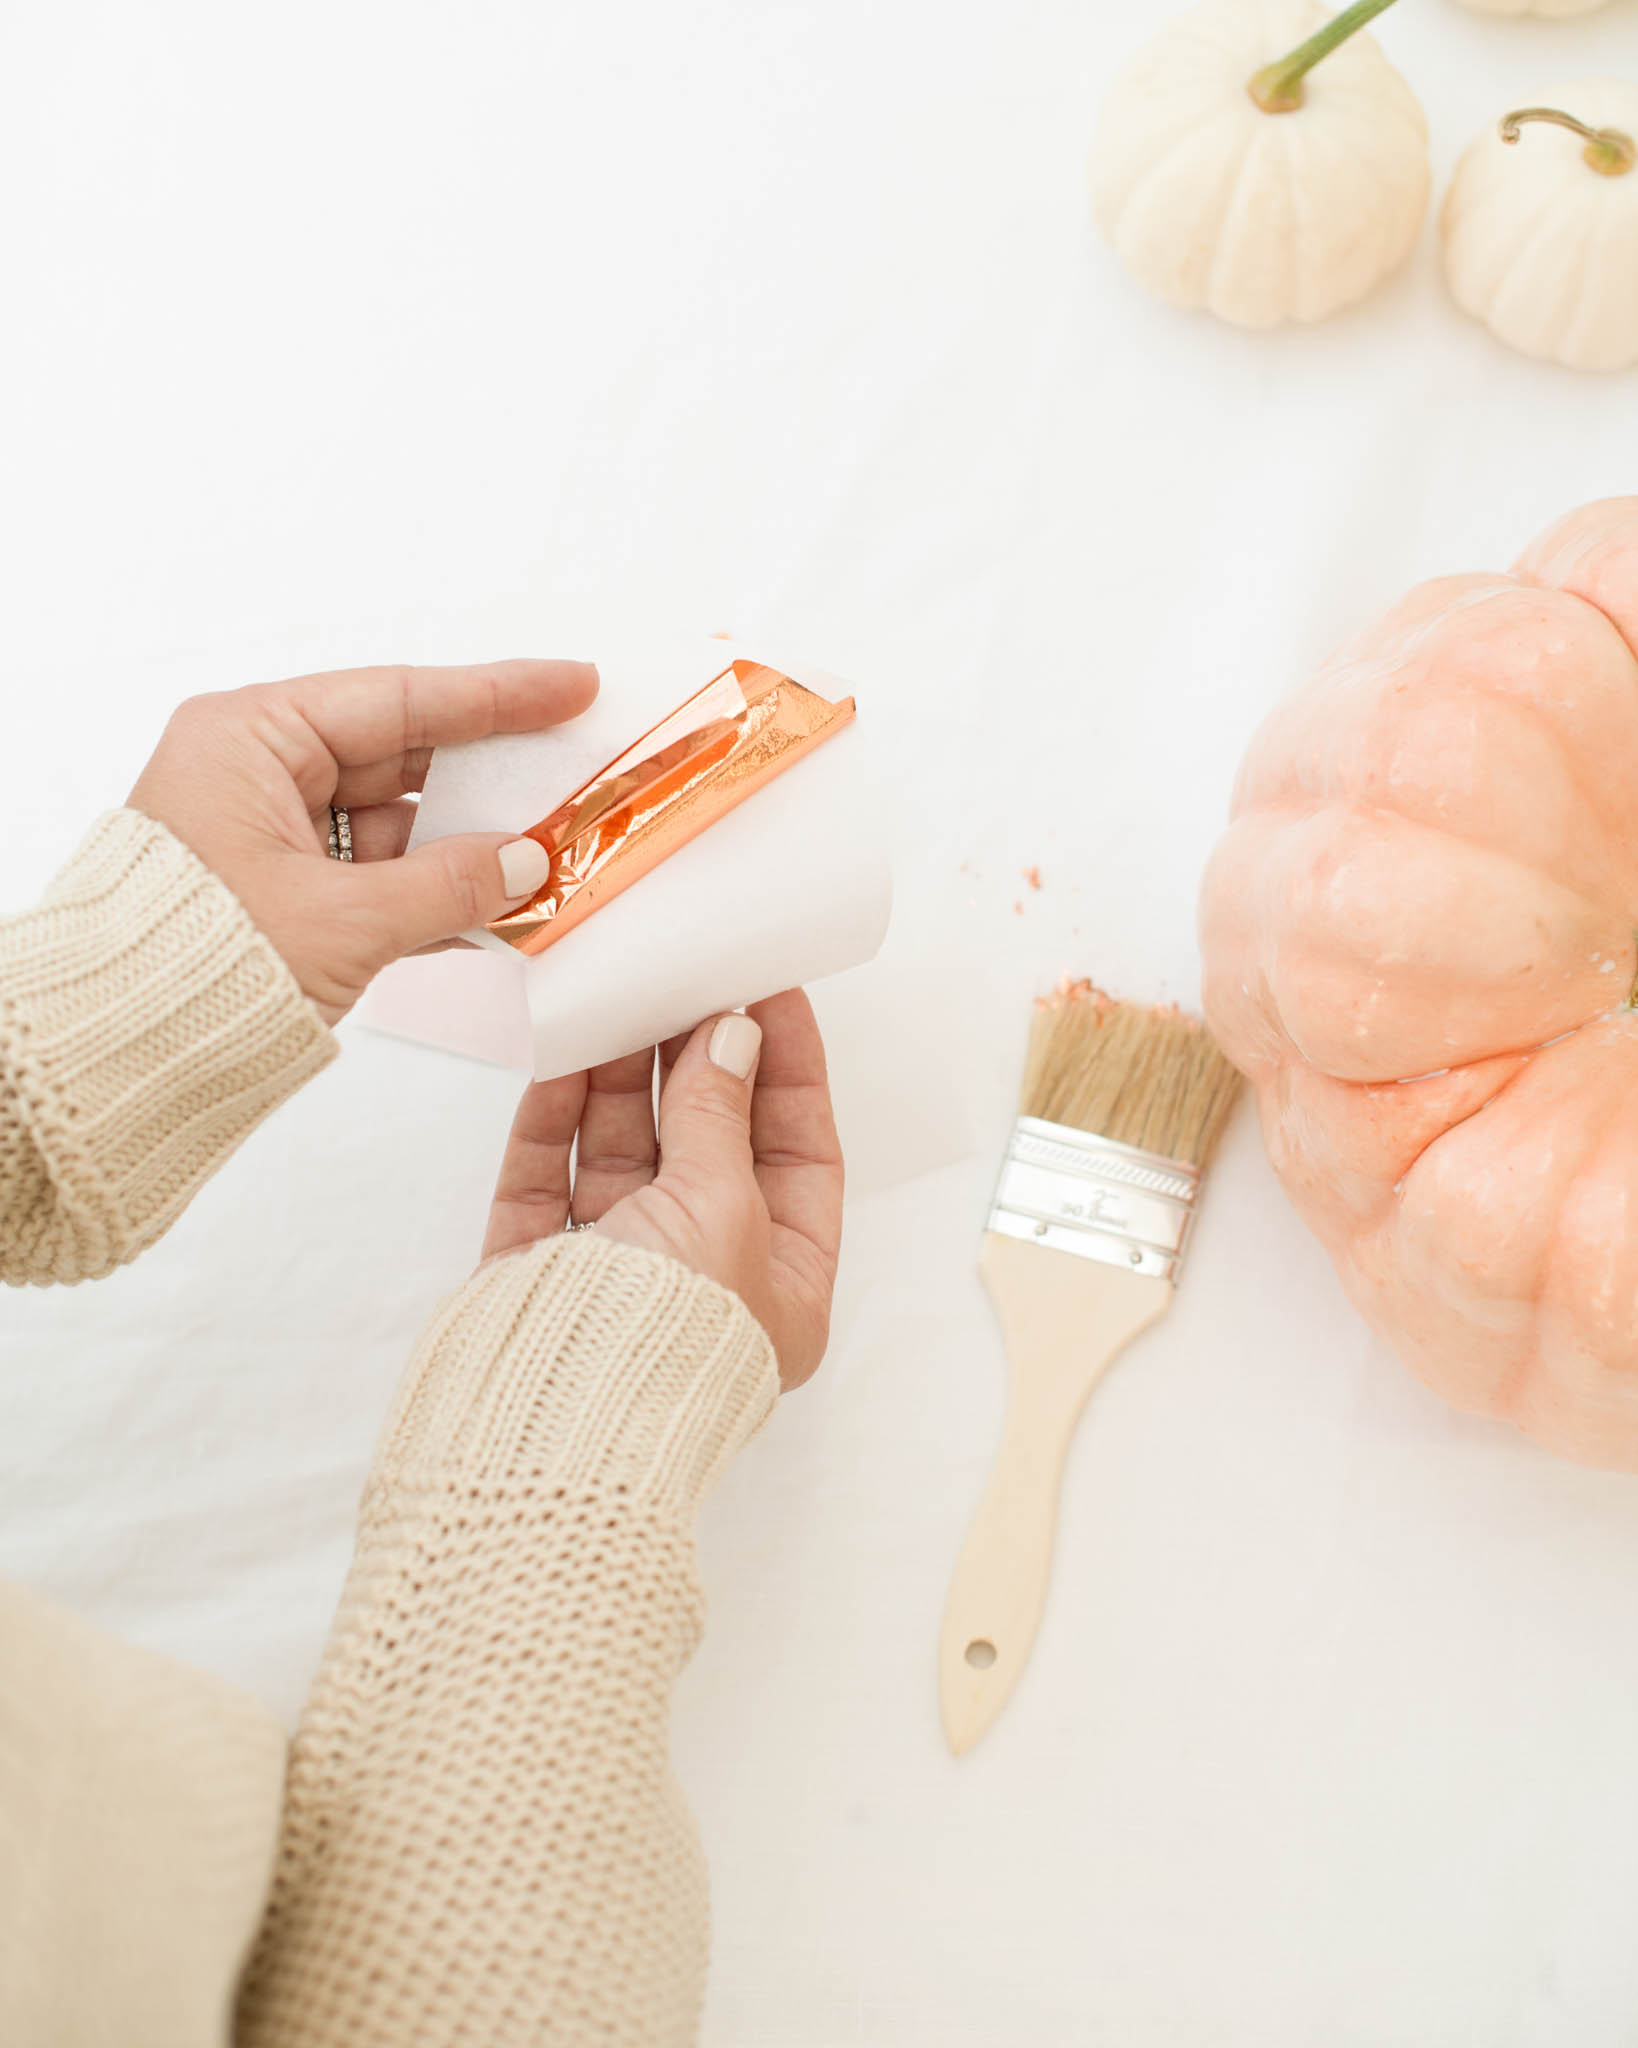
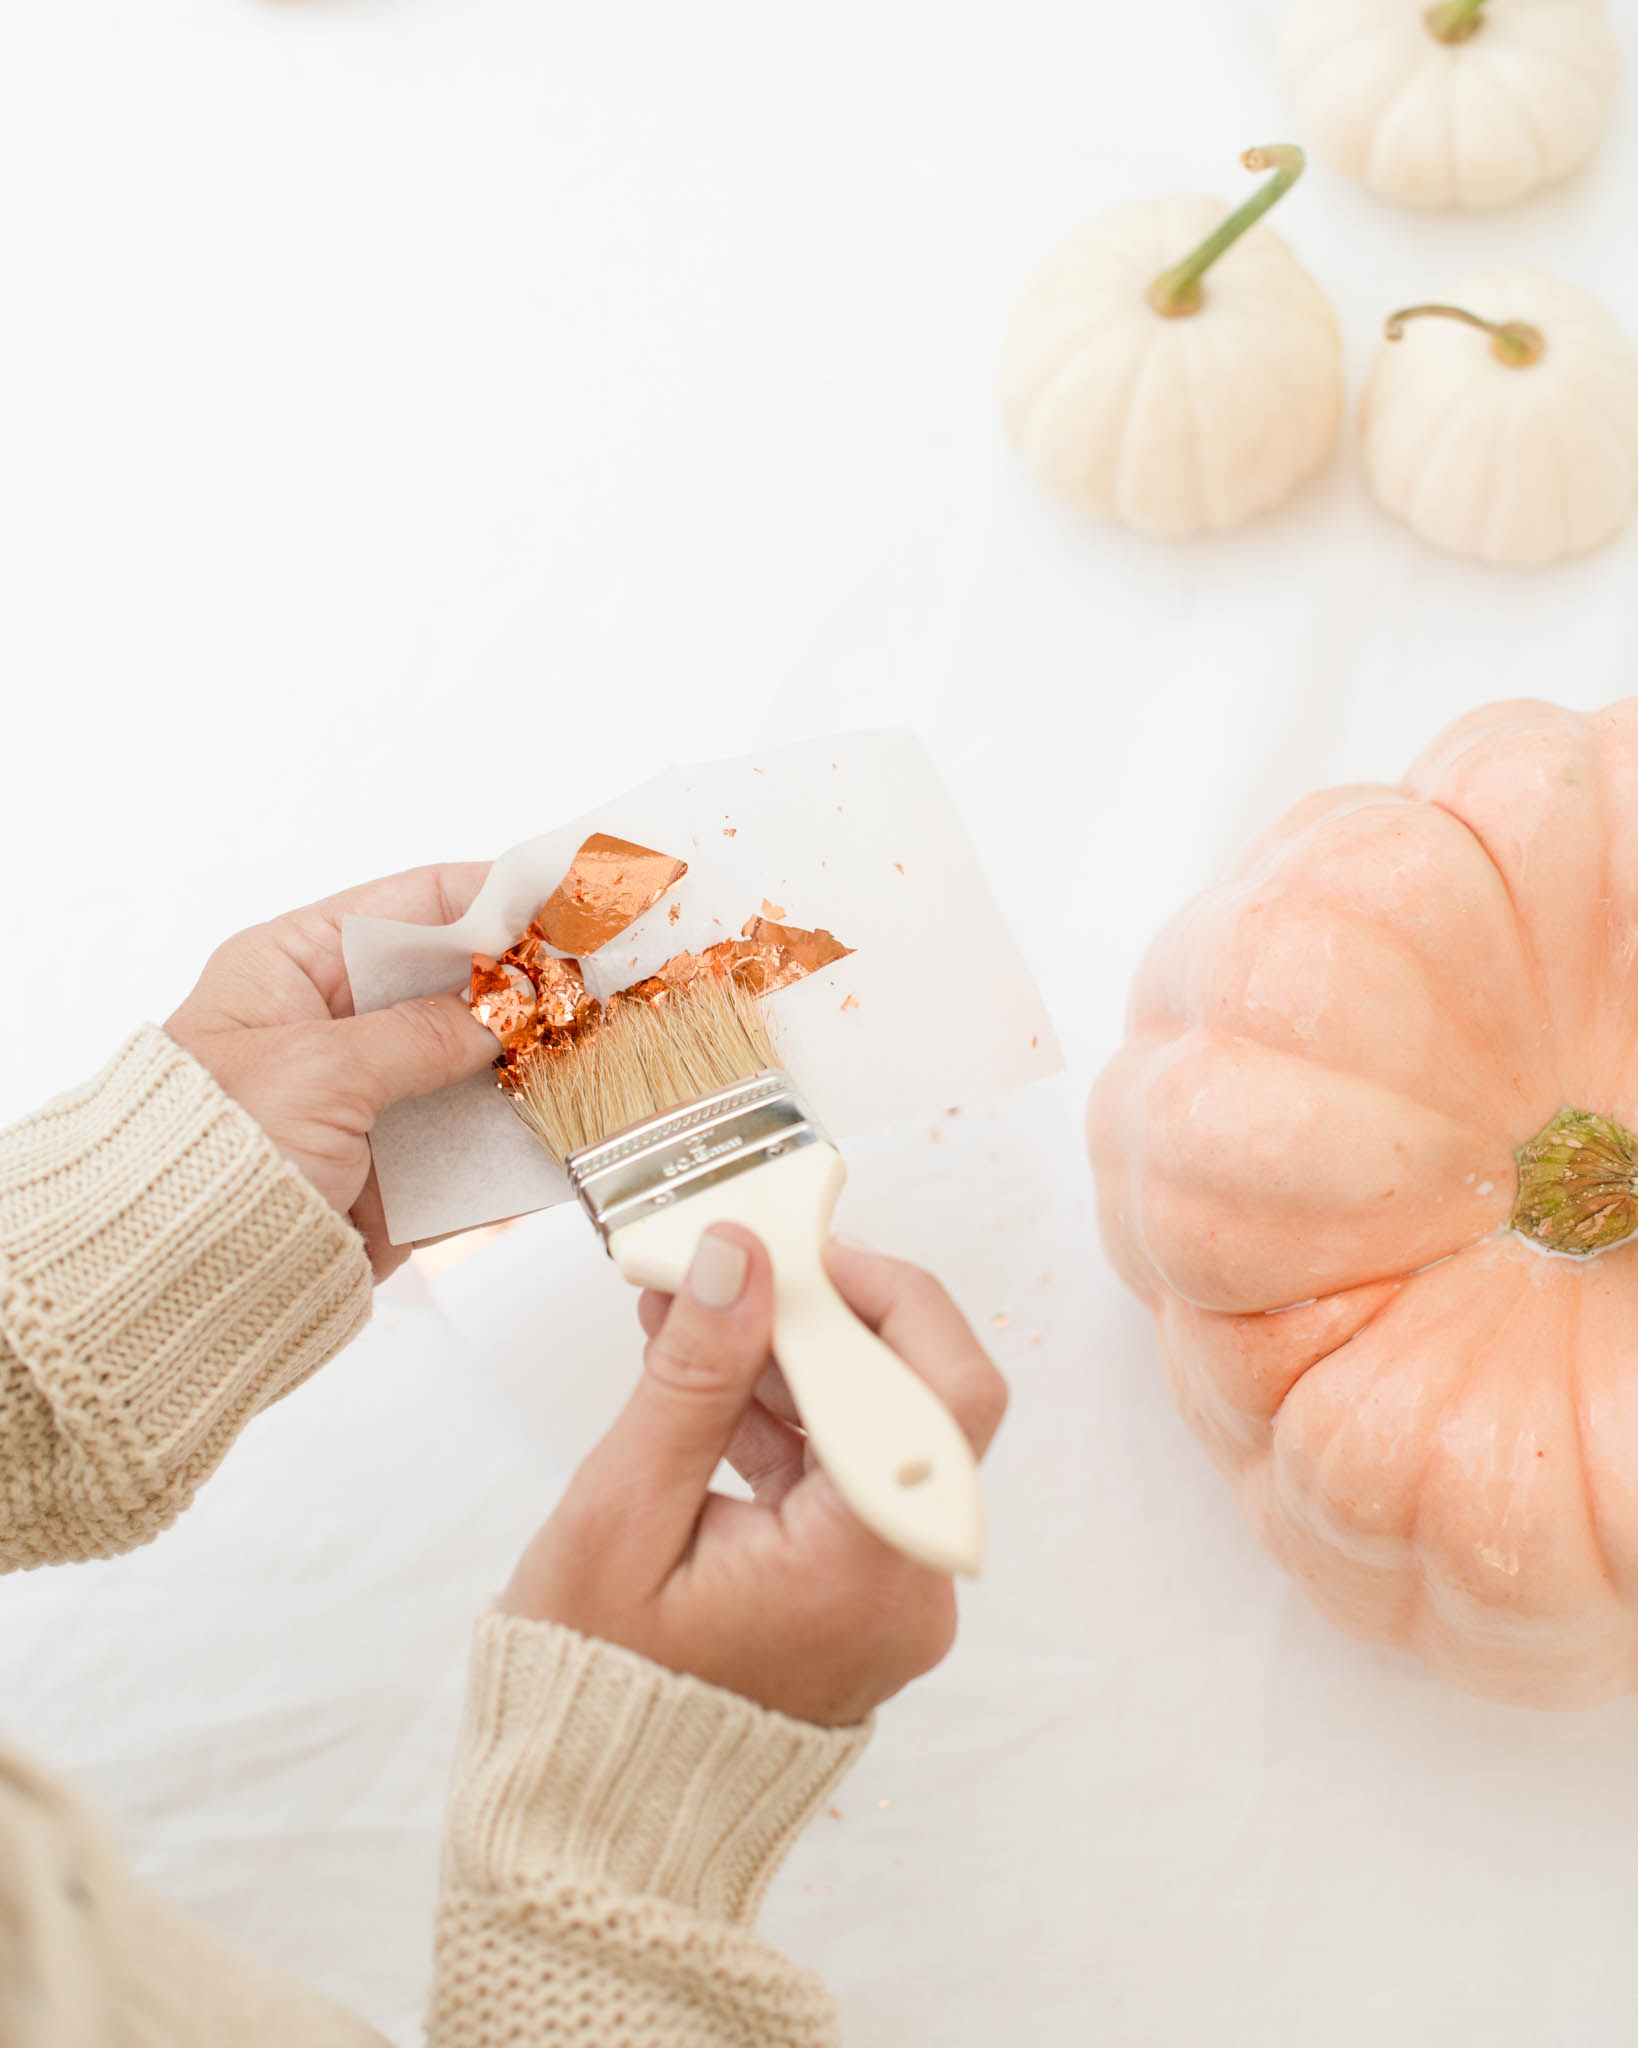
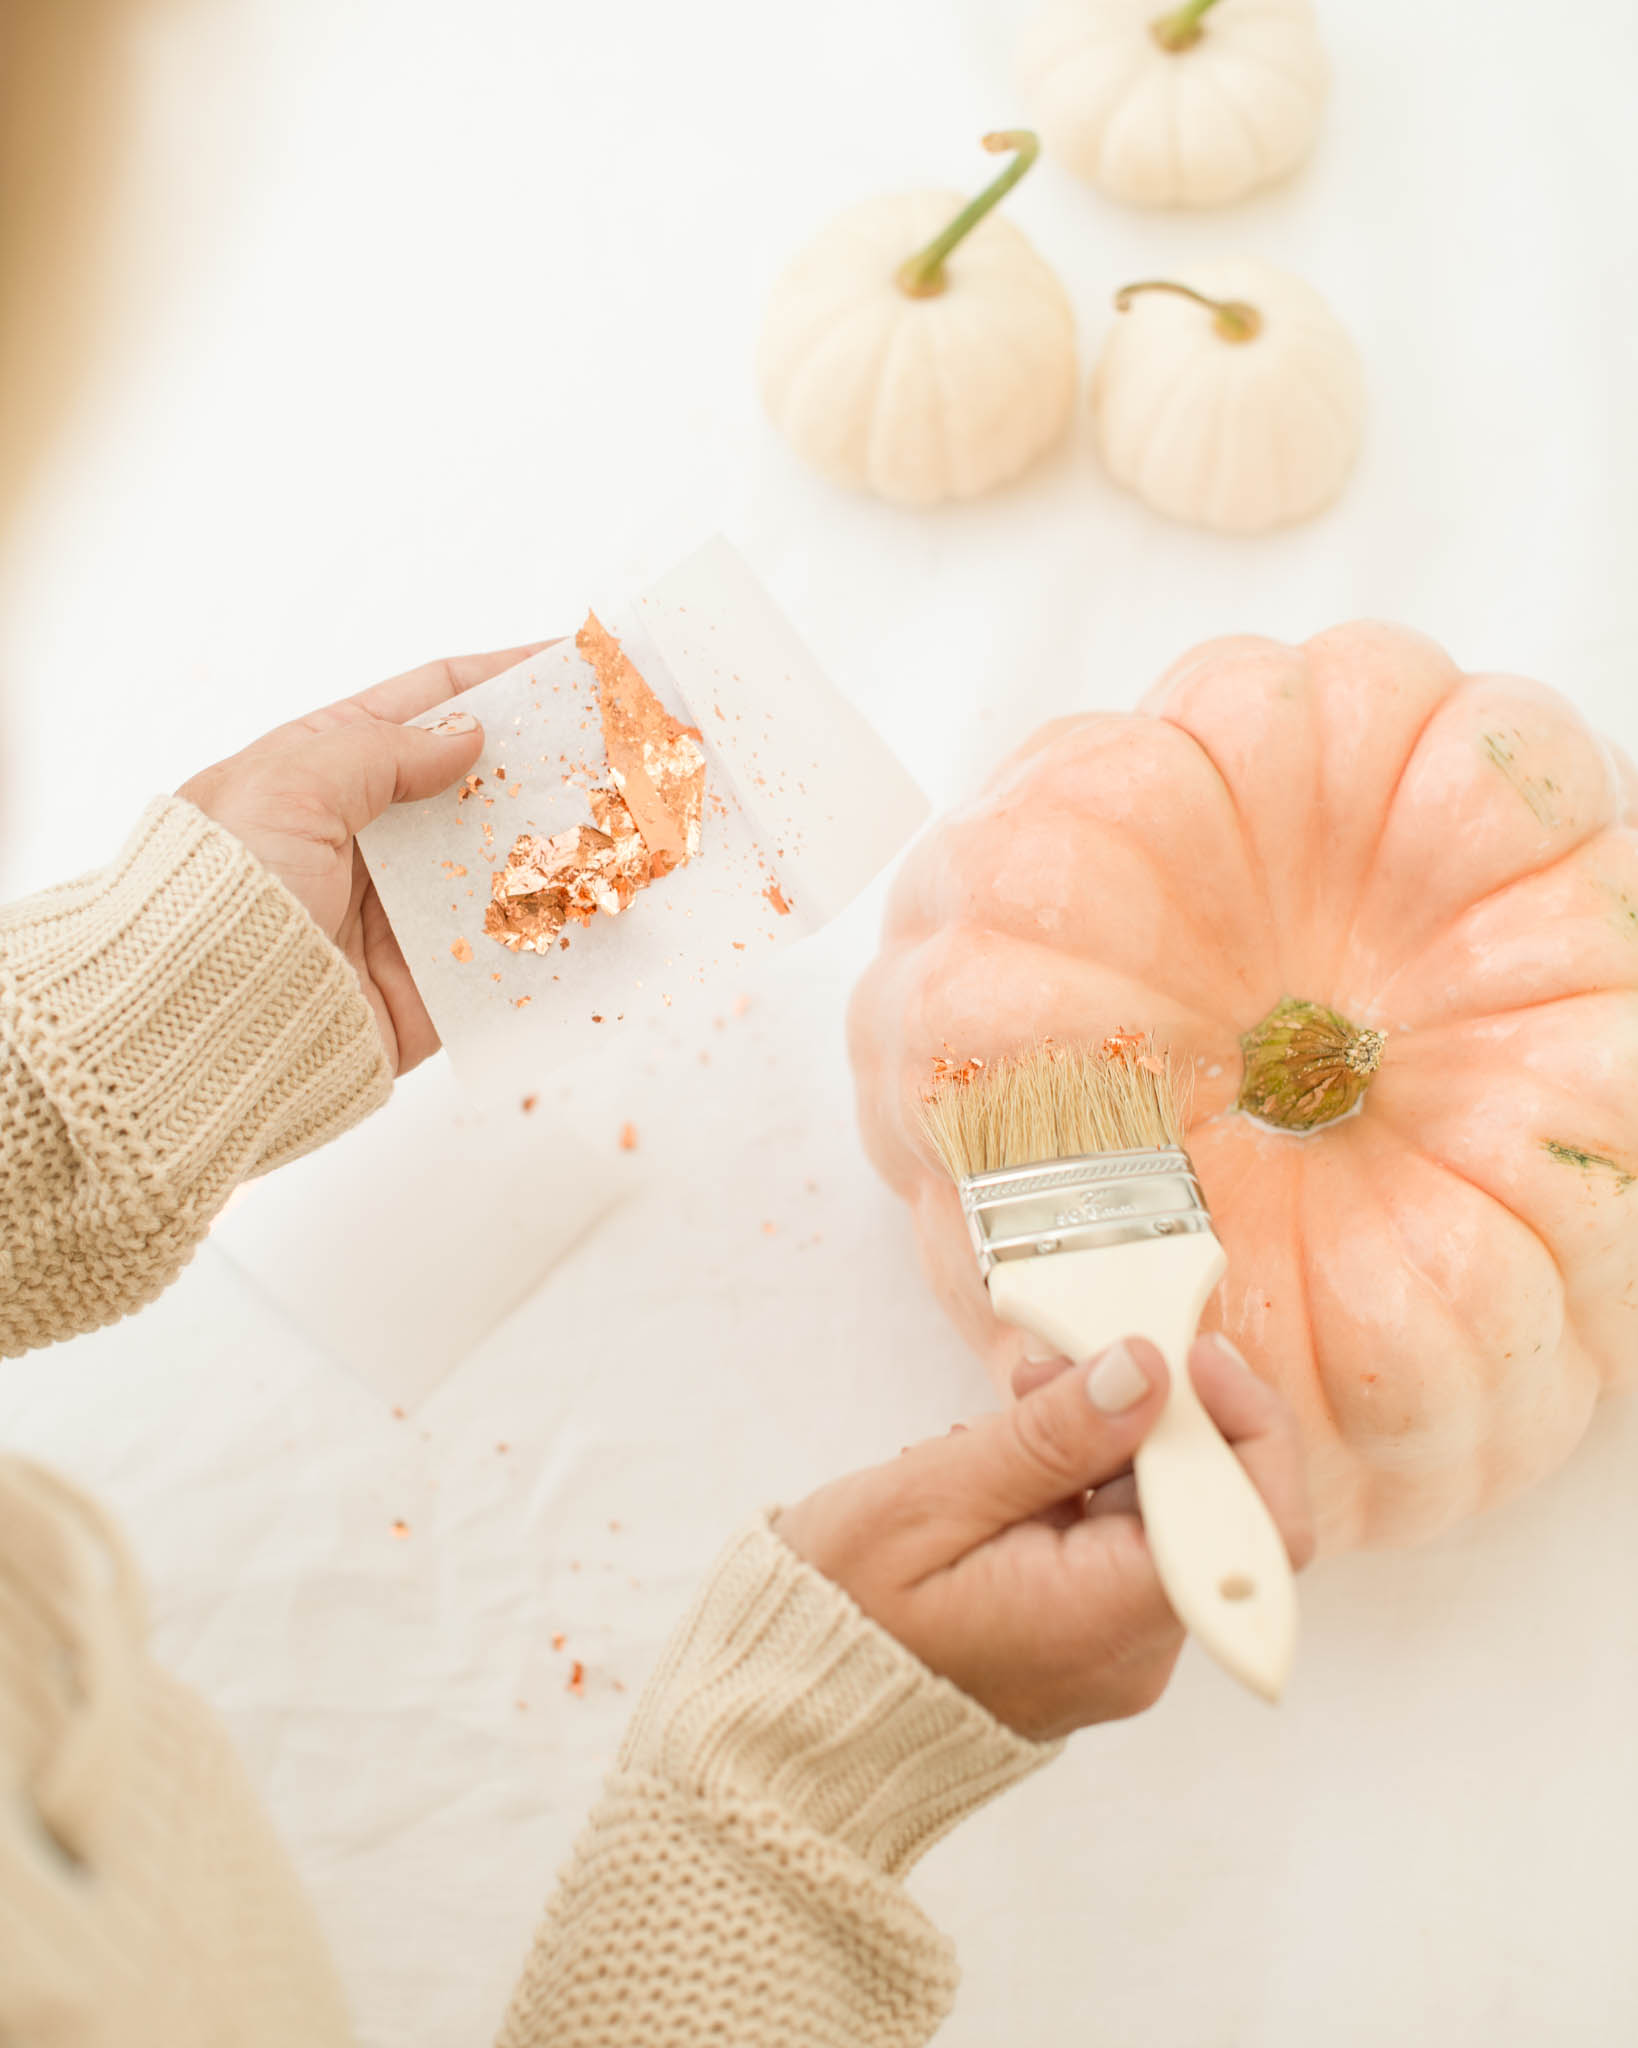
4. Gently remove a gold leaf sheet from the package and place it on your work surface. Use the paintbrush to blot the gold leaf and break it apart. Then use the paintbrush to transfer small amounts of the gold leaf to the spots on each pumpkin where the adhesive was applied. Gently use the brush to pat the gold flakes onto the surface so that they stick.

5. Once all of the pumpkins and gourds have been foiled, brush the metal leaf sealer over the gold leaf spots. Let dry for 30 minutes before placing the pumpkins and gourds in your preferred arrangement.
MH Tip In the arrangement shown, I used 1 Cinderella pumpkin, 2 acorn squash, 4 miniature white pumpkins, and 2 butternut squash and focused the foil on the tops of the gourds to give them a more natural vintage look. Applying a more generous amount of adhesive will allow you to adhere more gold leaf to each pumpkin, giving your display a bolder metallic look.
Shop The Post